Discovering 2014: Foil Starlight

Discovering 2014 is a personal goal to complete a daily project throughout the year!

Today’s project was Foil Starlight, and it really didn’t work out at all. This was supposed to be another dollar store craft you see floating around a lot on Pinterest, like seen here. It’s possible that it didn’t work out for a couple of reasons: my LED light may have not been strong enough or the lack of a real lid allowed too much light to shine. It’s also possible that this project is just not all it’s cracked up to be.

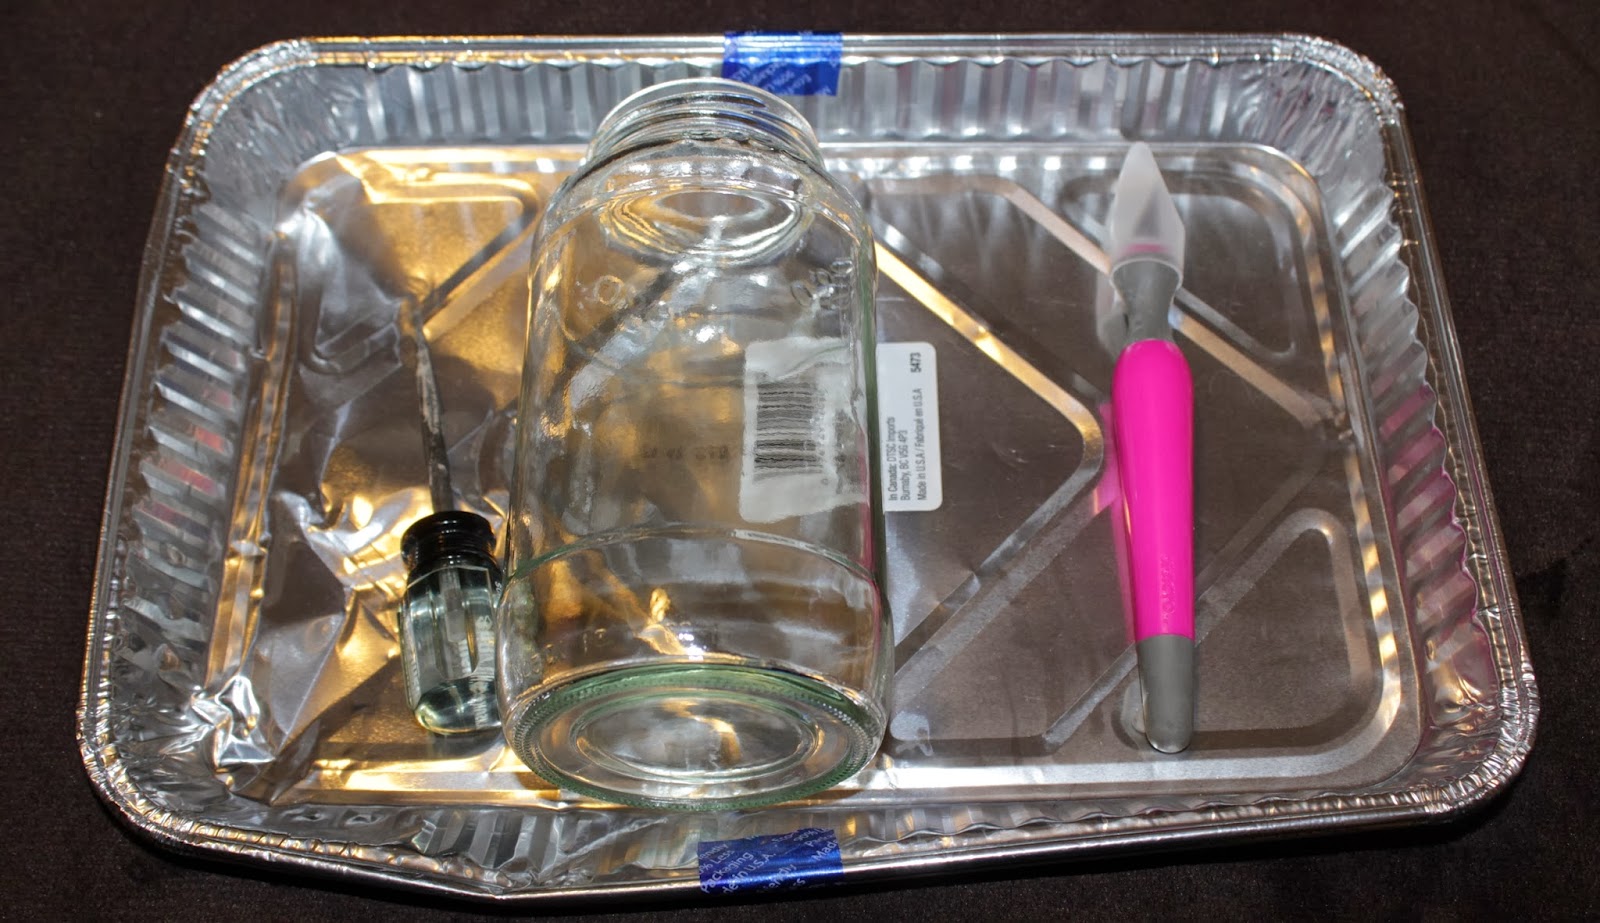
To start I used a foil dish from the dollar store, my exacto knife (scissors or a razor blade would work well, too) an awl, a jar and an LED light.

Contrary to this looking like a kid-friendly project, it’s not. There’s sharp objects involved, including the foil itself after it’s cut.

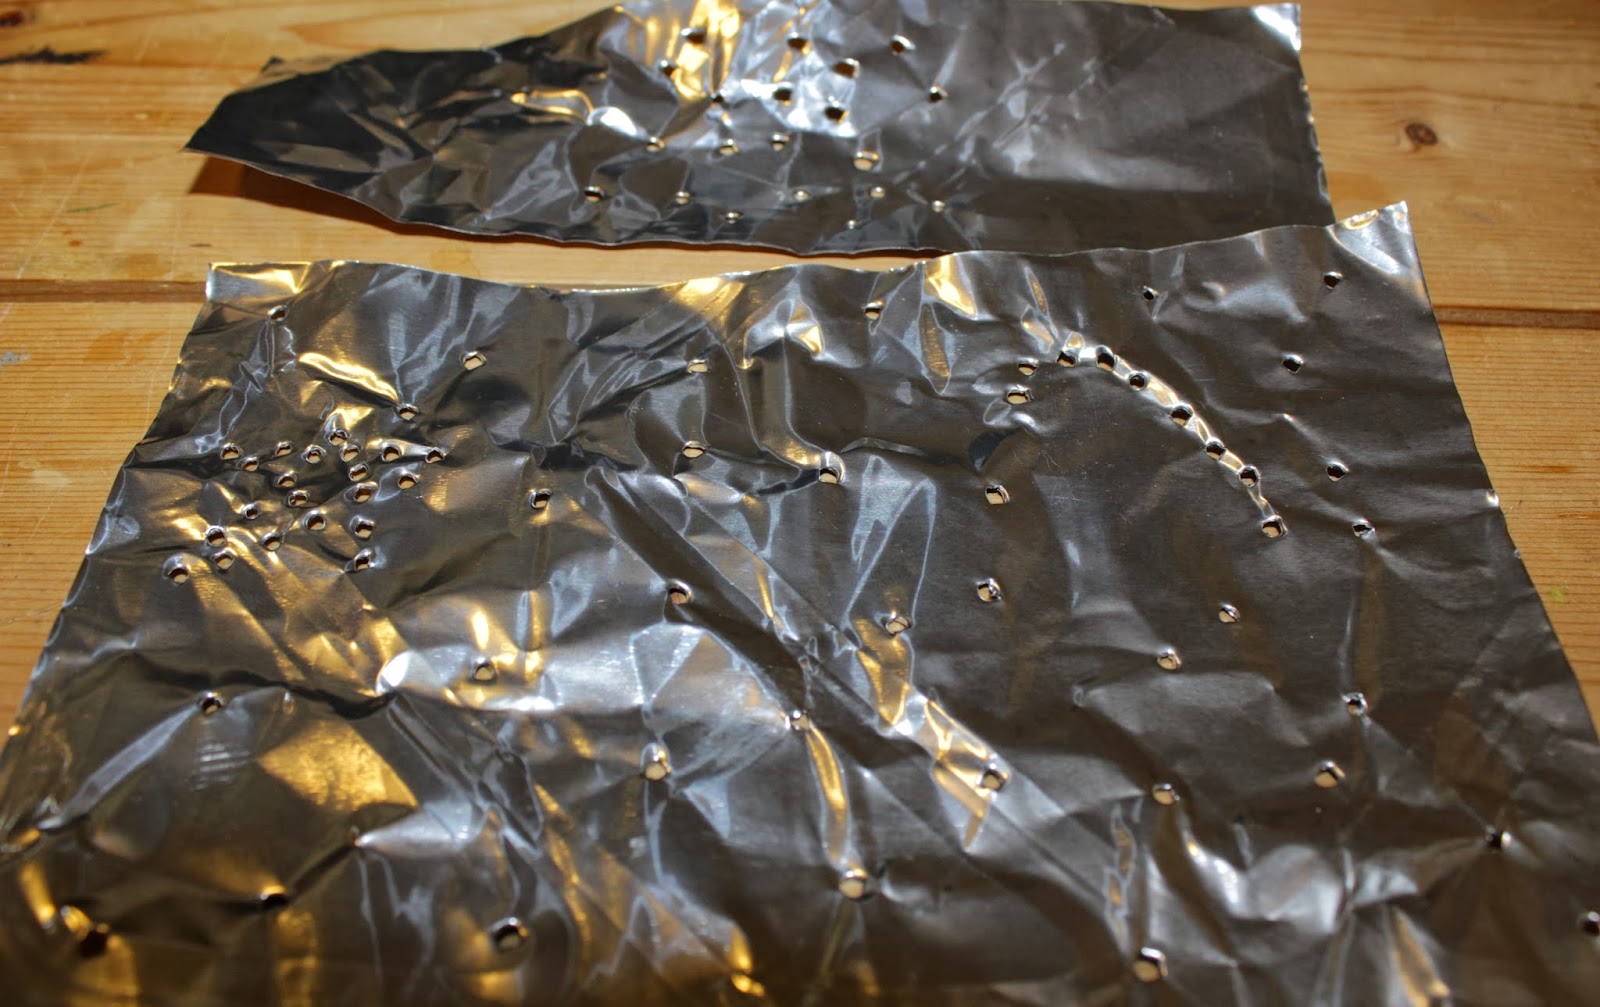
After you have your foil piece, roll it to figure out how much you’ll need to fit inside the jar and cut off any excess.

Use an awl (or similar object) to poke holes in your foil.

I had the idea to use the smaller piece like a lid, but that didn’t really work out.

Left: with lights on
Right: with lights out

Finally I tried making the foil tightly rolled and the foil “lid” covering the top, but all I could get was one hole to show up inside my blackbox (look on the left side of the lights-out pic).

After thirty minutes I called it a lost cause. It was interesting trying out various ways but obviously I’m missing something here.

Tomorrow’s project is Pancake Bites!

Discovering 2014: Dollar Store Serving Tray

Discovering 2014 is a personal goal to complete a daily project throughout the year!

Today’s project was a Dollar Store Serving Tray, based off of this pin from The Crafting Chicks. I chose to only add one tier instead of two since my local Dollar Store’s dish options were quite lacking. My kitchen storage space is quite limited at the moment, anyway.

There were two stoneware plates to choose from at my dollar store so I went for the most appealing one. I also picked up a glass candlestick and a four pack of plastic bowls (they didn’t have any stoneware or glass bowls). Total cost: $3.

I chose to use hot glue and applied some to the inside rim of the candlestick, then centered the bowl on it. After that cooled and dried I went around the outside lip of the candlestick to get a better bond.

You can also glue the candlestick to the plate (or, like the pin above, make a stack of plates), but I chose not to for storage purposes. Having them separate will also make cleanup a bit easier!

Tomorrow’s project is Foil Starlight!

Discovering 2014: Embroidery Floss Wrapped Cord

Discovering 2014 is a personal goal to complete a daily project throughout the year!

Today’s project was an Embroidery Floss Wrapped Cord. This is exactly how it sounds… you wrap embroidery floss around a cord! Silly me chose a cord that’s 6.5′ long, so I’ve gone through one skein of floss thus far, though that hasn’t quite reached the halfway point. This can definitely be time consuming!

Keep a clip of some sort on hand in case you need to set it down, then you shouldn’t lose your place. To start the wrap I held down the starter and began wrapping the cord around that.

I just continued with a tight wrap, and at the end of my first skein I tied it off. Since I was doing this during lulls in work it took me a couple of hours to get through it; I think without work it still would have been close to an hour.

I plan on finishing it, but probably this weekend instead! It’s a cool way to customize and organize your cords, but be prepared to invest some time on the project.

Tomorrow’s project is a Dollar Store Serving Tray!