Discovering 2014: Felt Bows

 Discovering 2014 is a personal goal to complete a daily project throughout the year!

Today’s project was a Felt Bow. I did this like the Paper Bow project, using the same template, but made the center-wrap section a bit longer since felt is thicker. A soft felt worked fine, and afterward I attached it to a covered hair clip, though it would also look nice as a present topper.

I traced an extra set of the template on paper, cut it out, and taped it to the felt to cut out the felt.

The bikini-shaped section you fold and hot glue the ends to the center. Since this part will be wrapped you could also sew it.

After that you just glue the bikini piece to the bow-shaped piece, wrap the center part around it all and it’s done!

Tomorrow’s project is a Felt Gift Box!

Discovering 2014: Homemade Pasta

 Discovering 2014 is a personal goal to complete a daily project throughout the year!

Today’s project was Homemade Pasta. My brother gave us a Marcato Atlas Pasta Machine for the holidays two years ago, and while my husband has used it from time to time, I’ve never bothered to learn how to make a pasta dough make use of the machine myself. That changed today!

I used a slightly modified version of this recipe posted on the Food Network site. The ingredients are:

  • 3 cups all-purpose flour (set 1/4 cup aside)
  • 5-6 large eggs
  • 1 tsp salt

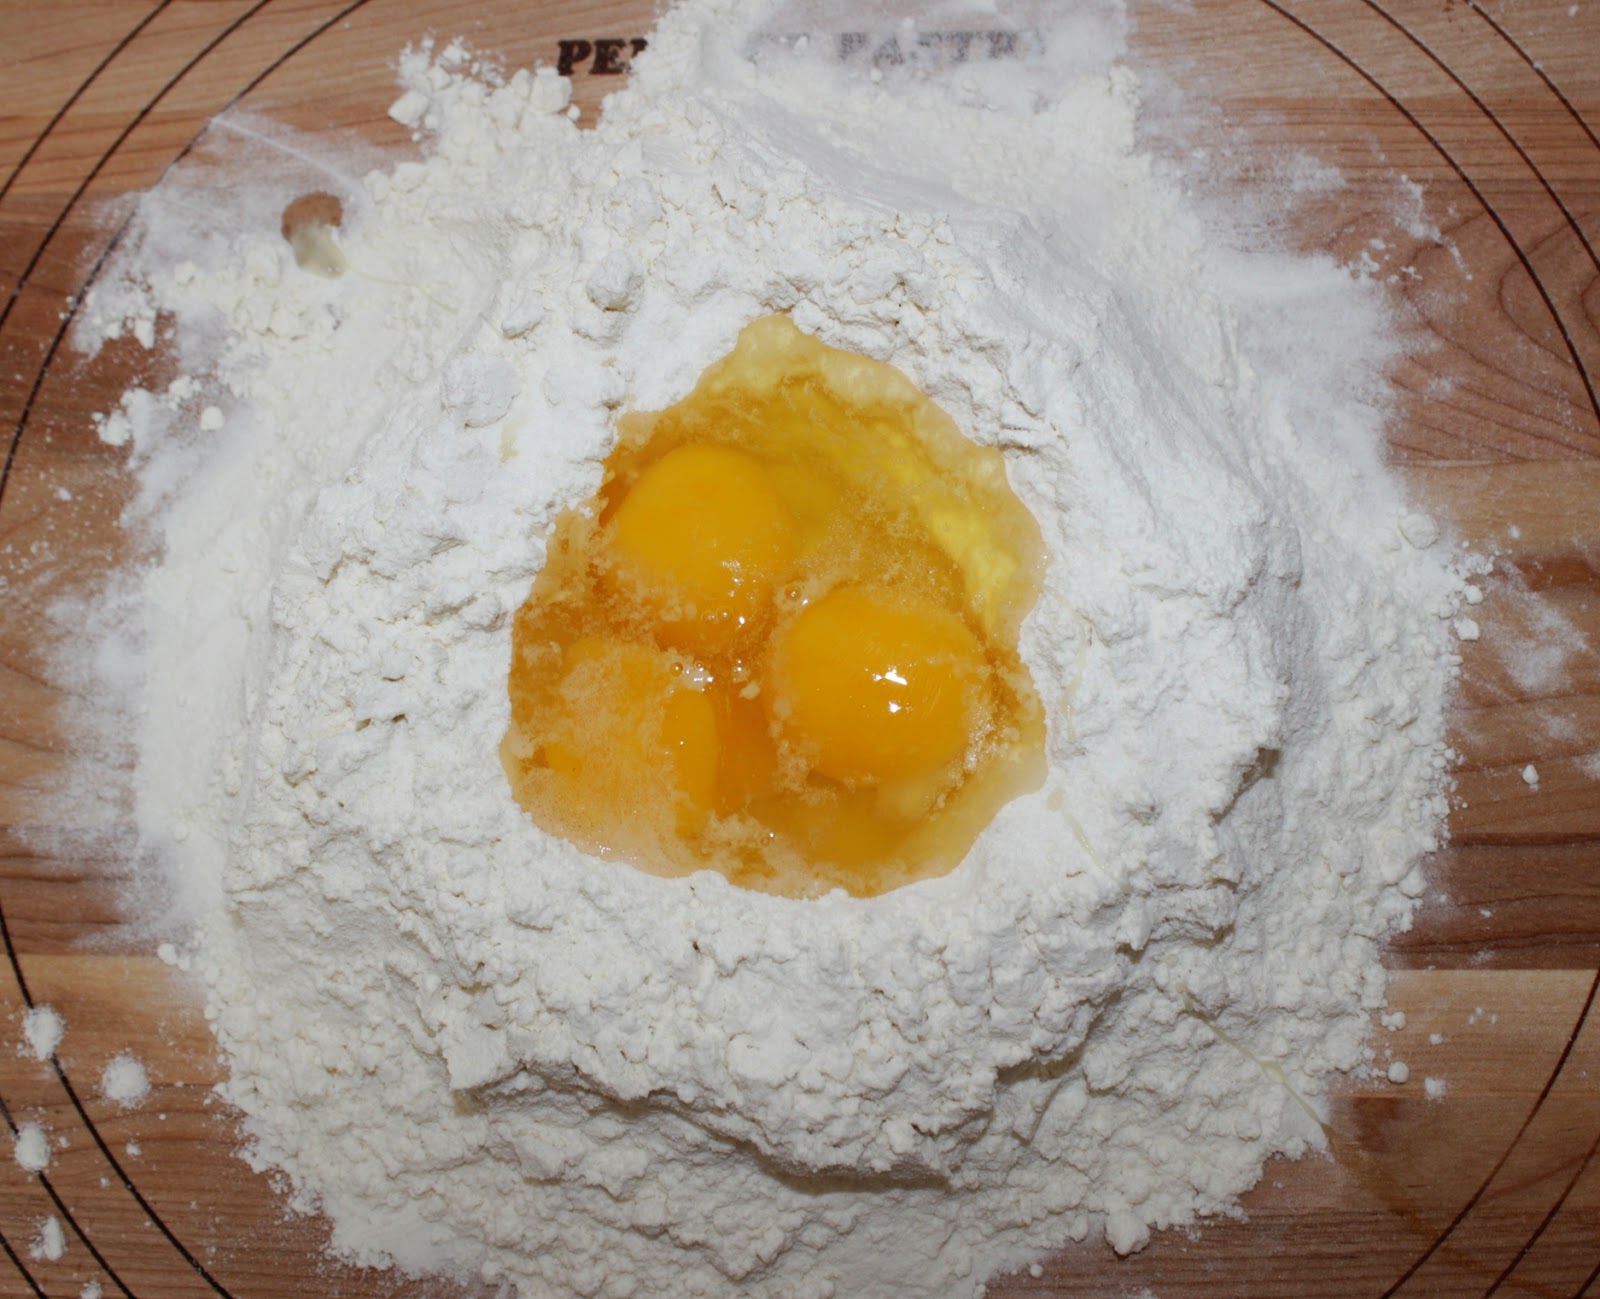
Mound 2 3/4 cups your flour, leaving a hole in the center. Crack your eggs into there (I cracked four eggs to start with), then add the 1tsp salt. After this point my hands got too messy to take pictures, but next you use a fork, break the yolks and slowly add some flour into the mix while keeping the mound solid so you don’t have runaway egg.

Once the egg mix is no longer runny, incorporate more of the flour until it’s all mixed well. At this point, because I had large instead of extra large eggs like the recipe calls for, I ended up adding a fifth egg, breaking it over top of the dough, piercing the yolk and spreading it before mixing it in. That got the dough closer but not quite there, so I used a sixth egg, then about 1/8 cup of the flour I had set aside. If your dough feels right after four or five eggs then stop at that point!

Next up is kneading the dough four 3-5 minutes. I separated mine into four chunks, turning it as I kneaded and stretched it with the heel of my hand, folding it over, and repeating this several times. Then wrap the dough with plastic wrap and let it rest for 20 minutes.

After this my younger two children decided they wanted to work the pasta machine crank while I held it and fed the dough. This went surprisingly well, though the flattening press they did have some trouble mustering the strength for.

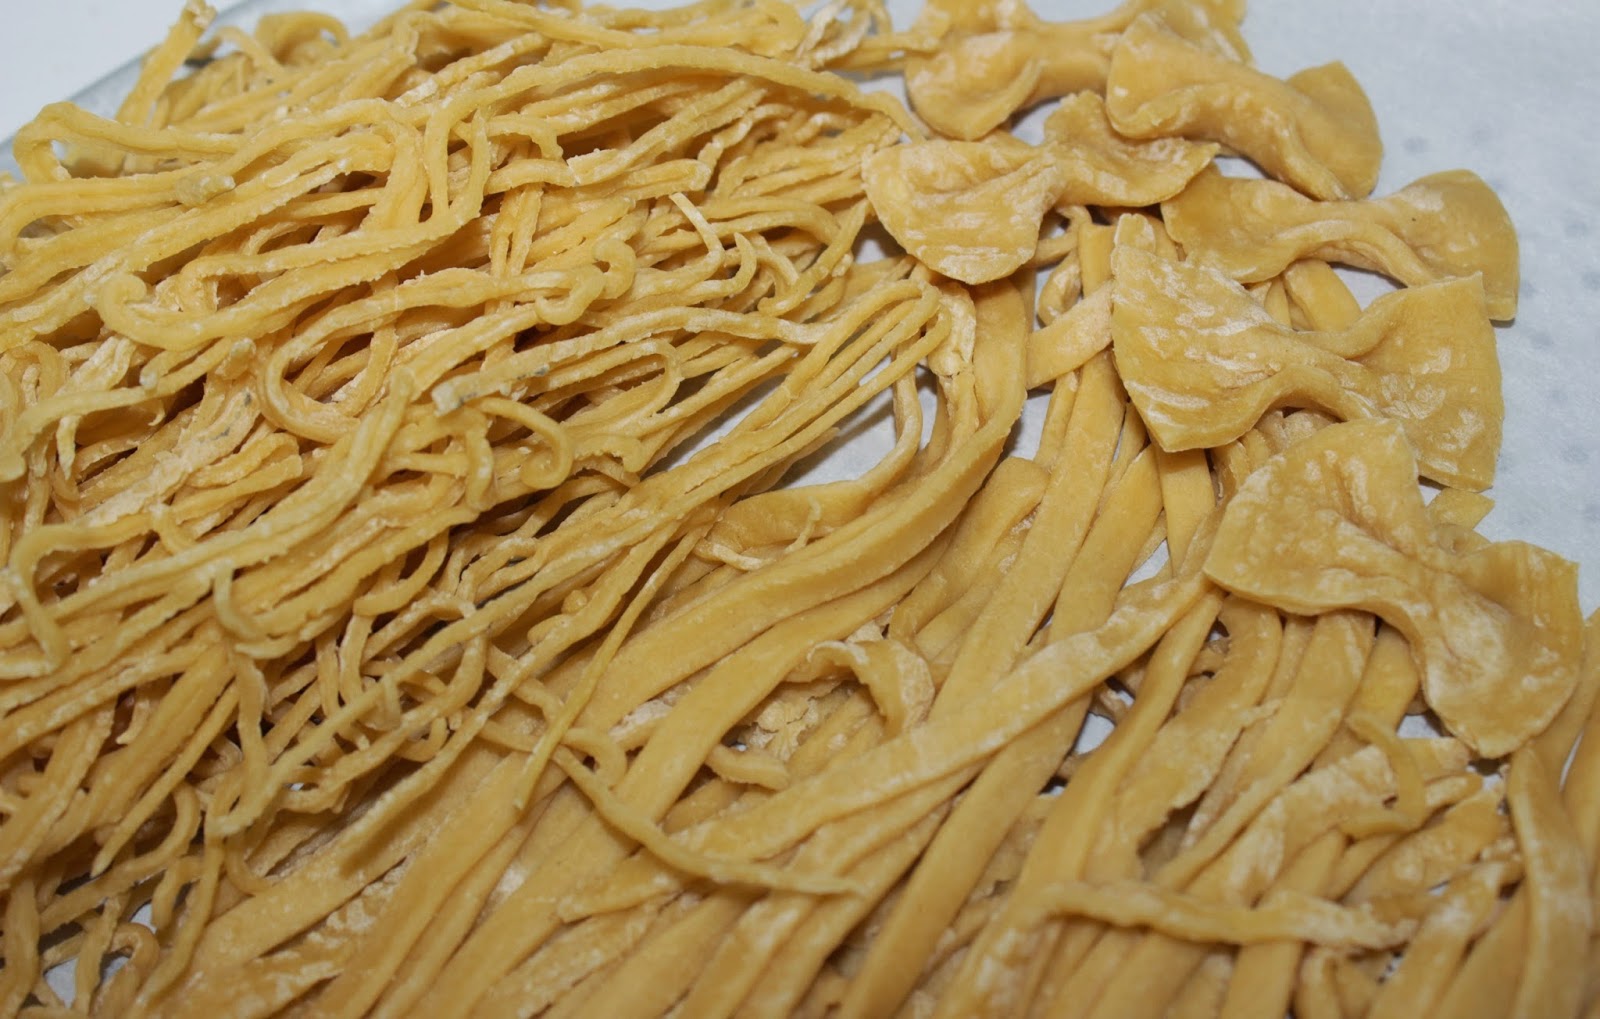
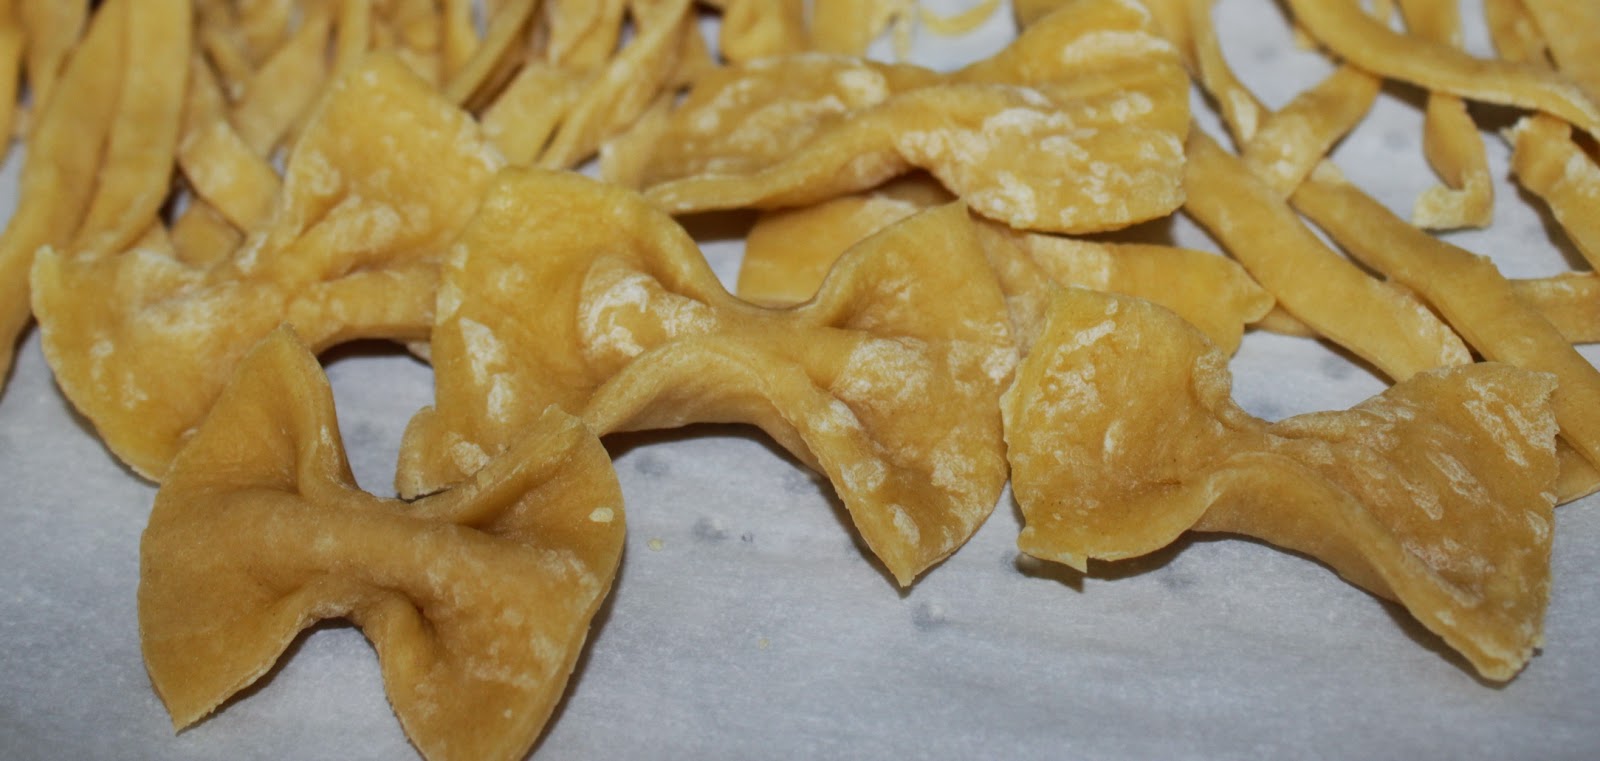
The machine also had an attachment so we used that to make a couple types of noodles.

My youngest son and I also tried our hand at making a few bowtie pasta pieces. I’m not quite sure what to think of those.

The pasta is currently sitting out to dry before I store it away. I’m sure it will come in handy soon!

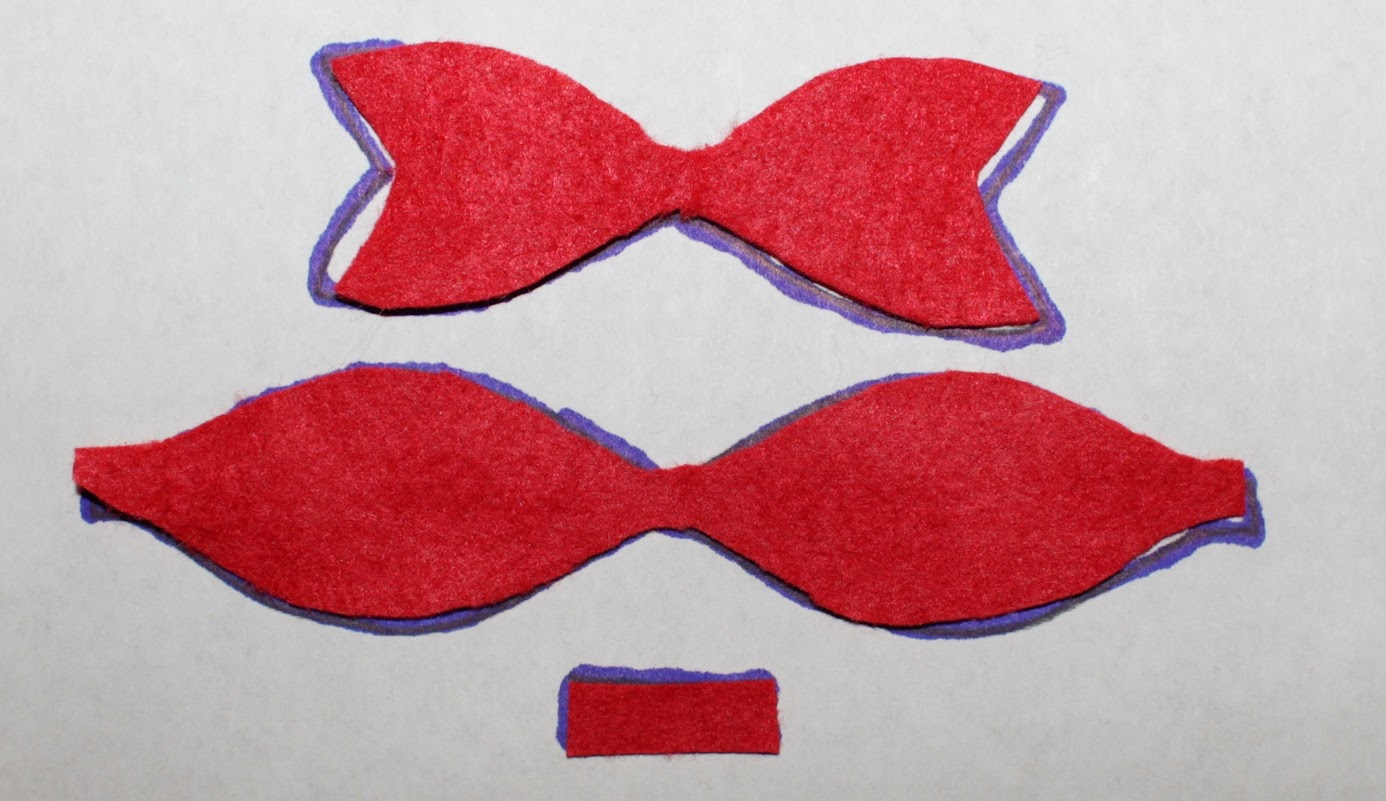
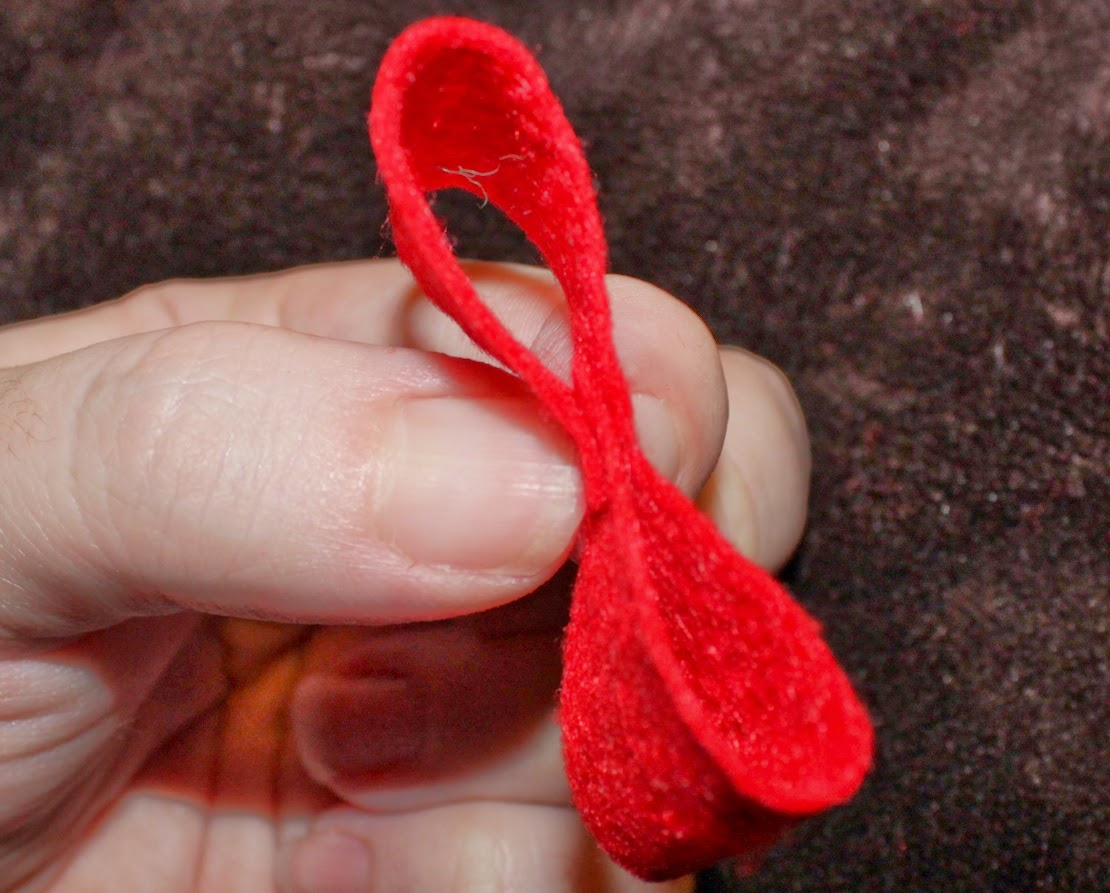
Tomorrow’s project is a Felt Bow!

Discovering 2014: Eucalyptus Shea Butter Lip Balm

Discovering 2014 is a personal goal to complete a daily project throughout the year!

Today’s project was Eucalyptus Shea Butter Lip Balm, following these directions from the Whole Woman Health site. I didn’t use Vitamin E oil or honey, but did use eucalyptus oil instead of peppermint.

Supplies:


I spent more time grating the beeswax than I did making it, so I don’t have many in-progress pictures. My teenage son helped me out, so you can do this easily with older kids. Next time I think I’ll just slice the beeswax instead of grating it because it melted so quickly that all that time grating felt wasted.

  1. Melt the beeswax, coconut oil and shea butter together in a double boiler, stir well
  2. Add your eucalyptus oil and any optional additives, stir well

3. Very carefully pour into your containers, or use a dropper/pipette if you have one. If you’re using tins with hinges, be careful to not fill at or above the hinges as it can overflow (I learned this the hard way)
4. The containers will be hot for the first several minutes; do not cover them and once the top begins to solidify you can move them to a safer place to finish cooling

5. Allow to cool and harden completely before putting the lids on

Optional Additions:

  • 4 drops Vitamin E oil (optional)
  • 3-5 drops of honey (optional)
  • Can substitute for different essential oils

This is a easy project that may take 15-30 minutes total. I got four of my acrylic jars and two tins worth out of the batch I made.. I probably could have gotten one more tin or jar worth had I not overflowed the first tin. These would make very nice gifts or stocking stuffers!