Discovering 2014: Beaded Bobby Pins

Discovering 2014 is a personal goal to complete a daily project throughout the year!

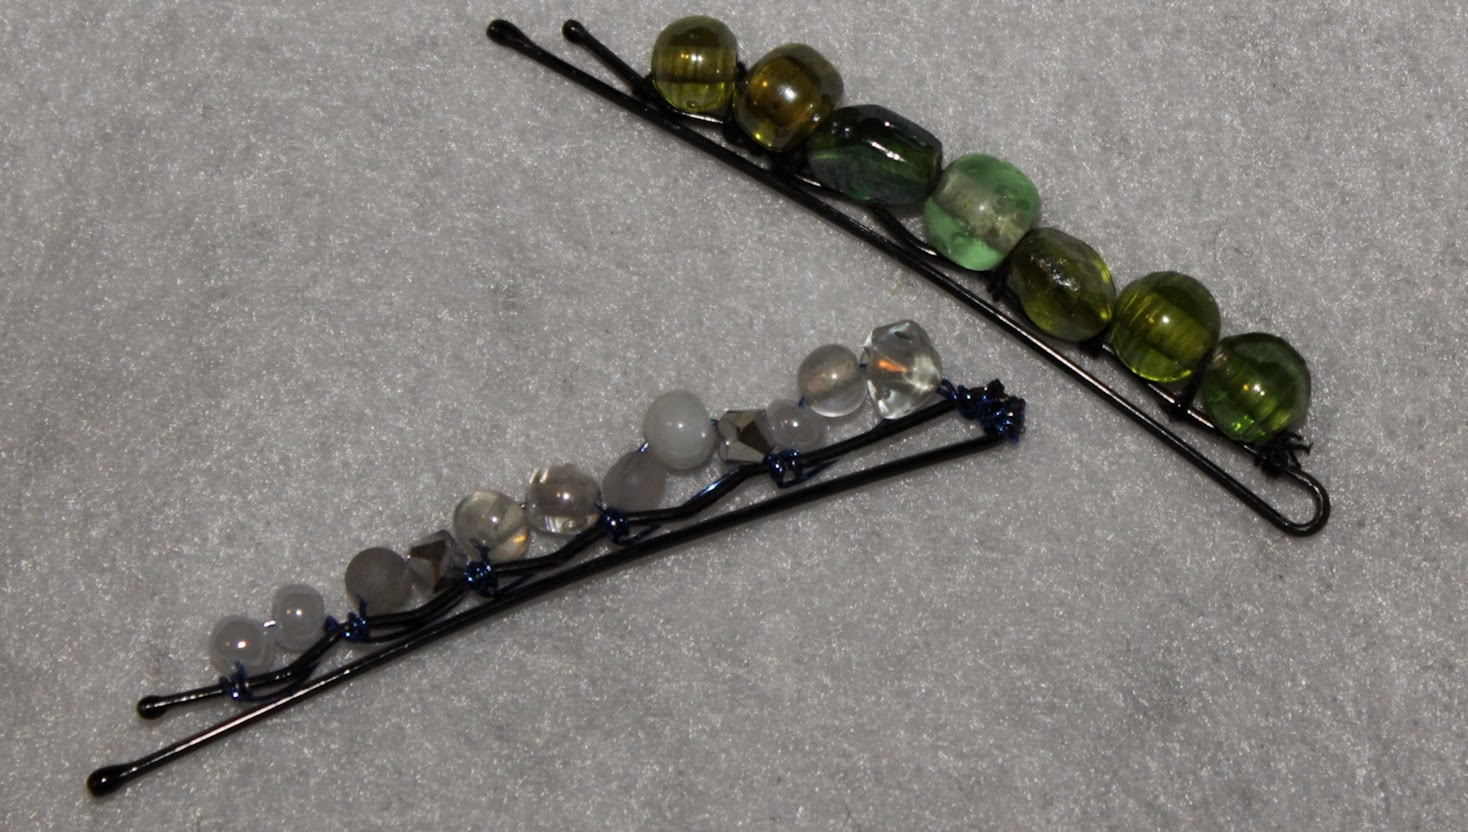
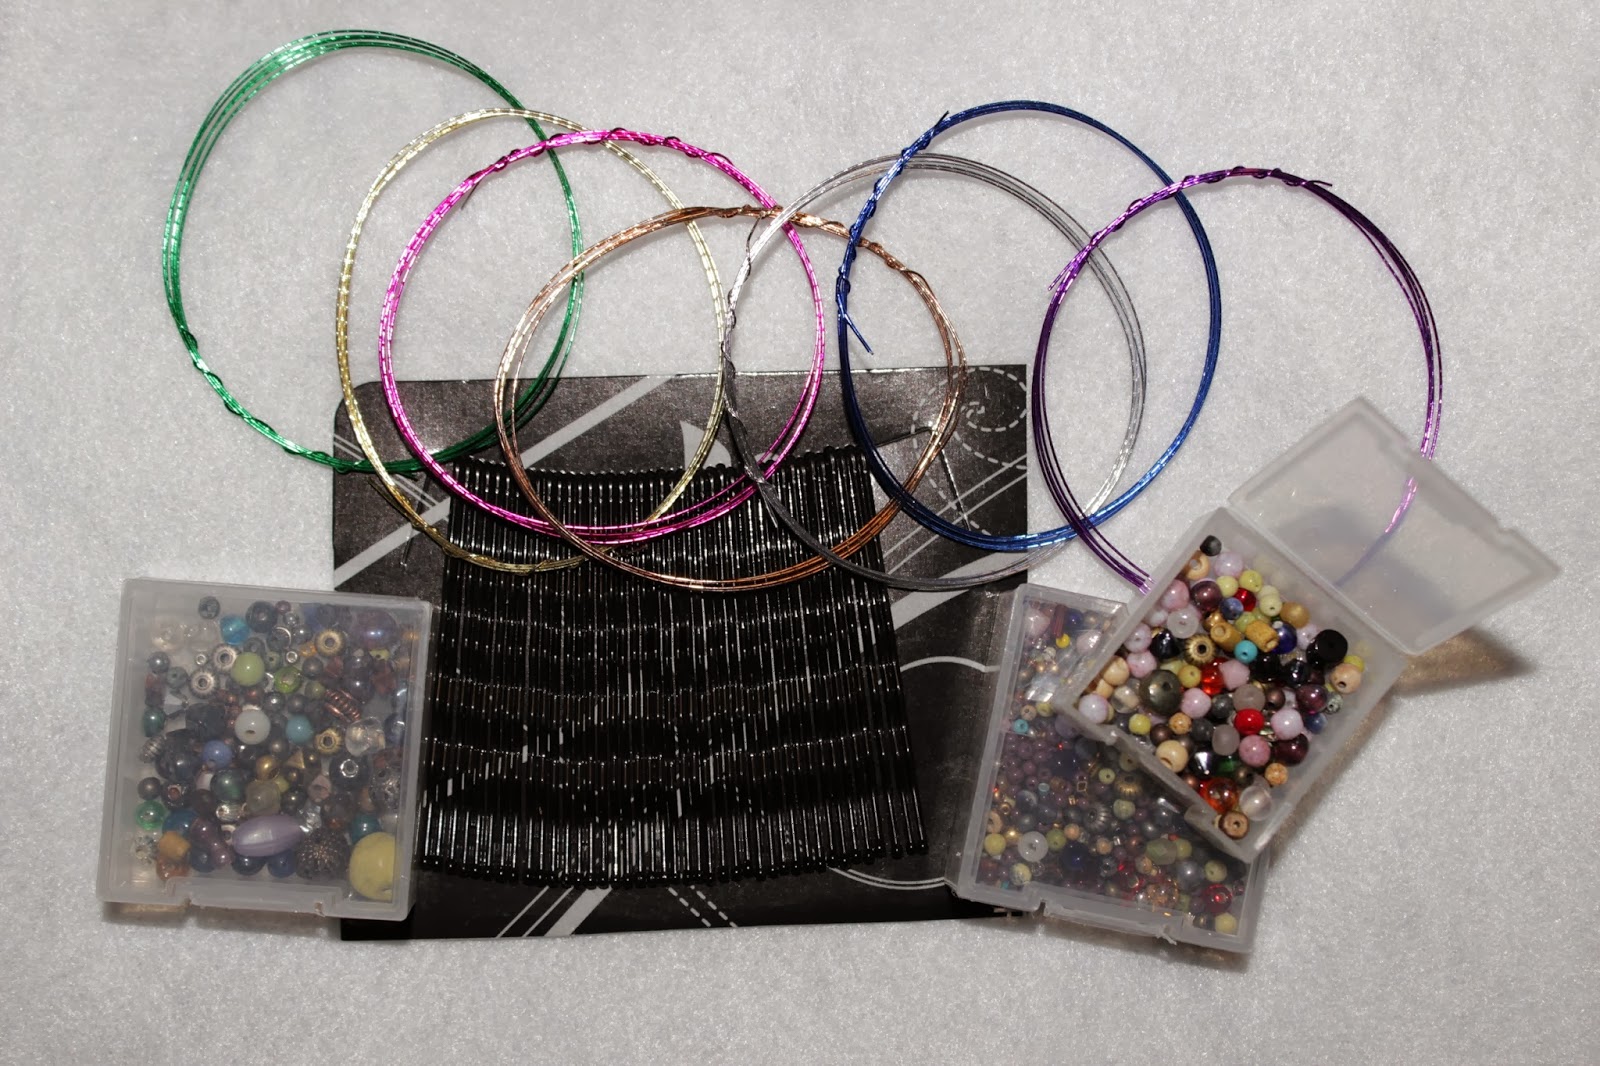
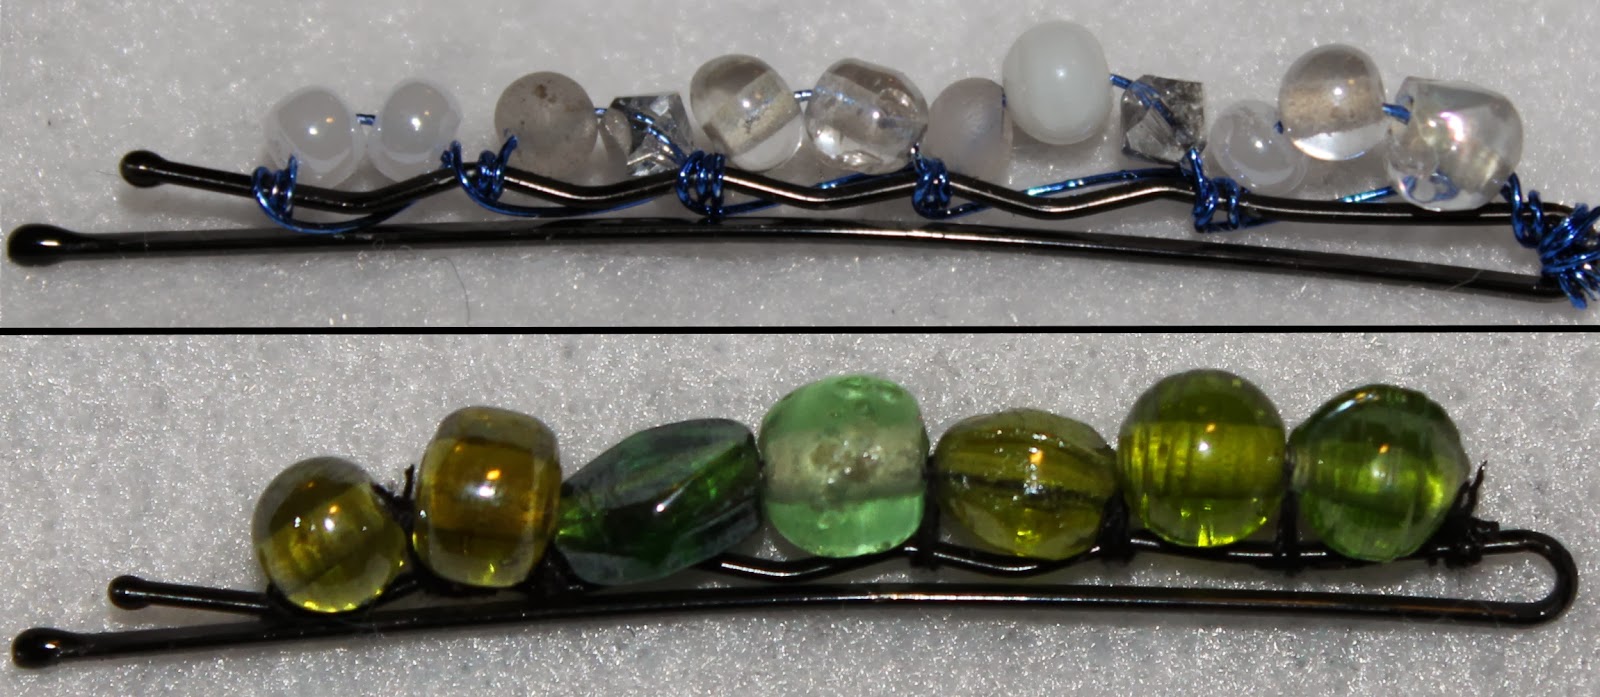
My day 15 project was Beaded Bobby Pins. The idea came from this pin that I came across last year. The pin is straight-forward: bobby pins, thread, and beads.

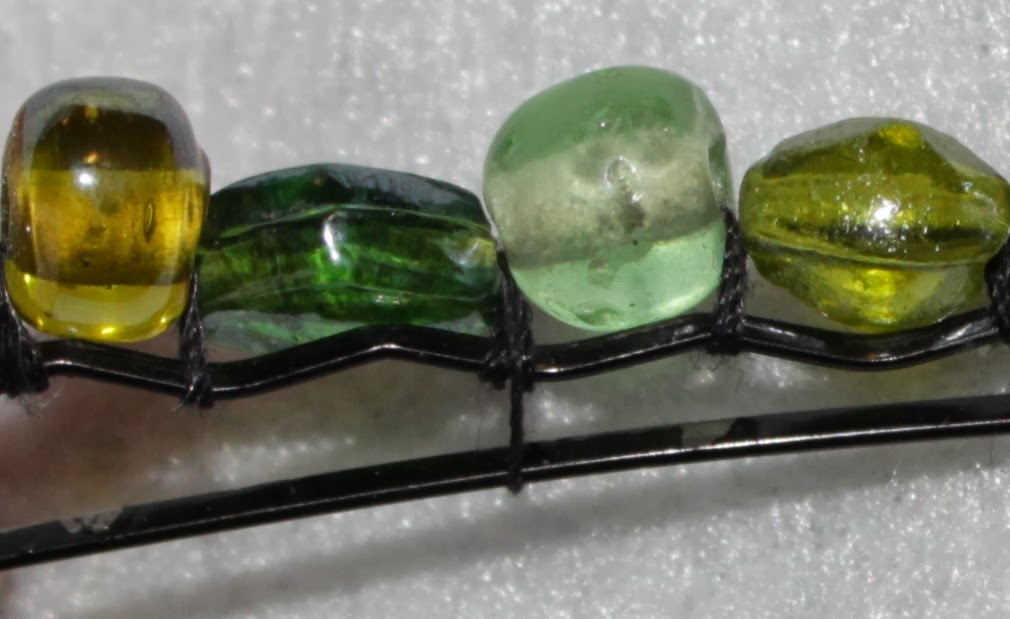
I decided to start out with some 28-gauge sampler jewelry wire instead of thread.

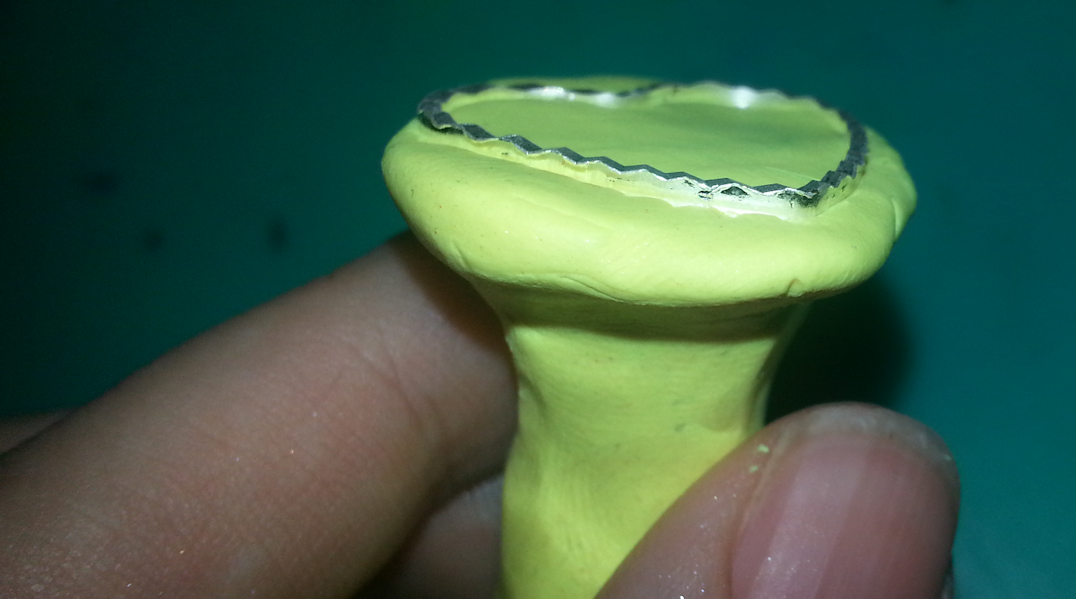
I started off with wrapping one end of my wire around the inside curve a few times.

Then I put on 2-3 beads at a time, wrapping around the top wire in-between bead sets as I go. I did a couple of wraps when I got to the end.

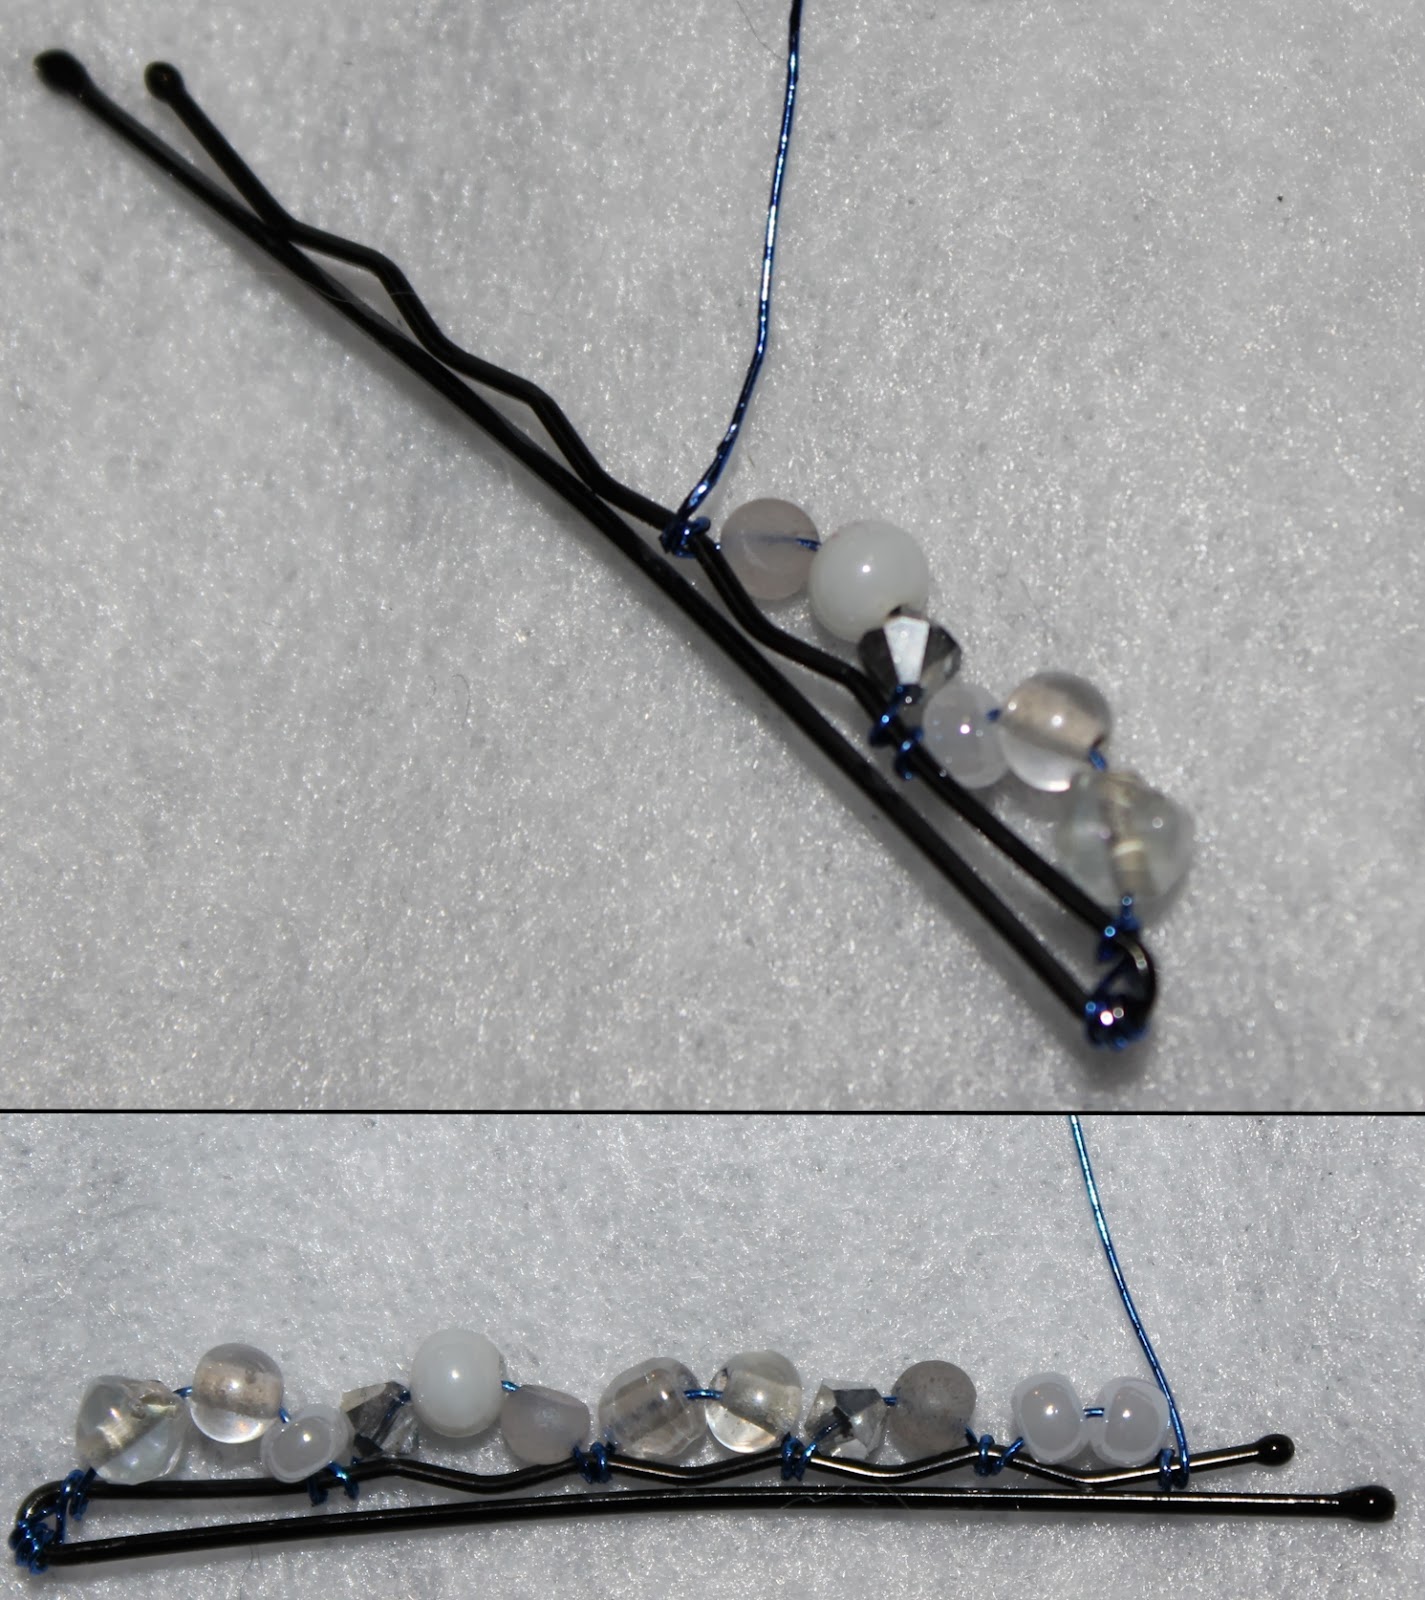
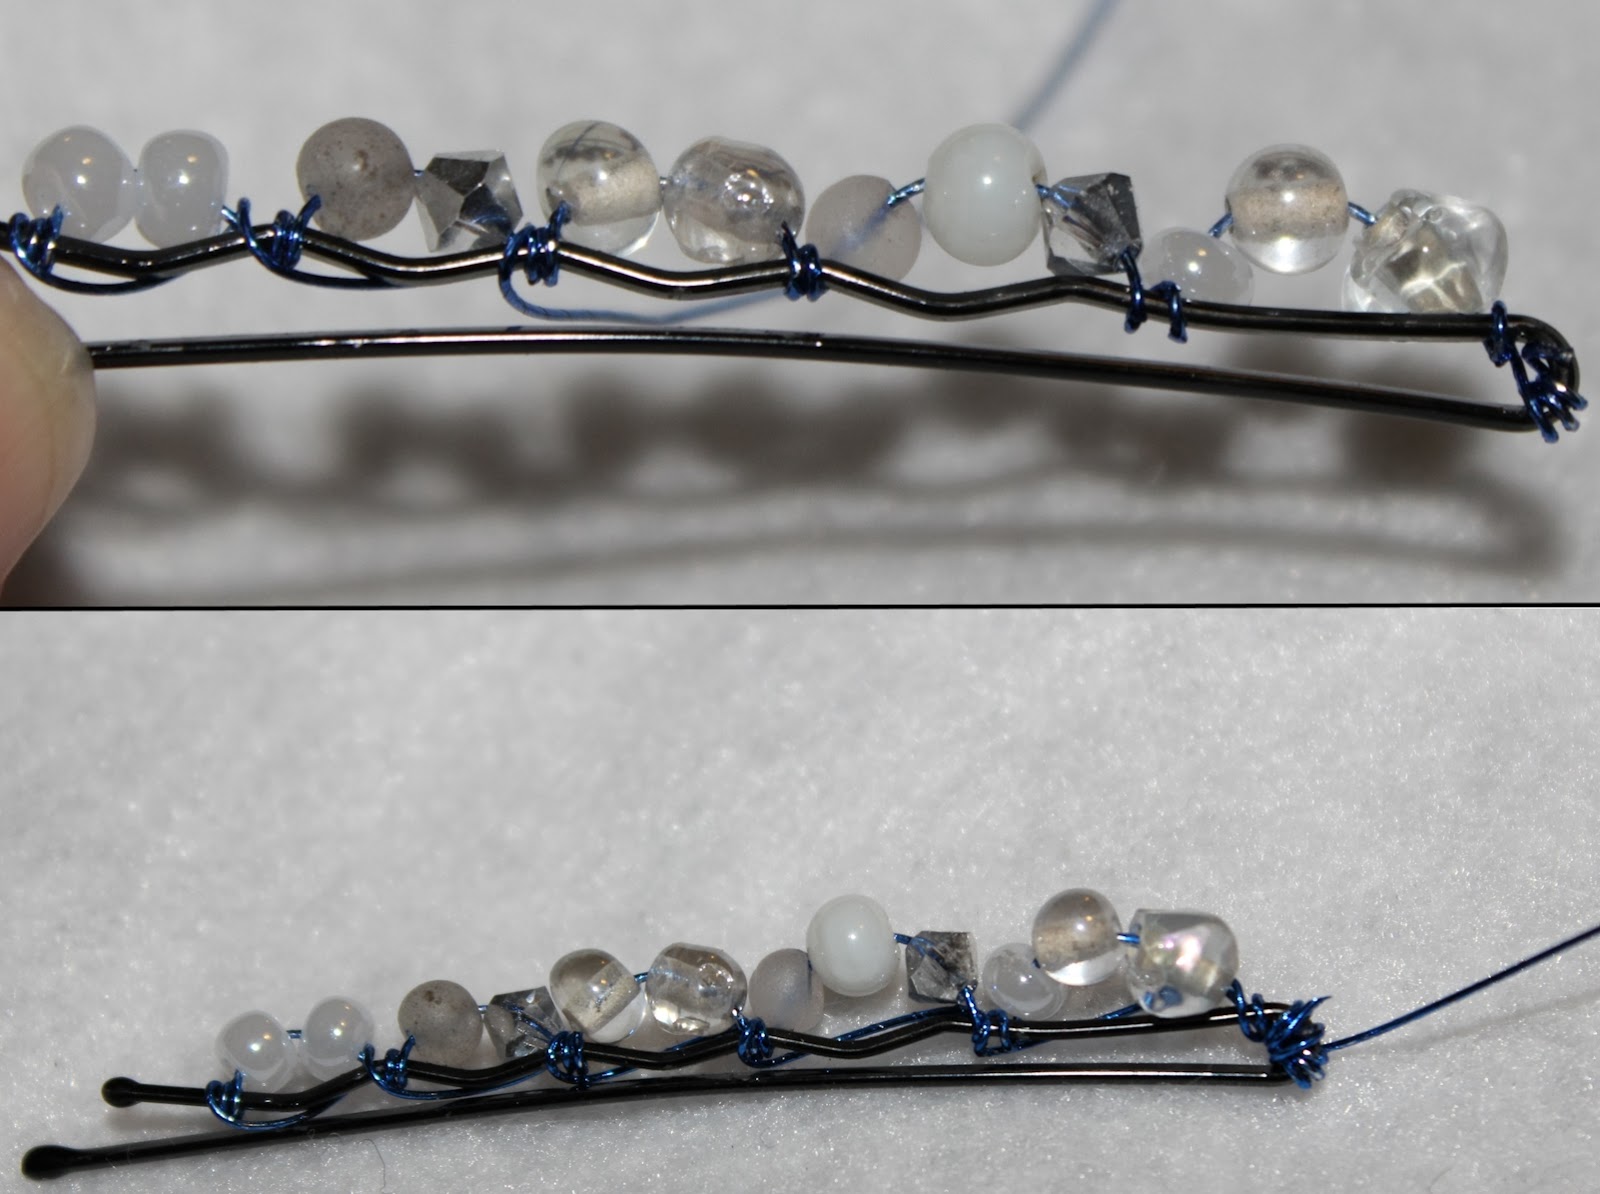
Next I wrapped the wire back around, doing one loop between each set on its trip back. When I got back to the inside curve, I did several more wraps around before cutting the wire and flattening it down.

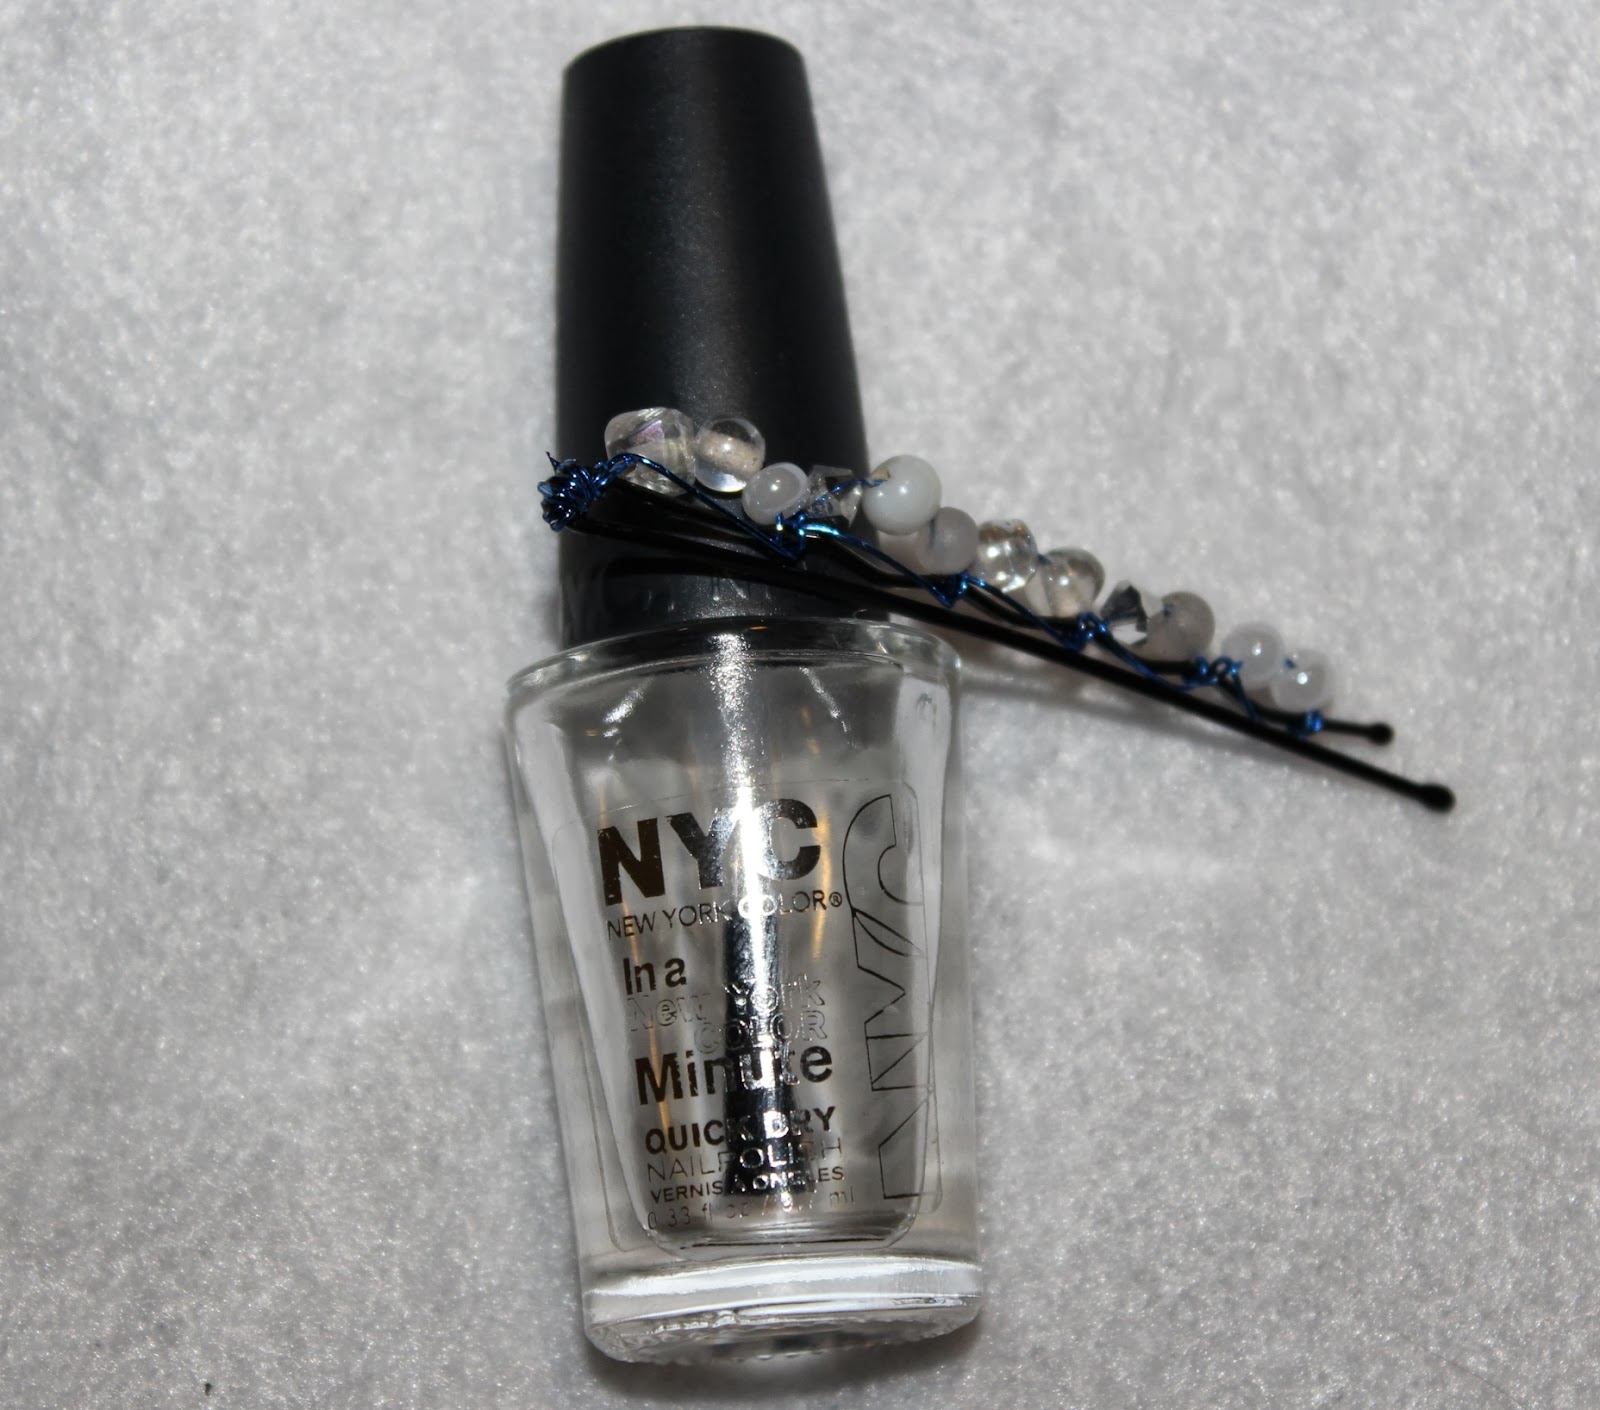
Finally I applied a dab of clear nail polish on the snipped end to help secure it in place!

Now, I did also try the thread method shown in the pin after I did the wire wrap. Maybe it’s my ineptitude at anything sewing related, but it took me over twice as long to complete the pin.

If I did it again with thread, the one thing I would change would be adding a wrap around the bobby pin with the thread between each bead instead of stringing them all on then wrapping back like the pin shows. They were really unstable until I did a wrap-around between each. Also, this happened way too often with the thread:

That particular one I discovered happened late enough that I couldn’t reasonably backtrack. I decided ultimately to cut it, and thankfully it stayed together once I wove in some additional reinforcement.

Overall this was fun and a great way to personalize a hair accessory. These would be fantastic stocking stuffers for ladies of any age. Of the two methods, I felt that the 28-gauge wire gave a lot more control and was easier to work with, but the end result for both ended up quite similar.

Ra, ra, sis boom ba!… tomorrow’s project is a Cheerleader Hair Bow!

Discovering 2014: Tulle Bows

Discovering 2014 is a personal goal to complete a daily project throughout the year!

My day ten project was Tulle Bows. There were several great variations available from this pin by Miss Lovie Creations, but I chose to make just the fluffy bow to start. We had purchased a roll of green tulle last year and still had half of it left, but you use so little for these bows that a single roll can last you a long time.

The tutorial suggested several loops, which I did, but originally made them too small to work with. After I lengthened them it only looped about three times. I’d suggest double for it to look better.

Next you pinch the center where the ends are open, so the looped ends are on the outside. I recommend having something ready to tie the middle with before doing this (I just used a small strip of tulle).

At this point you have a nice bow, but if you want a fluffy bow there’s a bit more to do. Gently cut open the looped ends, then trim some of the middle pieces to add more body.


Spread out the pieces some and fluff! The picture below shows a still-looped end on the left, and a fluffed end on the right. With more loops the fluffed end will look a lot fuller than pictured! 

Once you finish both ends, you have a fluffy tulle bow! This can be used for decoration, on gifts, tied on a headband, etc.

Tomorrow’s project is Decorative Mason Jar Lights!

Discovering 2014: Clay Texture Tools

Discovering 2014 is a personal goal to complete a daily project every day throughout the year!

My day seven project (yay, one full week now!) was to make some Clay Texture Tools, using the project from this pin by PolymerClayWeb. Mine look no where as nice as theirs do, but they are definitely functional and will work nicely for the Clay Medallion project coming up next week!

The basic tools you need for this project is clay and some random baubles (preferably oven-safe ones). I ended up selecting a variety of random beads and metal findings, but you could also incorporate other objects from around your home (like bolts, stranded jewelry pieces, etc) as well. It will be easier if all of your objects are oven safe, but if not, you can make do with glue.

Roll out some of your clay and check out what impressions your objects make to make sure you’ll like the final product. I didn’t end up using all the objects I grabbed since some of them didn’t make a very good impression.

Roll the clay into a handle shape that works well for you, then gently push your objects into the end caps. Aside from the large blue tool I made, the rest of mine were double-ended to maximize my clay real estate.

If any of the clay is not oven-safe (or you’re just not sure), remove them before sticking it in the oven. I baked mine at 275°F for 15 minutes, but check the instructions on your clay’s package in case yours differs!

I guess you can’t really tell the difference, but here’s the ones I didn’t have to apply glue to after they cooled down from coming out of the oven.

Here’s a couple that needed glue. I didn’t have clay glue like PolymerClayWeb suggested so we’ll see how it’s working out when I get to put them all to the test next week.

Then it was time to test out the non-glued ones! I think these will do quite nicely and am please with the results. 🙂

Tomorrow’s project should be Incense Cones. However, the “arctic freeze” or whatever that weather event is dubbed, has postponed all UPS deliveries for the past two days in my area, so I may not get the base ingredient in time. One way or the other, some project will be done!

Discovering 2014: Egg Carton Fire Starters

Discovering 2014 is a personal goal to complete a daily project every day throughout the year!

My day one project is Egg Carton Fire Starters. It is based on this pin from The Art of Doing Stuff blog that I spotted recently on Pinterest. I honestly didn’t expect it to work very well. Especially after I saw the finished product! It looked far from beautiful. But hey, store-bought fire starters are expensive and I had this huge candle my mom had sent me for the holidays, lots of drier lint and an empty egg carton.

I spent about an hour or so filling up six of the egg cubbies. I learned on the first one to cut off the lid and place it underneath; by the end of the second I put down a silicone mat to save time peeling off the wax drippage, as well as cut apart the cubbies early on.

The end product is far from beautiful, especially when you have four cats that contributed their fur to the drier lint. Good thing these are intended to be lit on fire.

So I threw a few pieces of wood into my fireplace and added in the first fire starter I made. My expectation was that it’d light briefly but peter out fast once the top lint was gone. I was actually surprised when it stayed lit long enough for me to grab my phone and snap this picture.

The fire just continued to grow. This was about 3-5 minutes in. The normal store-bought fire starters we use rarely catch the wood this well this quickly.

I attempted to get one last picture of the egg carton before the flame got too large, but though I was able to discern it with the nakid eye, it didn’t show well on camera. You get the picture (har), I’m sure. 🙂

From this point on the fire just got increasingly larger. It’s currently nice and toasty behind me as I type this up. If you have candles, egg cartons and some drier lint (or similar materials) around your home and a need to light a fire, I highly recommend spending the time on this project.


The final picture I took is the one at the top of this post. A toasty fire perfect for a cold day! 🙂

Tomorrow’s project should be paper beads. Happy New Year, everyone!

Thrifty Thursday: Hair Sticks


I’ve grown to be a frugal shopper, and whenever I’m out, clearance stickers always catch my eye. I usually pause to at least glance and see what the item is and how much it is discounted. My husband avoids going to craft stores with me because I’m known to get distracted for hours while there.

Usually this habit ends up with me just walking away from the item after admiring the sale price. One day while in Jo-Ann Fabrics I happened upon two remaining packages of 7″ hat pins (3 count each package). I had no idea that hat pins existed, what they were doing in a beading section, nor how large of a hat you would need to make use of a 7″ hat pin.. but there they were, on clearance and marked all the way down to $0.97!
Continue reading “Thrifty Thursday: Hair Sticks”