Discovering 2014: Faux Sea Glass

Discovering 2014 is a personal goal to complete a daily project throughout the year!

Today’s project was Faux Sea Glass. I only had this pin for reference with the caption stating to use Elmer’s School Glue and food coloring. I had no idea how many coats to apply, so I only did one (though I think, in the end, it needs a second).

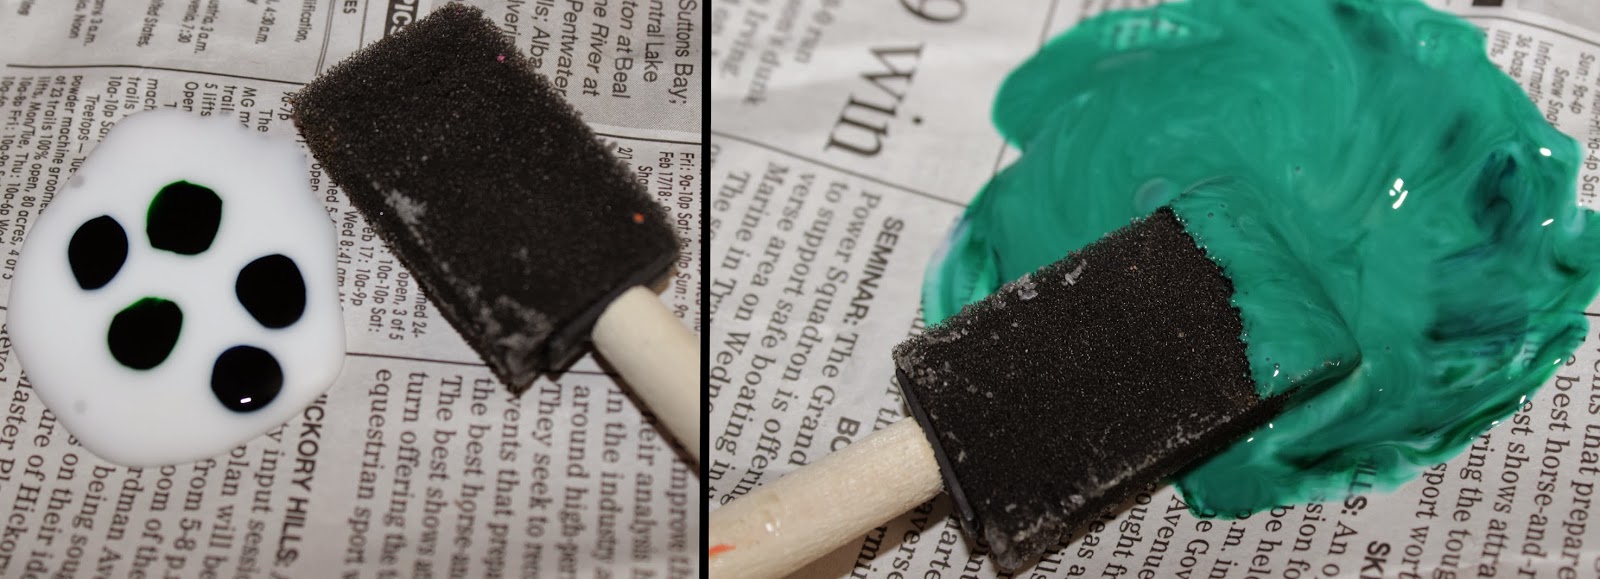
My supplies included dollar store candlesticks and vase, foam brushes, Elmer’s glue and McCormick food coloring.

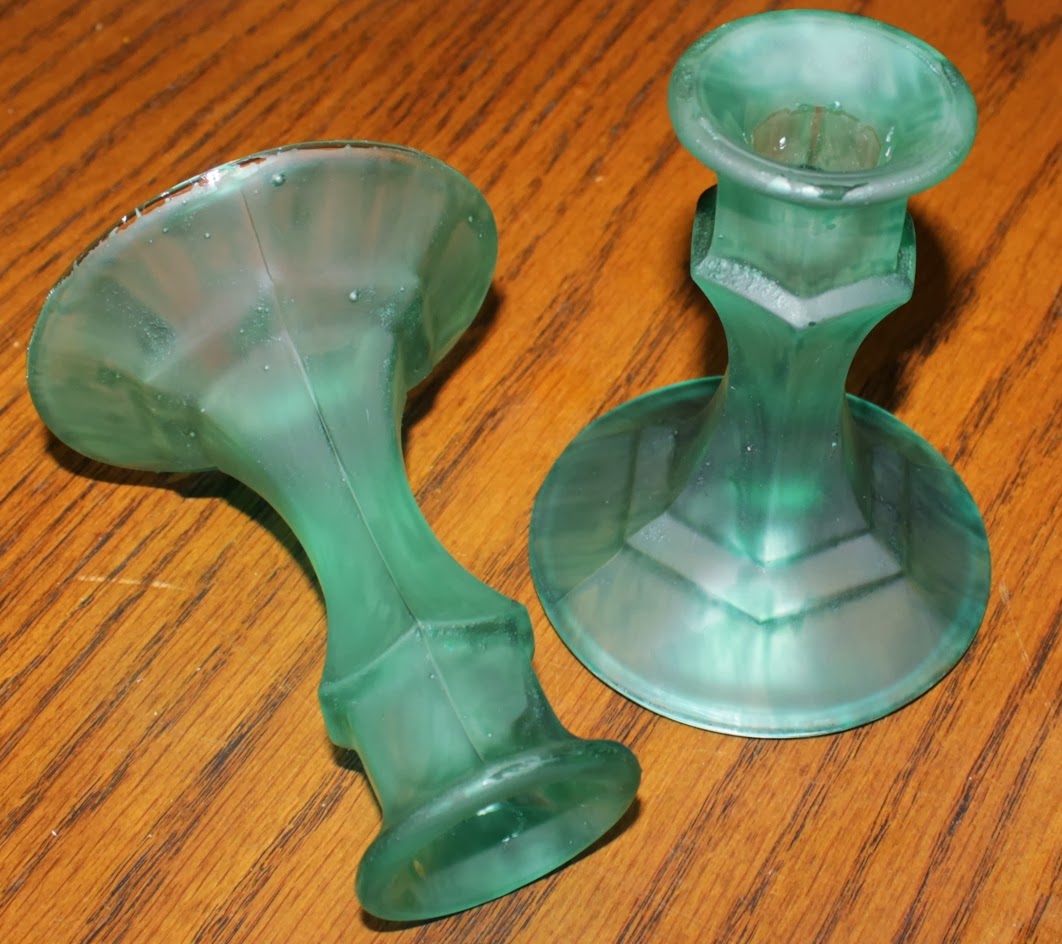
I decided to go with teal on the candlesticks and mixed it into the glue. I didn’t have quite enough glue (nor do I have an exact measurement) so I did have to make a bit more halfway through the second candlestick.

Here’s the candlesticks after it was all applied. I found that it was easier to apply from the top down, since you can brush the glue onto the base without holding it easier that you can onto that beveled top.

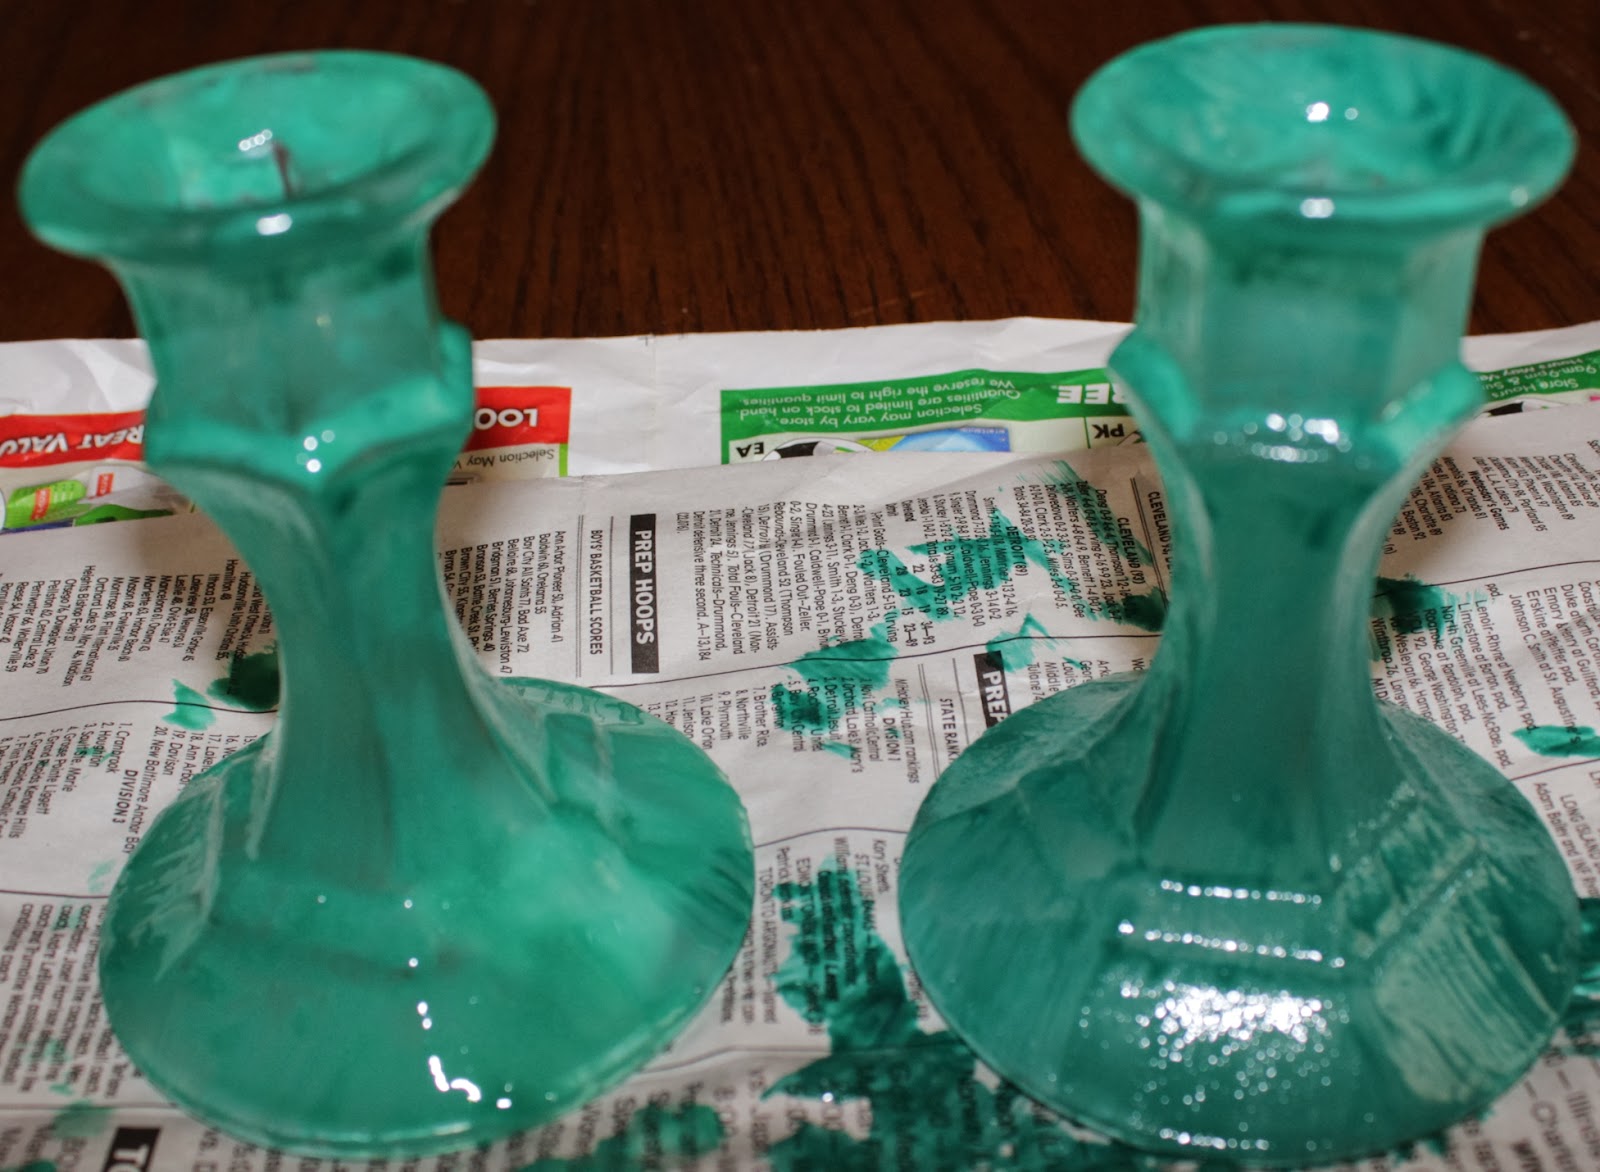
This is after it dried. I think it would benefit more from a second coat.

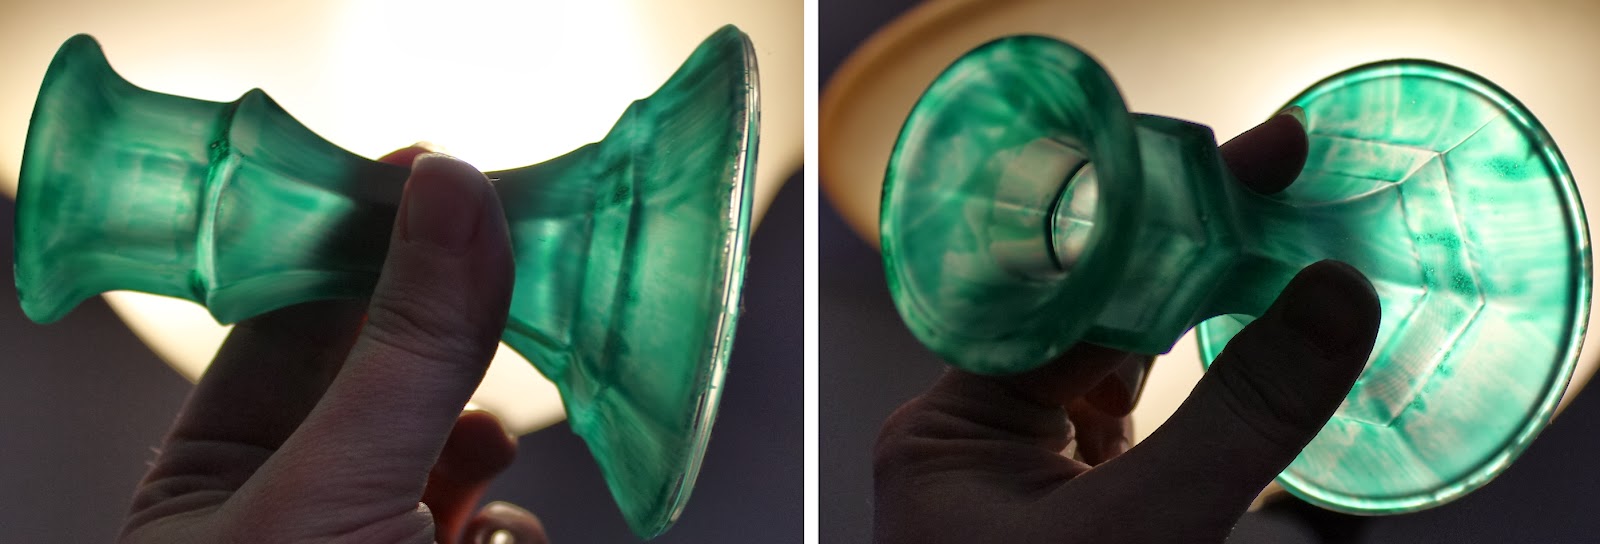
Here’s it held up against light. You can see that it’s definitely not a “solid” appearance and is more streaky.

For the vase I decided to be a bit crazy and see what would happen with Mod Podge and food coloring.

It is definitely thinner and that purple had me concerned, as it leaned more toward grey to me. So I applied the first coat and…

Wet on the left, dry on the right.

I actually wish I had left it at this point; it was an awesome effect. I got a bit sloppy applying the second layer to get it done before a meeting and this is how it turned out.

Wet on the left, dry on the right.

It’s kinda cool, but being overly critical of myself like usual I can tell the parts where I was messy around the rim, and I’m not a fan of the brush strokes on a second coat. At this point I think I’d rather do a Mod Podge application over Elmer’s Glue, but leave it at a single coat.

Elmer’s Glue is labeled as “washable”, so cleaning it off would likely yield a mess. I plan on applying a polyurethane spray once the weather warms up (that stuff is terribly stinky!).

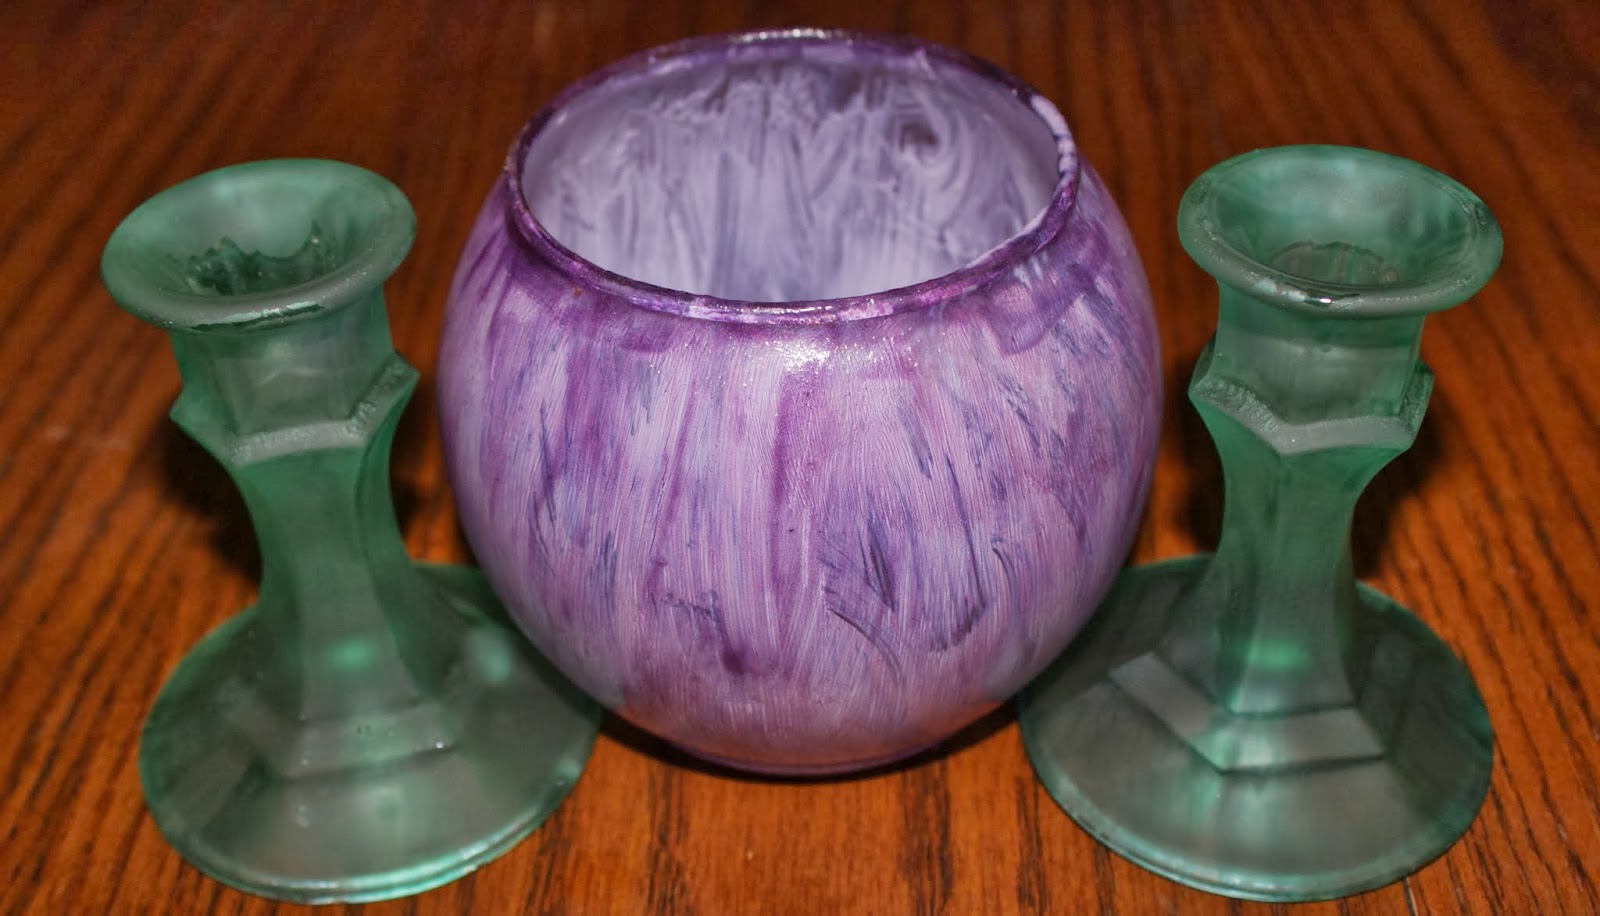
Either way, they’re fun DIY decor!

Tomorrow’s project is an Embroidery Floss Wrapped Cord!

UPDATE: After the vase sat for another day, the color became opaque again, as seen below!

Discovering 2014: Bubble Wands

Discovering 2014 is a personal goal to complete a daily project throughout the year!

Today’s project was Bubble Wands, fashioned after this picture found on Pinterest. This is a pretty quick craft that you could do for or with kids. I used about a foot or so of 18-gauge wire and some chunky beads. 20-gauge wire would likely work just fine as well, and the length you can vary depending on what you want

I made the purple by looping and wrapping the top then having a single wire at the bottom, and the brown by folding the wire in half, wrapping a few times, then having a double pronged bottom. Both I curled in after the beads were on; the purple with a flat spiral and the brown spiral curling outward.

I ran into the problem of being unable to take a picture while blowing bubbles, so once again my husband kindly obliged.

Tomorrow’s project is Whipped Cream Frosting!

Discovering 2014: Edible Glitter

Discovering 2014 is a personal goal to complete a daily project throughout the year!

Today’s project was Edible Glitter (homemade sprinkles), which came from this pin by She Knows. I honestly used more suggestions from the comments than from the original directions in the article, and it came out wonderfully that way.

Here’s a VERY important thing to remember with this project: do NOT use wax paper! It could start a fire. Make sure you’re using parchment paper in your oven.

I got four smaller bowls, sugar, measuring cup, baking pan, food coloring, parchment paper, and grapefruit spoons (though I’m sure any spoon would work). The oven should be pre-heated to 310°F (which is 285°F in a convection oven).

Since the bowls I used were pretty small, I only used 1/4 cup of sugar in each. Then I put in a few drops of food coloring. 4-6 drops should be plenty. If you’re doing multiple bowls, make sure you do only one at a time, so the food coloring doesn’t dry up in the ones you’re not working on.

At first it will clump (like above), but just mush it down and mix, mush and mix, mush and mix.

Keep doing this until you think you’ve mixed it as thoroughly as you can.

Put the parchment paper (again, NOT wax paper!!) on your baking pan. I did two colors at a time, and thinly spread them out on the paper (give them a mix first to make sure they didn’t clumped from sitting in the bowl). In hindsight I should have pre-cut the paper in half (made it easier to get back in the bowl at the end), but once it cooled I was able to carefully cut it.

The cook times I saw were between 8-10 minutes. I tried both 8 minutes and 10 minutes and saw no difference. Whichever you choose, set a timer for the halfway point (either 4 or 5 minutes) and pull the pan out when it goes off. The sugar will have clumped up some; gently break it apart and then put it back in for the remainder of its cook time.

Once its done allow about 10-15 minutes of cooling before you store it. There shouldn’t be anymore clumps but it doesn’t hurt to try and break it up the best you can. Mine still had a few tiny clumps here and there but overall it looked very nice (and tasted like… sprinkles!).

Tomorrow’s project is Italian Cookies. Gee, I wonder what sprinkles I could use on the icing? 🙂

Discovering 2014: Flower Clippies

Discovering 2014 is a personal goal to complete a daily project throughout the year!

Today’s project was Flower Clippies, inspired by The Laughy Giraffy’s Posie Hair Clippies on Etsy.

To start I got a couple different double-sided ribbons, green covered hair clips, one extra length of green ribbon (for the leaves) and embellishments for the center of the flowers (I used decorative stones for this but many things would work fine here). A hot glue gun (not pictured) is also needed!

Next I made two figure eights for each flower.

I then glued the centers of the figure eights together with them perpendicular to each other.

Then it was time to glue the flowers onto the clips.

After this I took some time cutting the leaves. I ended up making four with the length of ribbon I had grabbed, and I really don’t think I could have fit much more than two leaves on each clip anyway.

Finally it was time to put the leaves and embellishments on the flower clippie!

My youngest son spotted them as I was putting everything away and couldn’t resist hamming it up.

Tomorrow’s project is Bottlecap Candles!