Discovering 2014: Dreamcatcher

Discovering 2014 is a personal goal to complete a daily project throughout the year!

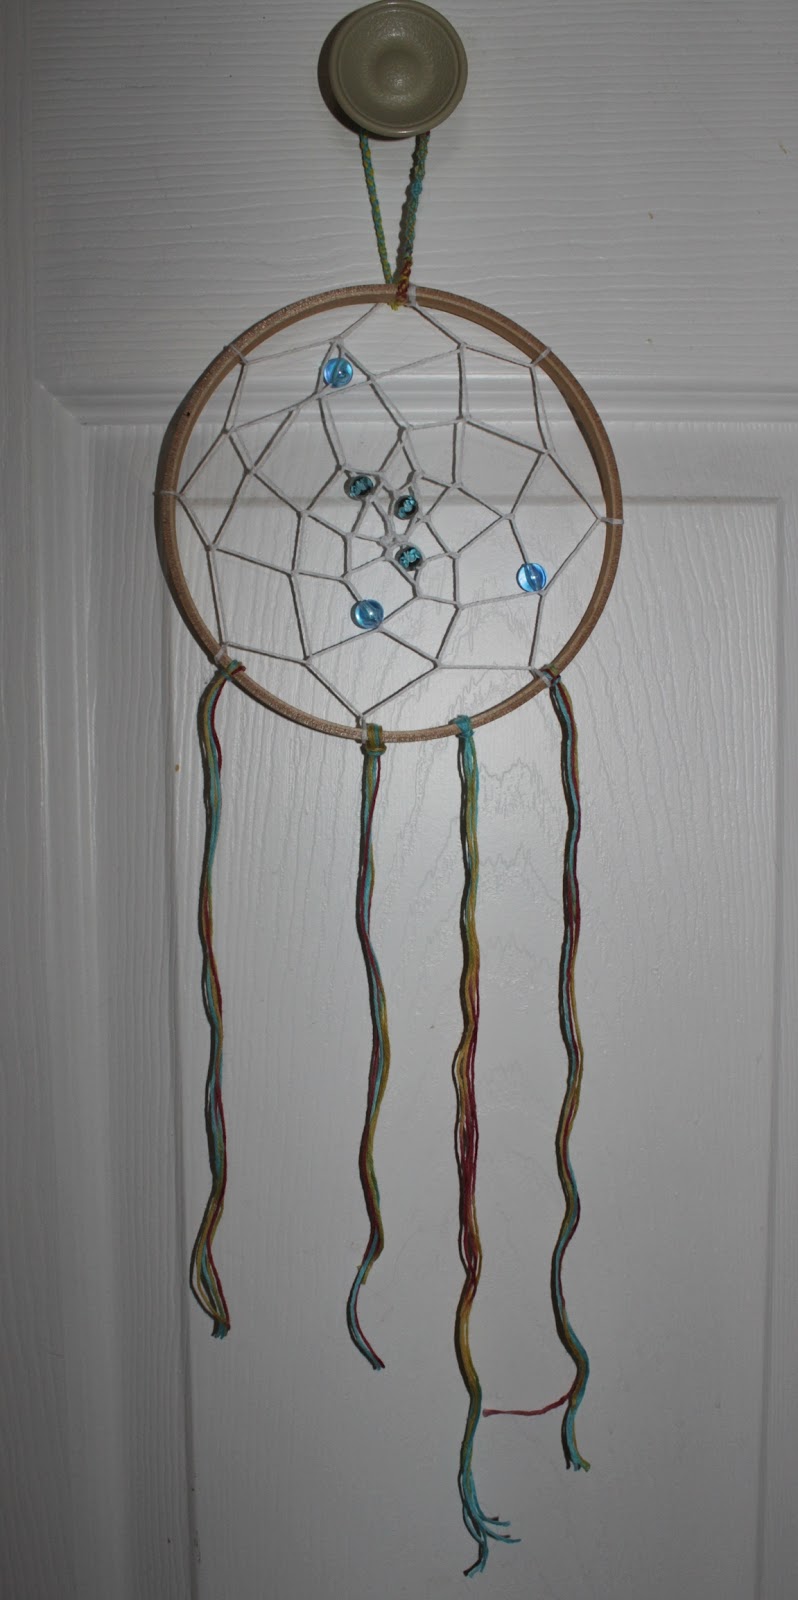
Today’s project was a Dreamcatcher. I made one once before as a young teen, but once I recalled how to get the web pattern down it went pretty quick.

You’ll need the inside hoop of an embroidery hoop, embroidery floss (amount will vary by your hoop size; I needed under half a skein for the smallest hoop), and you can optionally use 6mm and 8mm beads as well.


Knot the beginning of your floss onto the hoop, leaving a 2″-3″ tail.

Continue around the hoop, taking your embroidery floss over the top then through the opening. Pull tight!

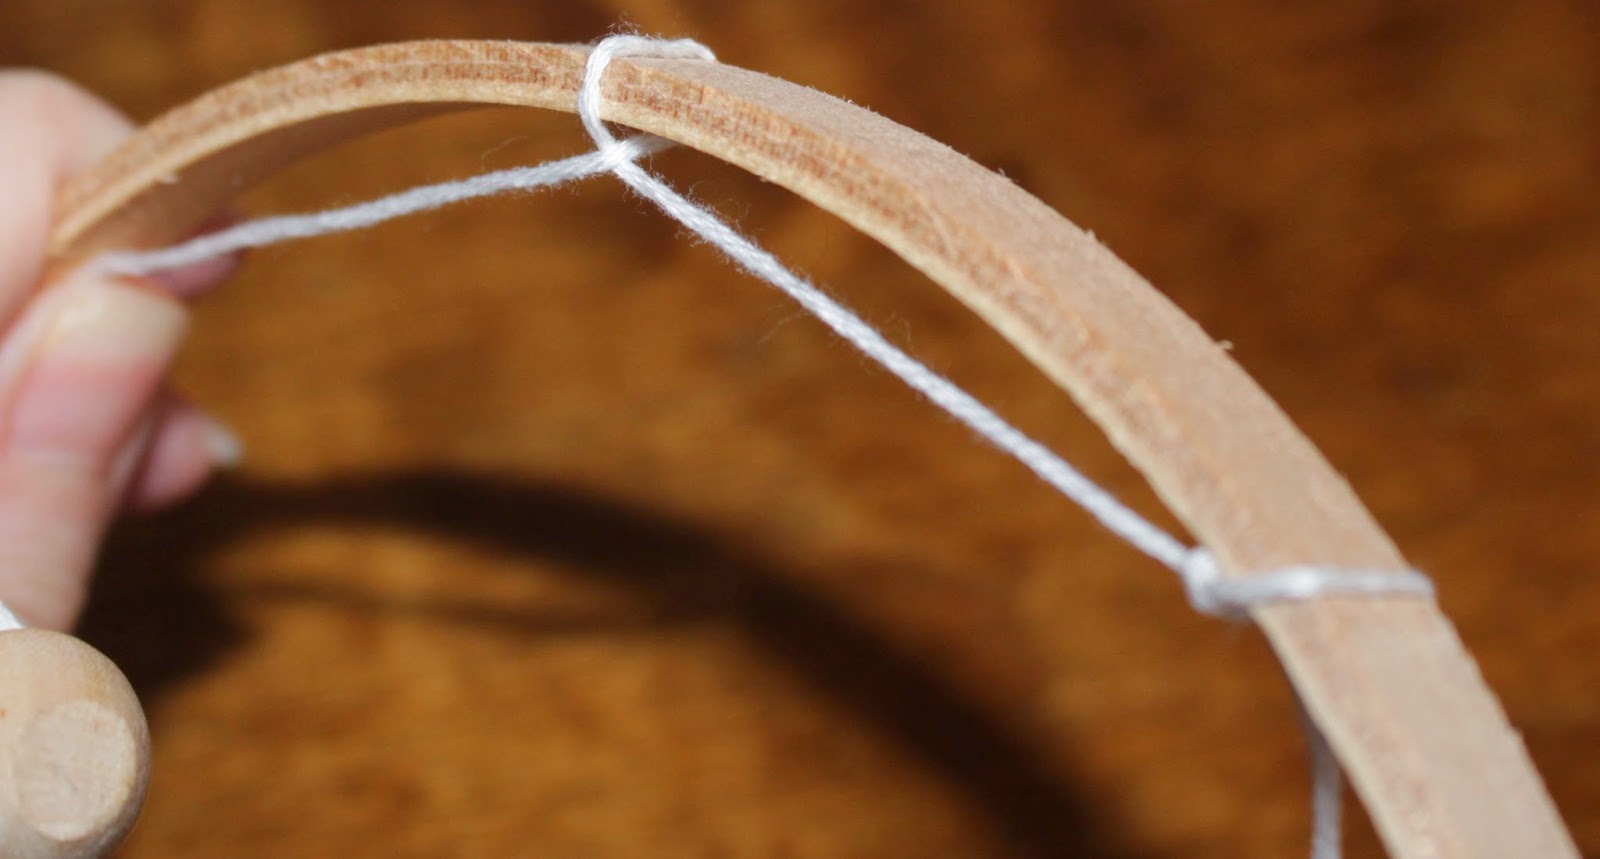
This is a bit further along, but maybe it shows the “over and through” better:

At the end of the first rotation around the hoop, tie the tail you left at the beginning with the floss you just ended on. Double or triple knot, then feel free to trim the tail.

The second, and remaining, rotations you just do the “over and through” method on the previous rotation, aiming for the center.

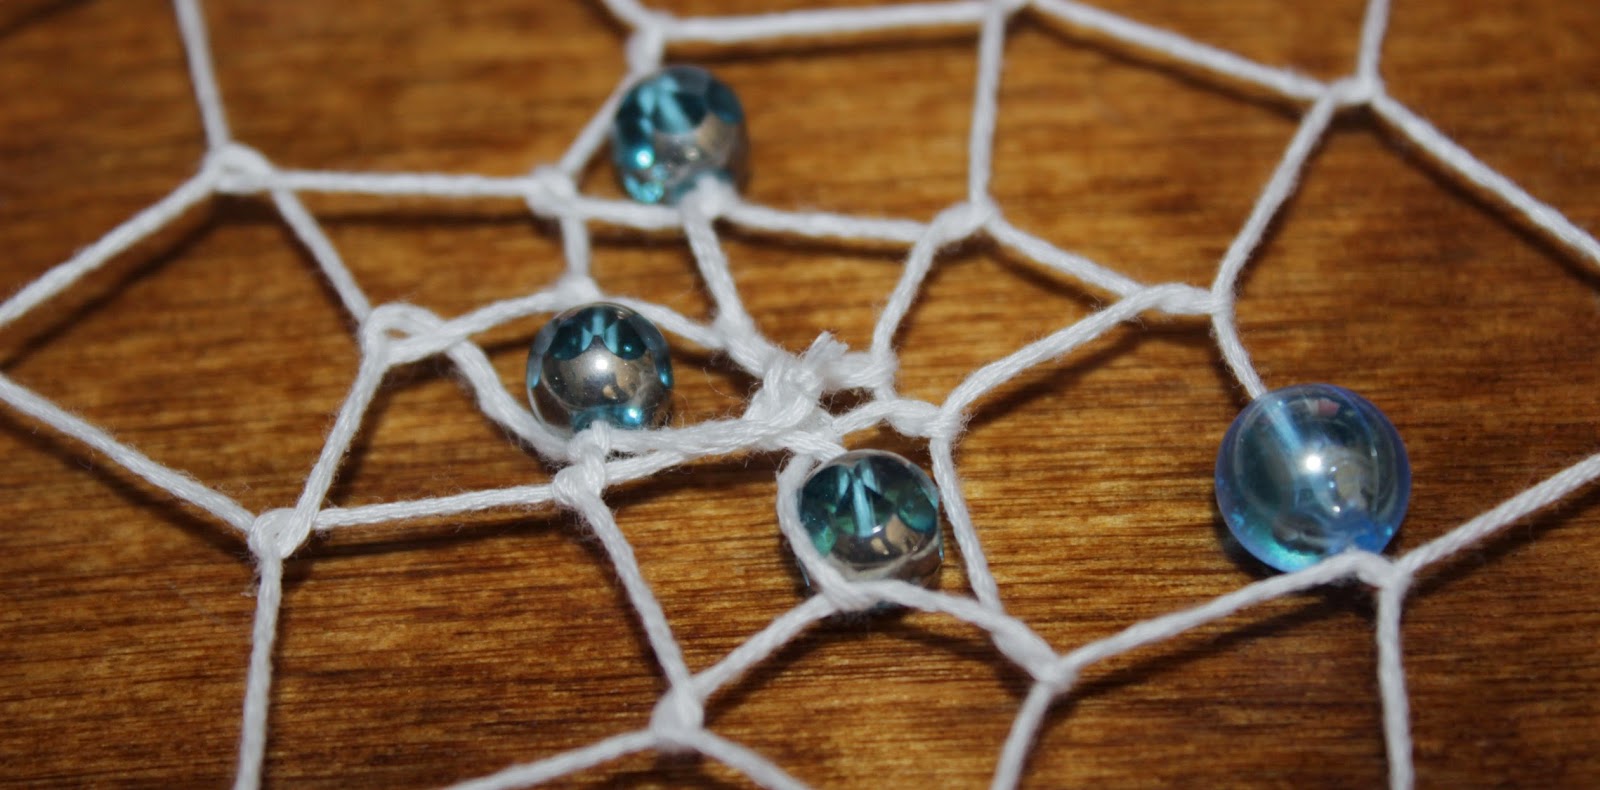
Optionally you can string some beads on!

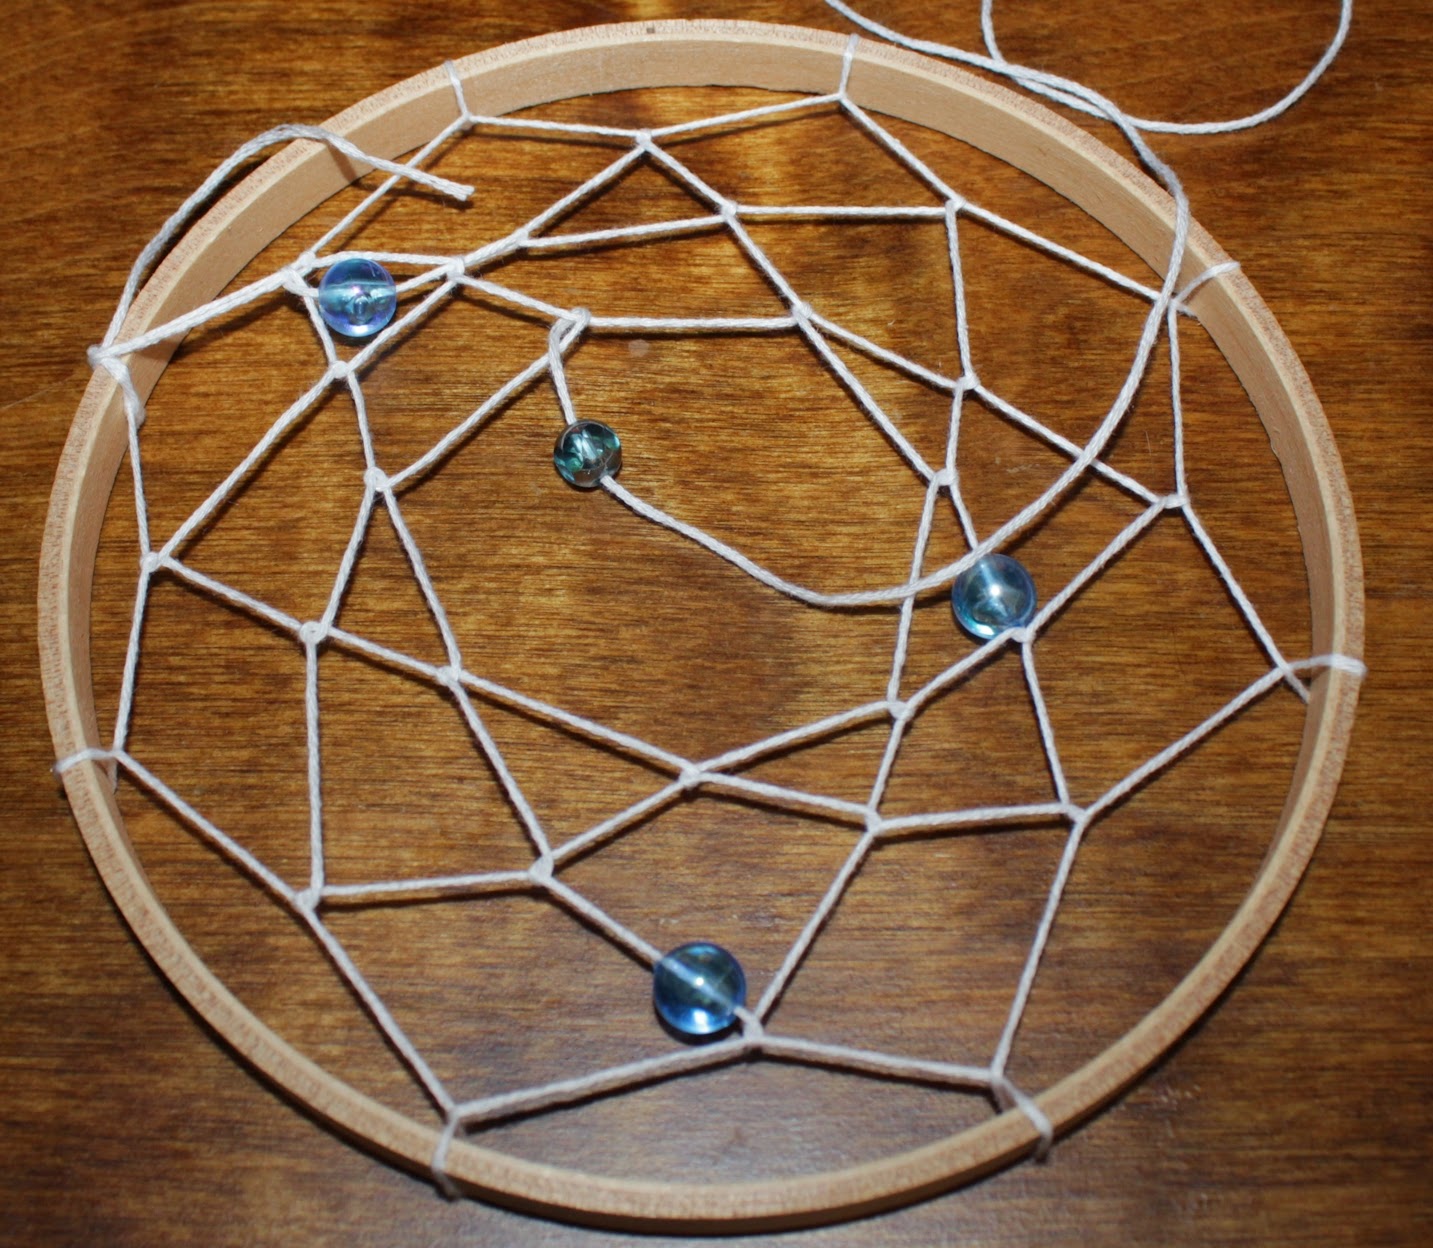
Once you reach the middle make a double or triple knot and trim the remaining embroidery floss.

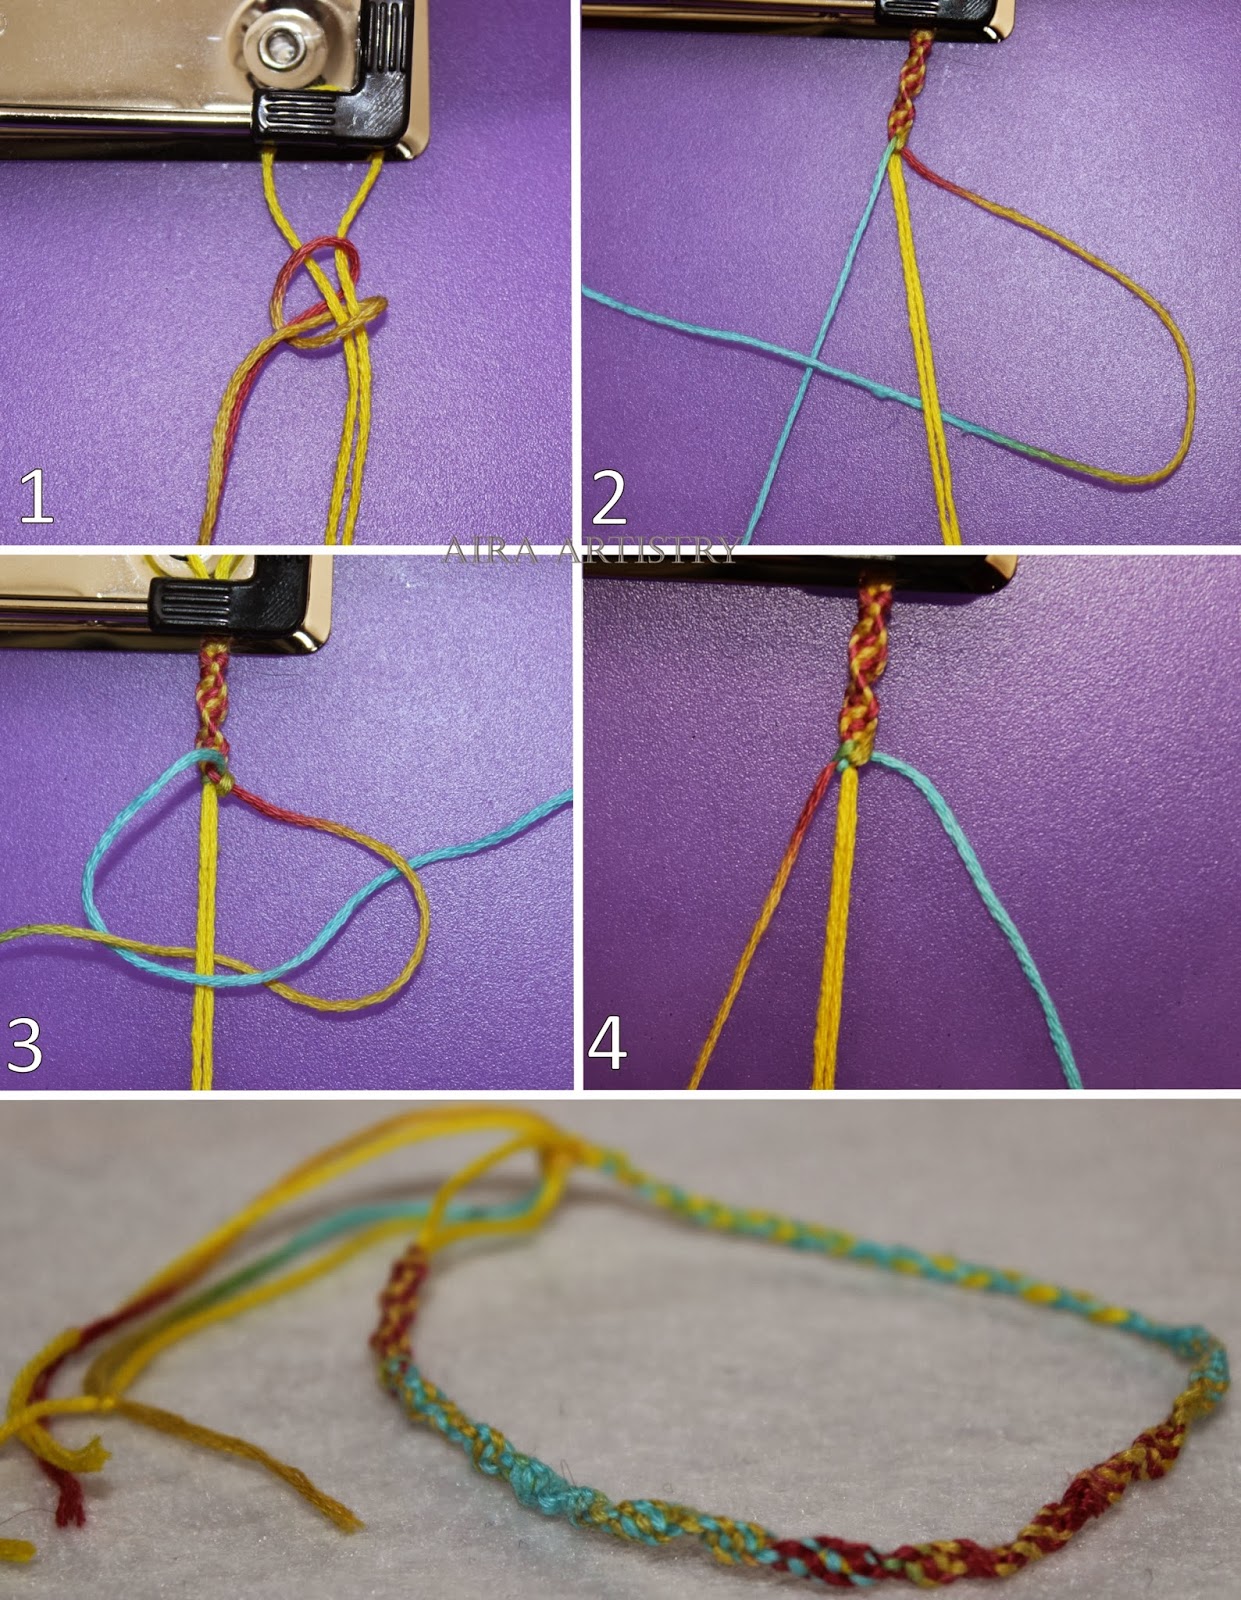
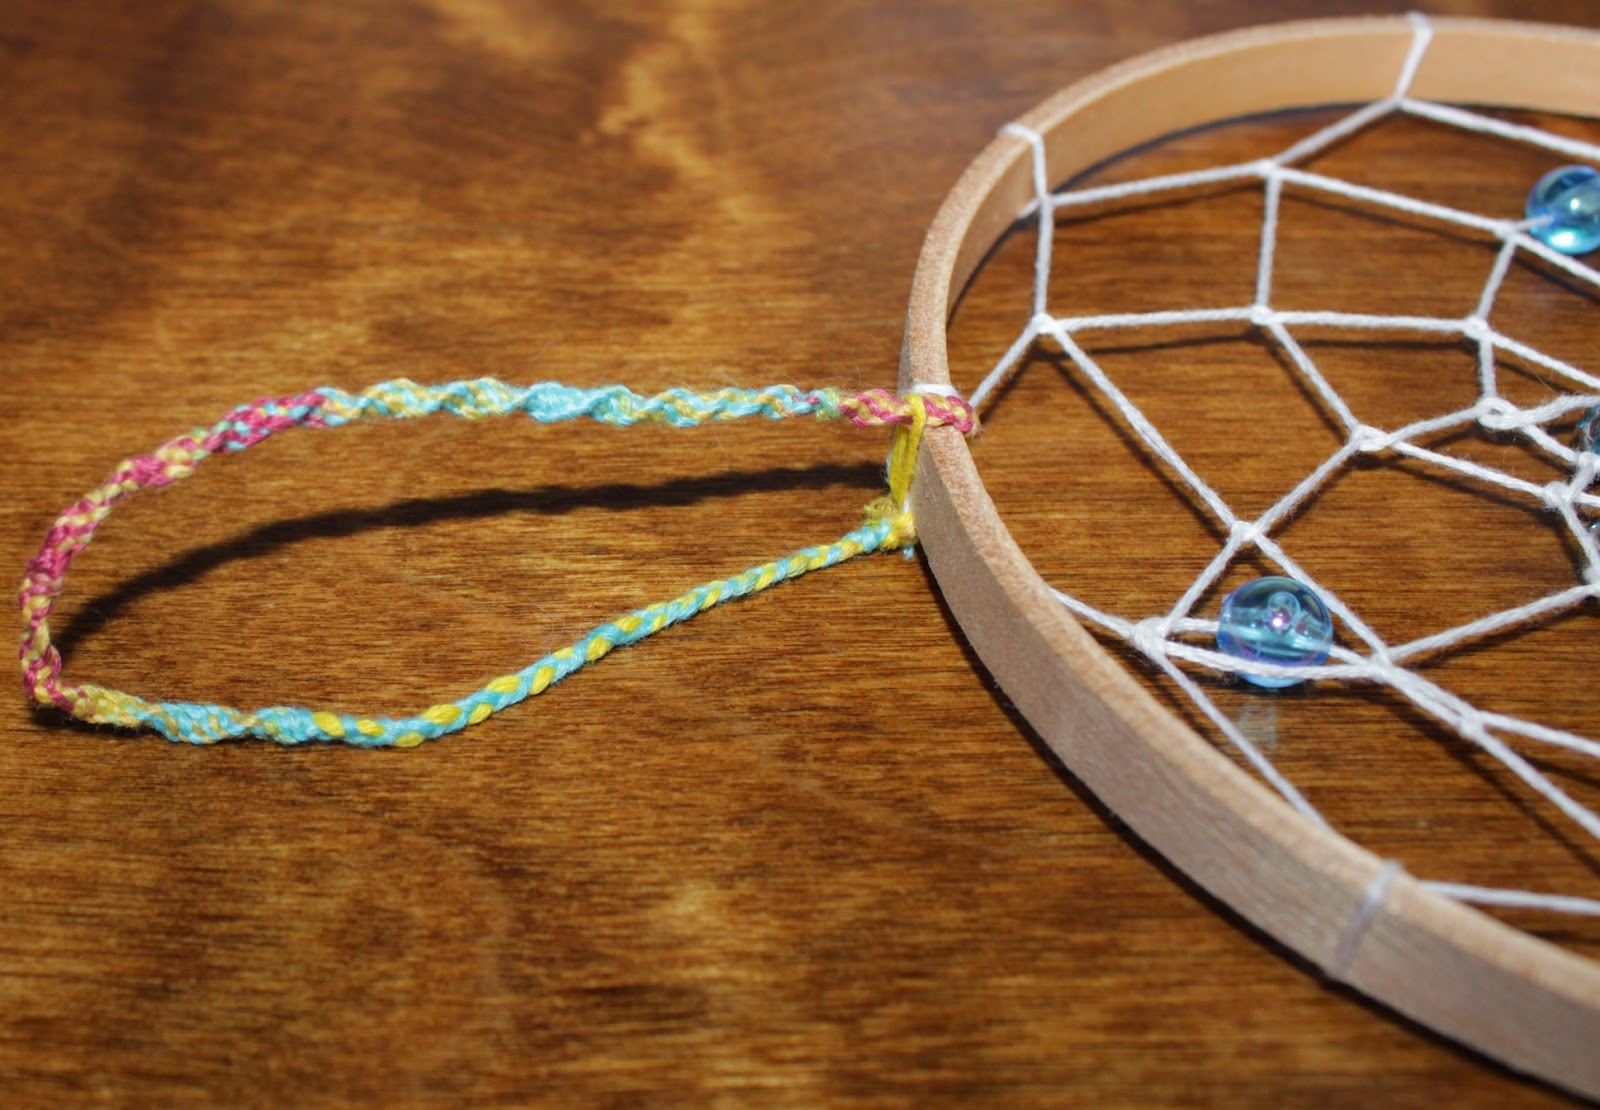
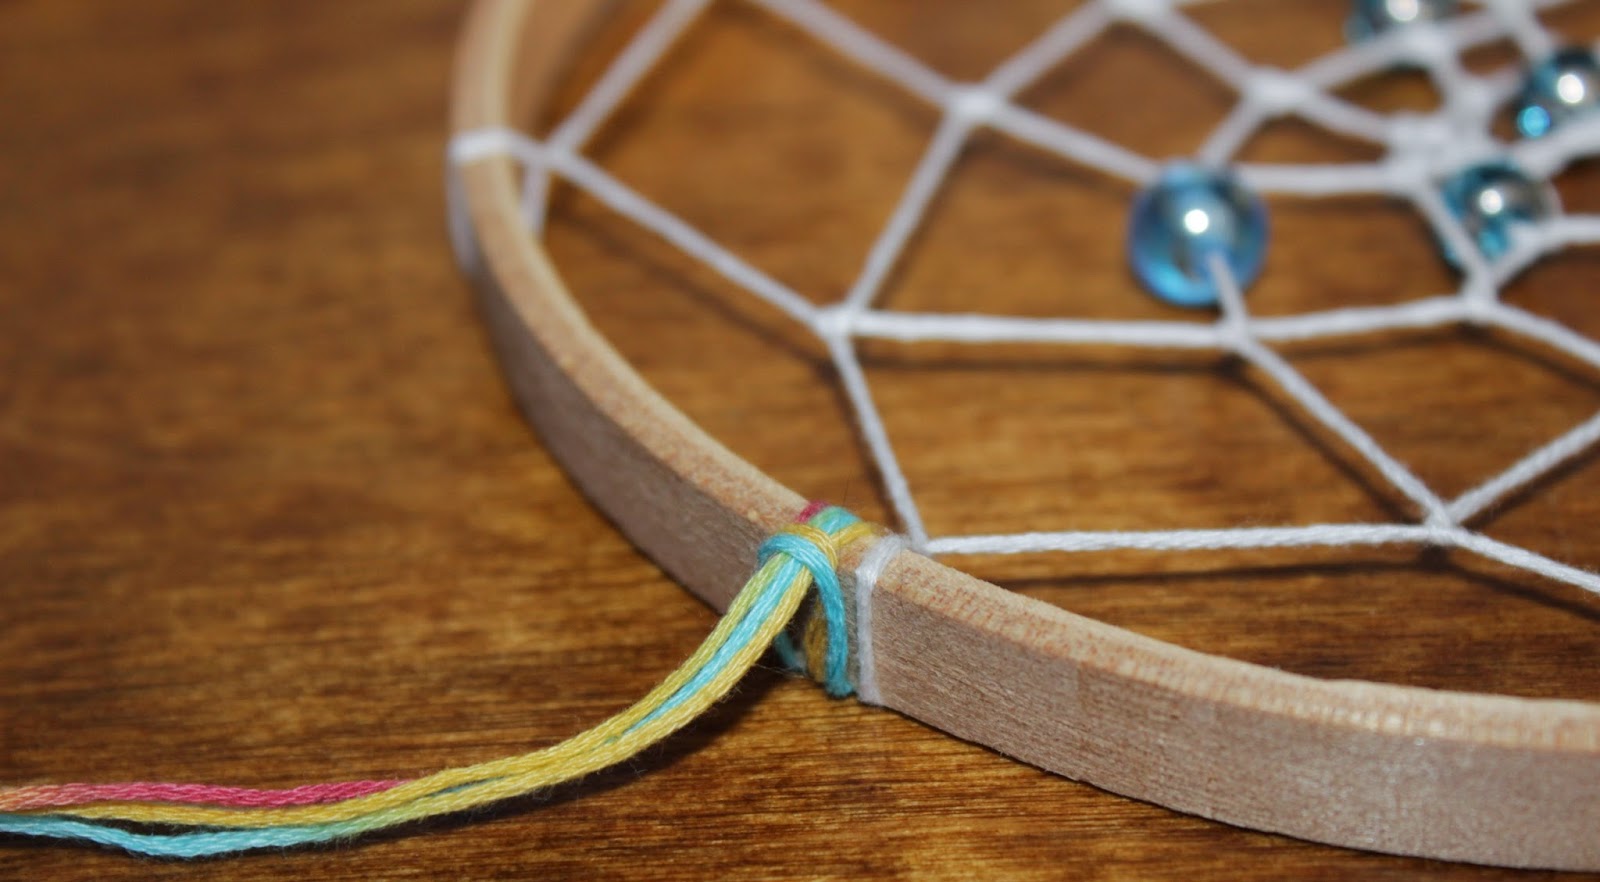
Make a loop to hang your dreamcatcher with. I actually used the French Knot bracelet I made earlier this month for my loop, but just looping around some plain floss would work fine, too!

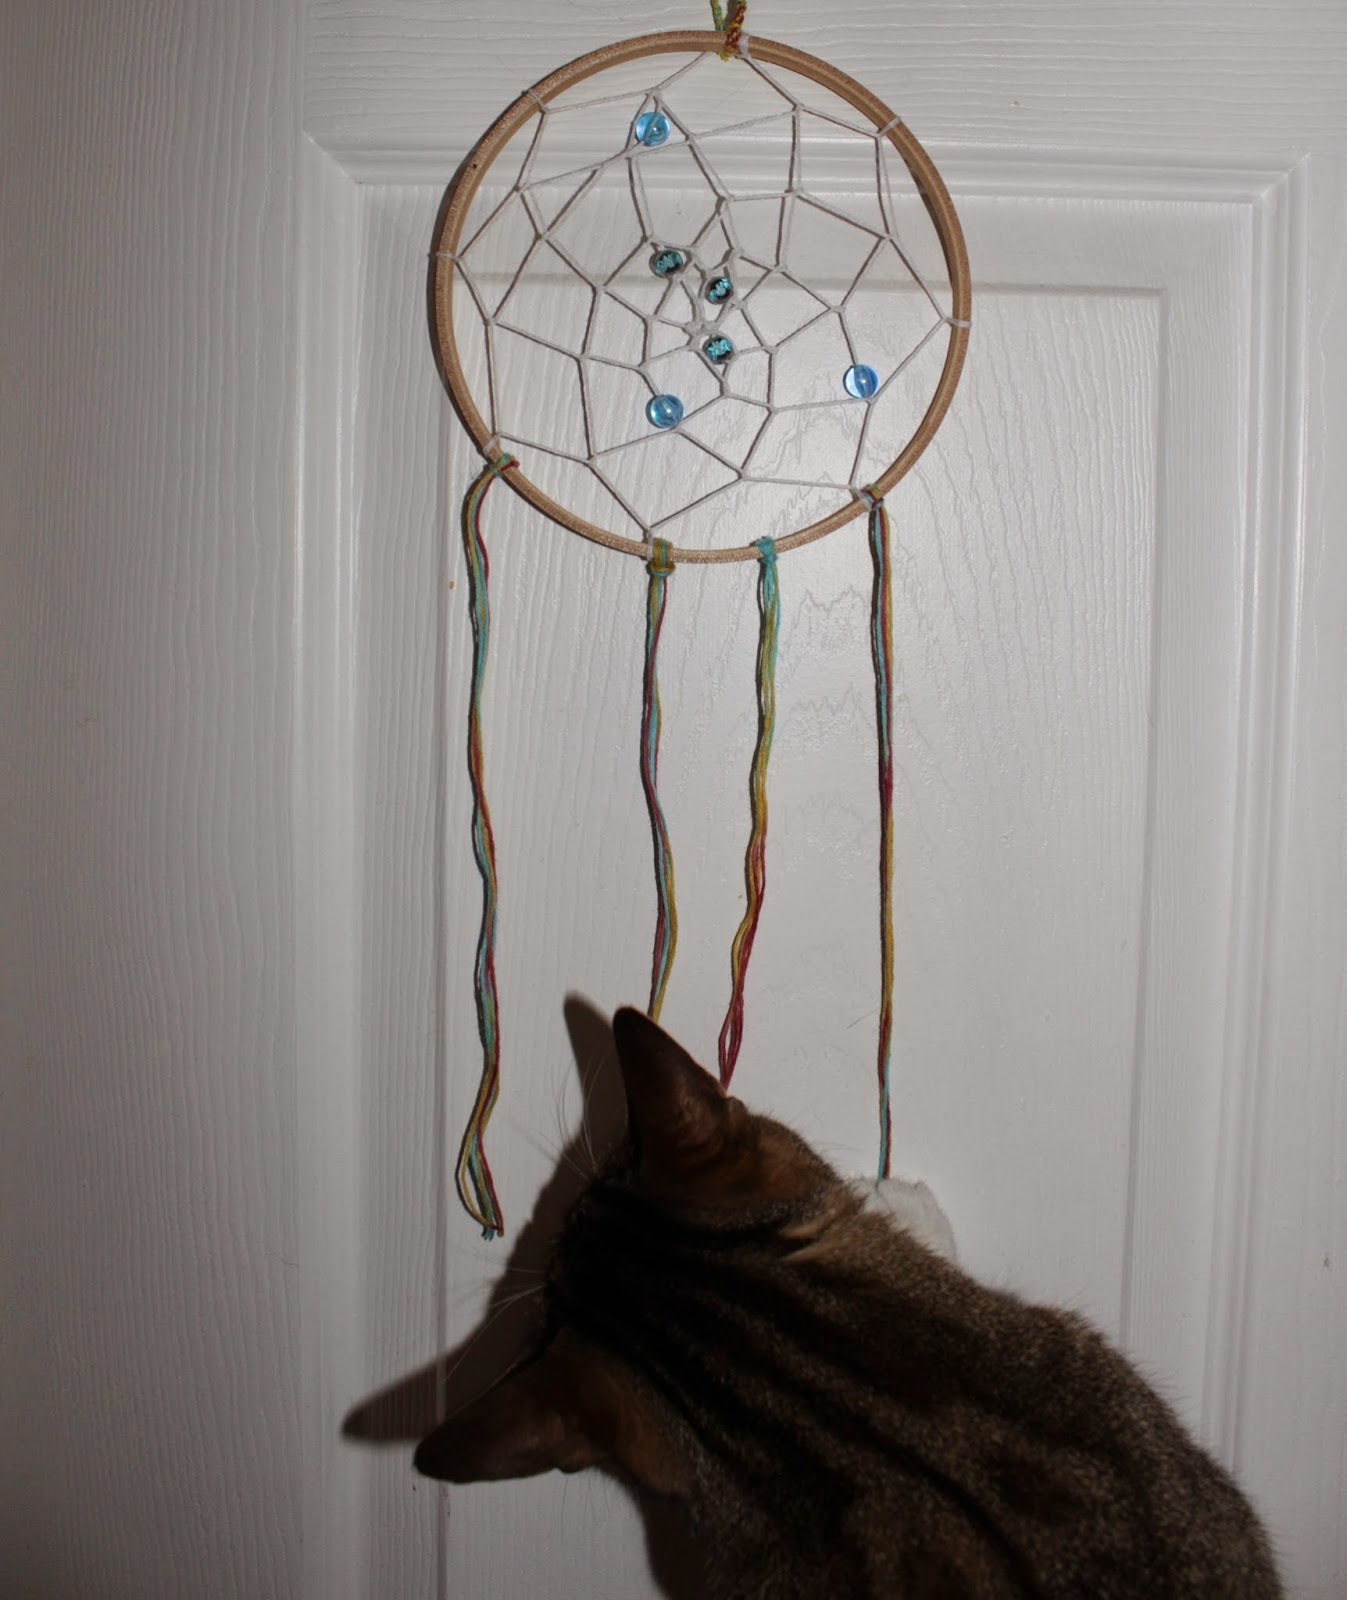
Finally, make some tails for your dreamcatcher. I cut some random lengths of embroidery floss, folded them a few times then looped them onto the bottom of the hoop.

My cat approved a bit too much!

Tomorrow’s project is Snickerdoodle Sugar Cookies!

Discovering 2014: Egg Carton Flowers

Discovering 2014 is a personal goal to complete a daily project throughout the year!

Today’s project was Egg Carton Flowers, inspired by this pin. When I started this we had an internet outage, so I had to go off of months-old memory for this one. This is a kid-friendly project, though depending on age you may want to pre-cut the cartons.

Before diving in though, I’d like to take a brief moment to celebrate blog post #100! Wooooo! *throws around confetti*

All you need for this is an egg carton, scissors, paint and pipe cleaners (optional).

I cut out some egg cups and went for four simple, rounded petals on each. For the center hole I used an awl, but scissors should work fine as well.

Then the painting began! This took a good part of the day while waiting for it to dry.

After the petals dried, I painted in some center color.

I only had to gently reopen the holes after it all dried, then my six year old and I got the pipe cleaners on the flowers.

Does that vase look familiar? It’s from my Mod Podge experiment during the Faux Sea Glass project. After sitting around an extra day, the second coat had ended up drying clear!

Now we have some flowers on our dining room table while thinking warm thoughts of spring…

Tomorrow’s project is Whipped Shortbread!

March Madness: French Knot Friendship Bracelet

Today I took a break from memory wire and turned to my embroidery floss. Using a pattern from the book “Friendship Bracelets 101” by Suzanne McNeill, I made a French Knot Friendship Bracelet. It features colors from the Prism Tie Die Pack.

The book has more variations of this knot, but here’s the basic version of it:

  1. Cut two 60″-72″ lengths of floss. Fold each in half. Make a cow hitch knot to tie your second length onto the center length.
  2. The second length will be what will do the knotting. Divide it to the right and left of center, then bring the right strand under the center and over the left strand.
  3. Bring the left strand over the center and through the loop created by the right strand (or under, if you prefer to think of it that). This will be your pattern the entire bracelet; I found it helpful to repeat “under then over; over then through” in my head while working on it.
  4. Pull the strands tight to knot, then continue until it reaches your desired length! The bracelet will naturally spiral as you work on it, but try to keep the center strands flat.

Discovering 2014: Egg Carton Ladybugs

Discovering 2014 is a personal goal to complete a daily project throughout the year!

Us northerners are still stuck in the depths of this very long and cold winter, but it doesn’t mean we can’t dream of a nice spring day. Today was the first project of March: Egg Carton Ladybugs, inspired by this pin.

This one the kids can definitely get involved in; the only parts mine didn’t do were cutting up the egg carton and gluing at the end (because I got frustrated with school glue and used hot glue instead). You’ll need some egg carton cups (I used both scissors and an Exacto knife to cut mine out), paint (at least one bright color and black) and paint brushes, pompoms, chenille stems and googly eyes. How you want to glue it is your choice: I tried to use school glue but it wouldn’t keep for me, so I opted for hot glue, though that was a bit messier.

Once you have your egg cups, one layer of paint on the exterior should suffice. Let it sit a while to dry!

Next add your black spots and do touch-ups as necessary. I opted for large black spots while my kids both did smaller spots. Let it sit to dry again.

Finally, glue on the chenille stems (I curled the tops by wrapping it around my paint brush handle), pompoms and googly eyes. My daughter and I used the “girly” googly eyes, which ended up crazy looking for some reason, while my youngest son used the “boy eyes, because mine is a ninjabug, not a ladybug.”

Tomorrow’s project is Angel Bites!

Discovering 2014: Personalized Frames

Discovering 2014 is a personal goal to complete a daily project throughout the year!

Today’s project was Personalized Frames. The idea came from a gift my sister-in-law gave all the ladies in the family for the holiday. It had our first name initial on a scrapbook paper background in a 4×6 matte frame.

For this, I picked up a 4×6 matted frame from the dollar store. I had some leftover green matte that I ended up using for the backdrop, as well as an extra iron-on transfer from a value pack I got many moons ago.

After adhering the rose iron-on with Mod Podge (any glue should work), I used some of my scrapbook embellishments to jazz it up and closed up the frame. I think I’ll send it to my mom for Mother’s Day this year!

The Flavored Marshmallow update is still yet to come this evening. We’ve been working on it and have them cut into strips and were letting the sticky insides solidify some before cubing the remainder.

Tomorrow’s project is a Dry Erase Frame!