Discovering 2014: Cardstock Notepad

Discovering 2014 is a personal goal to complete a daily project every day throughout the year!

 
My day five project was a Cardstock Notepad. This was a simple venture, but one I thought of while jotting down a list of potential January ideas on the backside of a receipt. You can easily do this project with children so they can have their own notepads or write a short story!

The basic supplies you need for this project are cardstock, a hole puncher and something to bind the papers together (such as jump rings, lock washers, ribbon, twine, etc).

The cardstock pieces I used were from a mixed-size value pack of cardstock I got at Michaels and were about one-quarter the size of a standard 8.5×11 piece. I picked out two pieces that were slightly bigger than the others to be a front and back cover, though that’s not necessary.

I also used a three-hole puncher; a one-hole puncher would be fine as well, though more tedious. Because the sheets were smaller than standard sheets I had to adjust the hole placements on my 3-hole puncher. I ended up with about 20 sheets inside and the two cover sheets, which can be easily expanded.

I then decided to use a couple of stamps to decorate the front and back covers, and also used hole reinforcements on the cover sheets (all optional!). I’ve had some 3/4″ oversized jump rings around for years that I rarely have a use for, so they finally saw the light of day again for this project.

I added on the sheets about five at a time. You can use other materials such as ribbon, twine, cord, etc instead of the jump rings, of course. Just be sure to not tie them too tightly so the pages can turn!

I closed my jump rings and now have a notepad I can keep by my bedside for those midnight brainstorms!

Tomorrow’s project is a Fabric Hair Bow!

January Schedule Update!

Just wanted to drop a quick note that, due to a business trip, I had to change some of the late January projects to be more travel friendly. I also swapped the Chakra Jewelry day this Wednesday with the Incense Cone day a couple weeks out, as my husband has a day off work and wanted to help out with the cones.

Here are the changes:

January 8  : Incense Cones (was Chakra Jewelry)
January 23: Chakra Jewelry (was Incense Cones)
January 28: Embroidery Floss Friendship Bracelet (was Flower Clippies)
January 29: Embroidery Floss Washer Necklace (was Bottlecap Candles)
January 30: Embroidery Floss Wrapped Bangle (was Flower Wire Rings)
January 31: Embroidery Floss Tassel (was Flavored Salts)
February 1: Embroidery Floss Wrapped Hair Comb (there was nothing planned yet, but I’ll likely be on a plane this day)
February 2: Flavored Salts
February 3: Flower Wire Rings
February 4: Flower Clippies
February 5: Bottlecap Candles

All of this month’s projects can be seen here.

I haven’t scheduled anything further out yet, but I have a list of at least 20-30 more projects to do so far. They’re a mix of general crafting, jewelry, hair clips and a lot of yummy sounding recipes. As always, suggestions for future projects are appreciated as well!

I’ll be tackling today’s project of a Cardstock Notepad this afternoon, so expect to see that later in the evening.

Discovering 2014: Paint Chip Earrings

Discovering 2014 is a personal goal to complete a daily project every day throughout the year!

My day four project was Paint Chip Jewelry, inspired by this pin by Minted Strawberry that made the rounds last year on Pinterest. This project took a bit of extra time and I ended up just making a few pairs of earrings, but I had a fun time doing it. This is another craft that you could probably do with kids, though it may require a touch more patience!

Your supplies will vary for this craft, but the one constant will be to have at least one or two paint chip (sample cards), which you can pick up from basically any hardware store. The samples are free but be polite and don’t go overboard cleaning them out, as I doubt crafts are their intended use!

Once you pick out your paint chips, other tools you may use would include glue or Mod Podge (optional), shape punches (I used a heart shape and a 1″ round) or scissors, and either a bottlecap hole punch (which is what I used and recommend for this) or a small paper hole punch. After that the only other thing you need is the appropriate jewelry supplies, which will vary depending on what you choose to create.

Start out by punching out the shapes you want, then punch a small hole for jewelry attachments to them. I punched one, then lined up a second one in back of it and punched again to ensure the hole placements were identical.

Optional: 
The backside of these aren’t colored, so you can optionally punch out extra shapes and glue them together. Remember to punch out the jewelry attachment holes first, and line them up while gluing and don’t accidentally clog the holes with glue. Set something on top to flatten them (I used my phone and stamps). On the first pair I made (the green circles, pictured above) I also put a matte Mod Podge coat on both sides, which I think gave them a better appearance.

I tried pre-gluing together the hearts before doing my shape punches, and while they’re functional, they were a lot harder to deal with and ended up with more imperfections. I just don’t recommend doing it this way. Punch those holes first!

Another alternative method is to use some acrylic paint on the backside, but it will take longer to dry and is more difficult to keep from curling.

After you have your shapes how you want them, attach your jewelry bits and show off your new style! There’s a lot of variety you can pull off with these so I can foresee me doing it again in the future.

Tomorrow’s project is a Cardstock Notepad!


While I was working on this, my youngest child decided he wanted to make something with my shaped hole punchers, so I thought I’d share that as well! =) If you can’t read the second photo, he had written “10 Snowflakes.” The black circle on the green paper is “a full moon.” The glue has since dried and they’re now hanging on his door.

Discovering 2014: Paper Bows

Discovering 2014 is a personal goal to complete a daily project every day throughout the year!

My day three project was Paper Bows. This was a much shorter project, only taking about 10-15 minutes for my first try. It’s pretty simple and I see it as a nice way to add a personalized touch to a present. This could also be a nice craft to do with your kids!

The directions to create the bow are easy to follow.

I ended up printing out the template pictured above, which was generated from this pin by ThriftyJinxy over on Pinterest. Since the paper I was using started as a 12×12 I couldn’t run the paper itself through the printer, so just cut out the shapes, traced them onto the back of my scrapbook paper and then cut those out.

Once you have your cut-outs you take the bikini-looking shape and gently curve each oval until the two side tabs touch in the center back. Glue the tabs together (I used Mod Podge but regular glue would work too), but don’t worry about gluing them to the center back (the little wrap-around one ends up holding it in place). Then glue the center of the no-longer-bikini-shaped piece to the center of the wing-shaped piece. Now take the tiny tab piece, wrap it around the center of all of that, and glue it on the backside. The result should look like this:

That’s it! Let the glue finish drying and you have a paper bow. I used scrapbook paper, which will hold its shape well as long as it isn’t outright crushed, but I imagine any paper would work fine for this. The finished product is about the length of my index finger.

Tomorrow’s project is Paint Chip Jewelry!

Discovering 2014: Paper Beads

Discovering 2014 is a personal goal to complete a daily project every day throughout the year!

My day two project is Paper Beads. I have a confession with this one: I actually started it yesterday, since it’s time consuming, I had a day off work, and I wanted to have time to make a final product with them today.

Paper Beads are something I’ve seen from time to time on Pinterest. I’ve repinned this pin showing various techniques, this pin showing how to make them using a calendar, and this pin for making round scrapbook paper ones with Mod Podge Dimensional Magic. The round ones are different than what I did here and I may try those in a future project since in the end they look more interesting to me.

While these were fun to make, mine obviously look like rolled paper, compared to pictures I’ve seen that look like normal beads and not paper at all. I can definitely see doing it again in the future if I have a very specific project that requires a highly custom look, but overall I don’t think the time investment paid off for me.

Here’s the process I took!

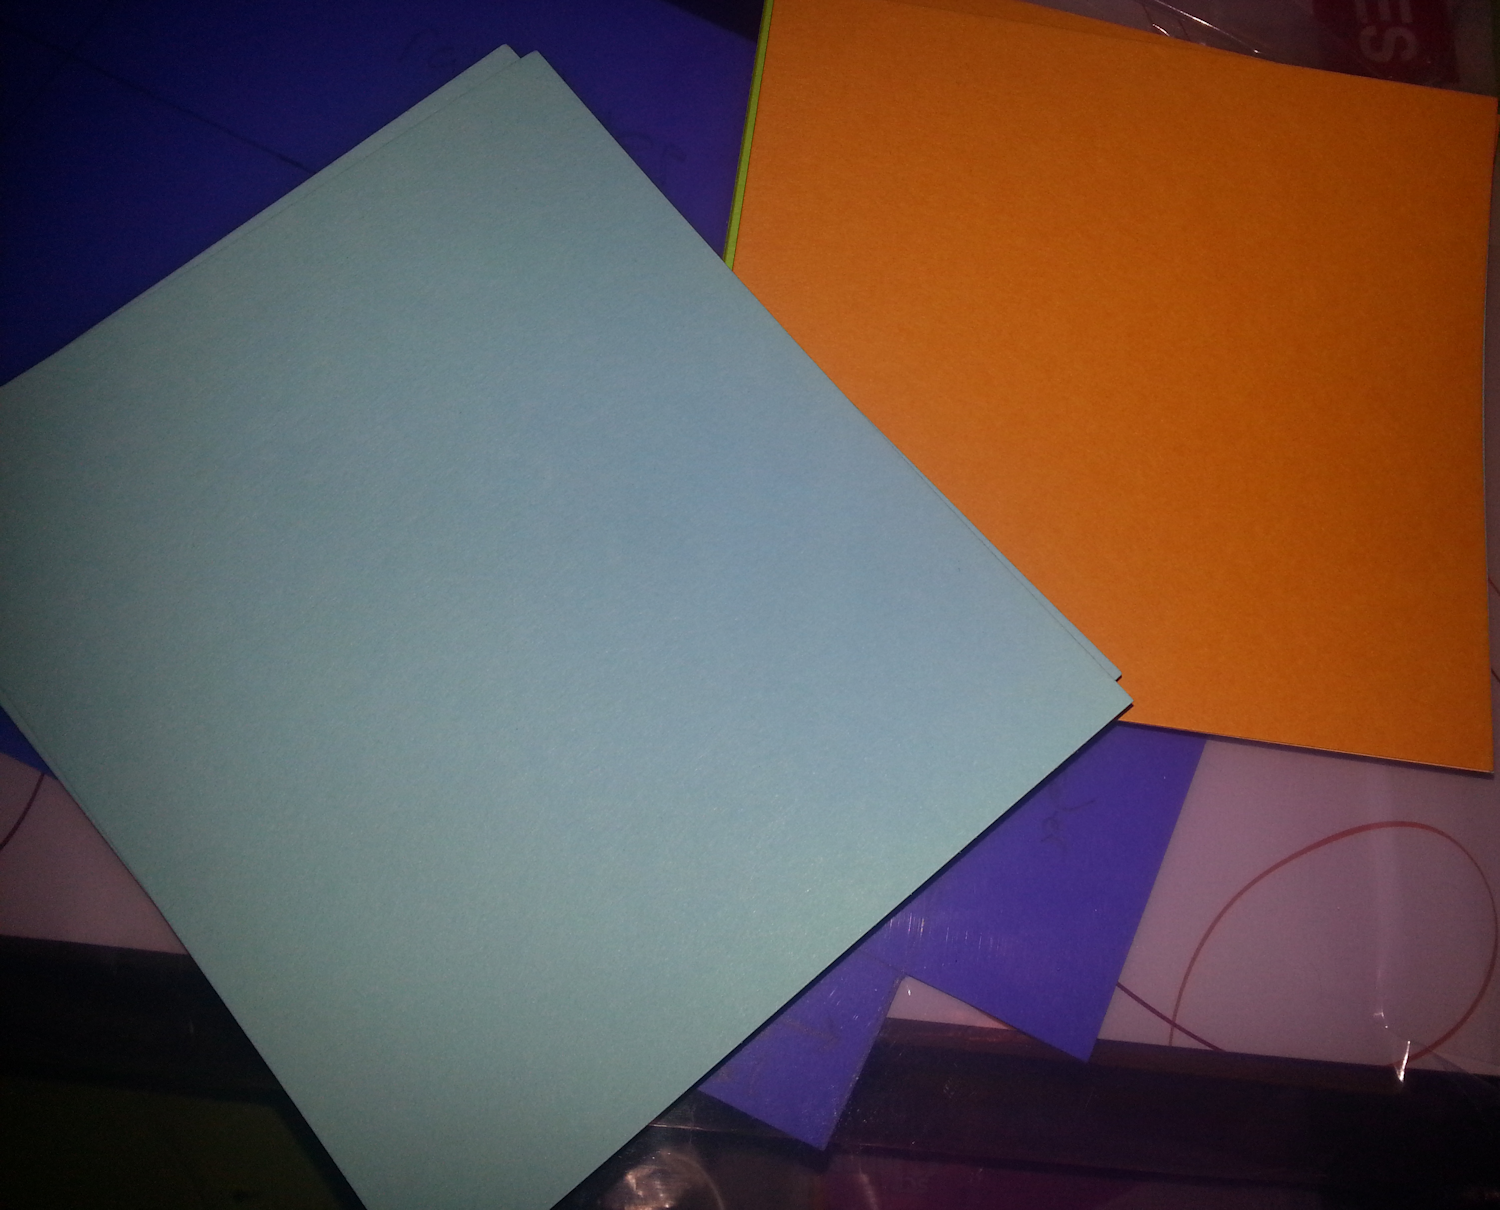
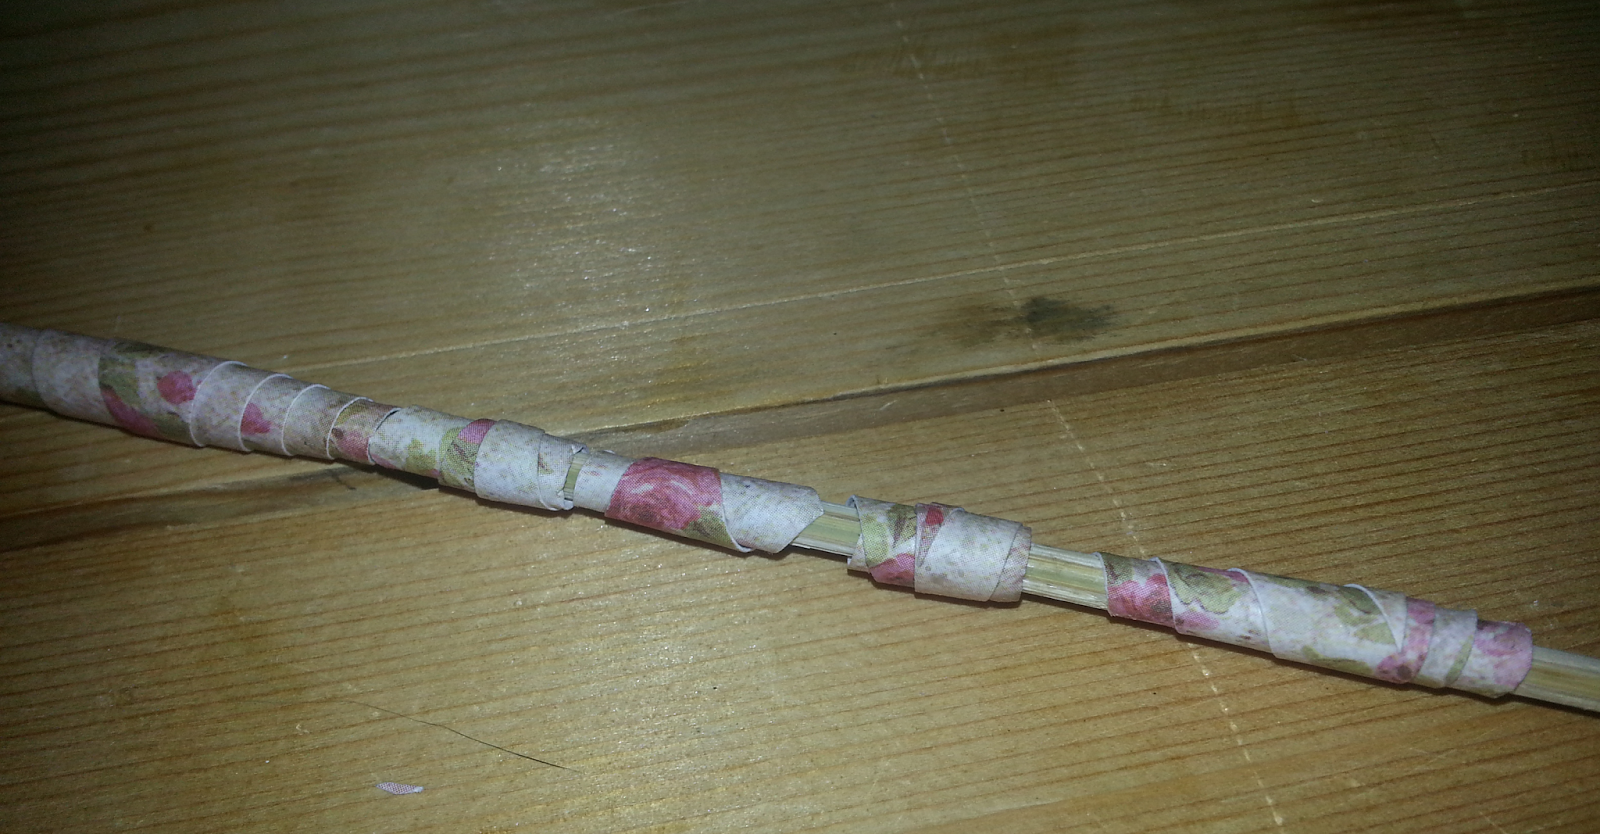
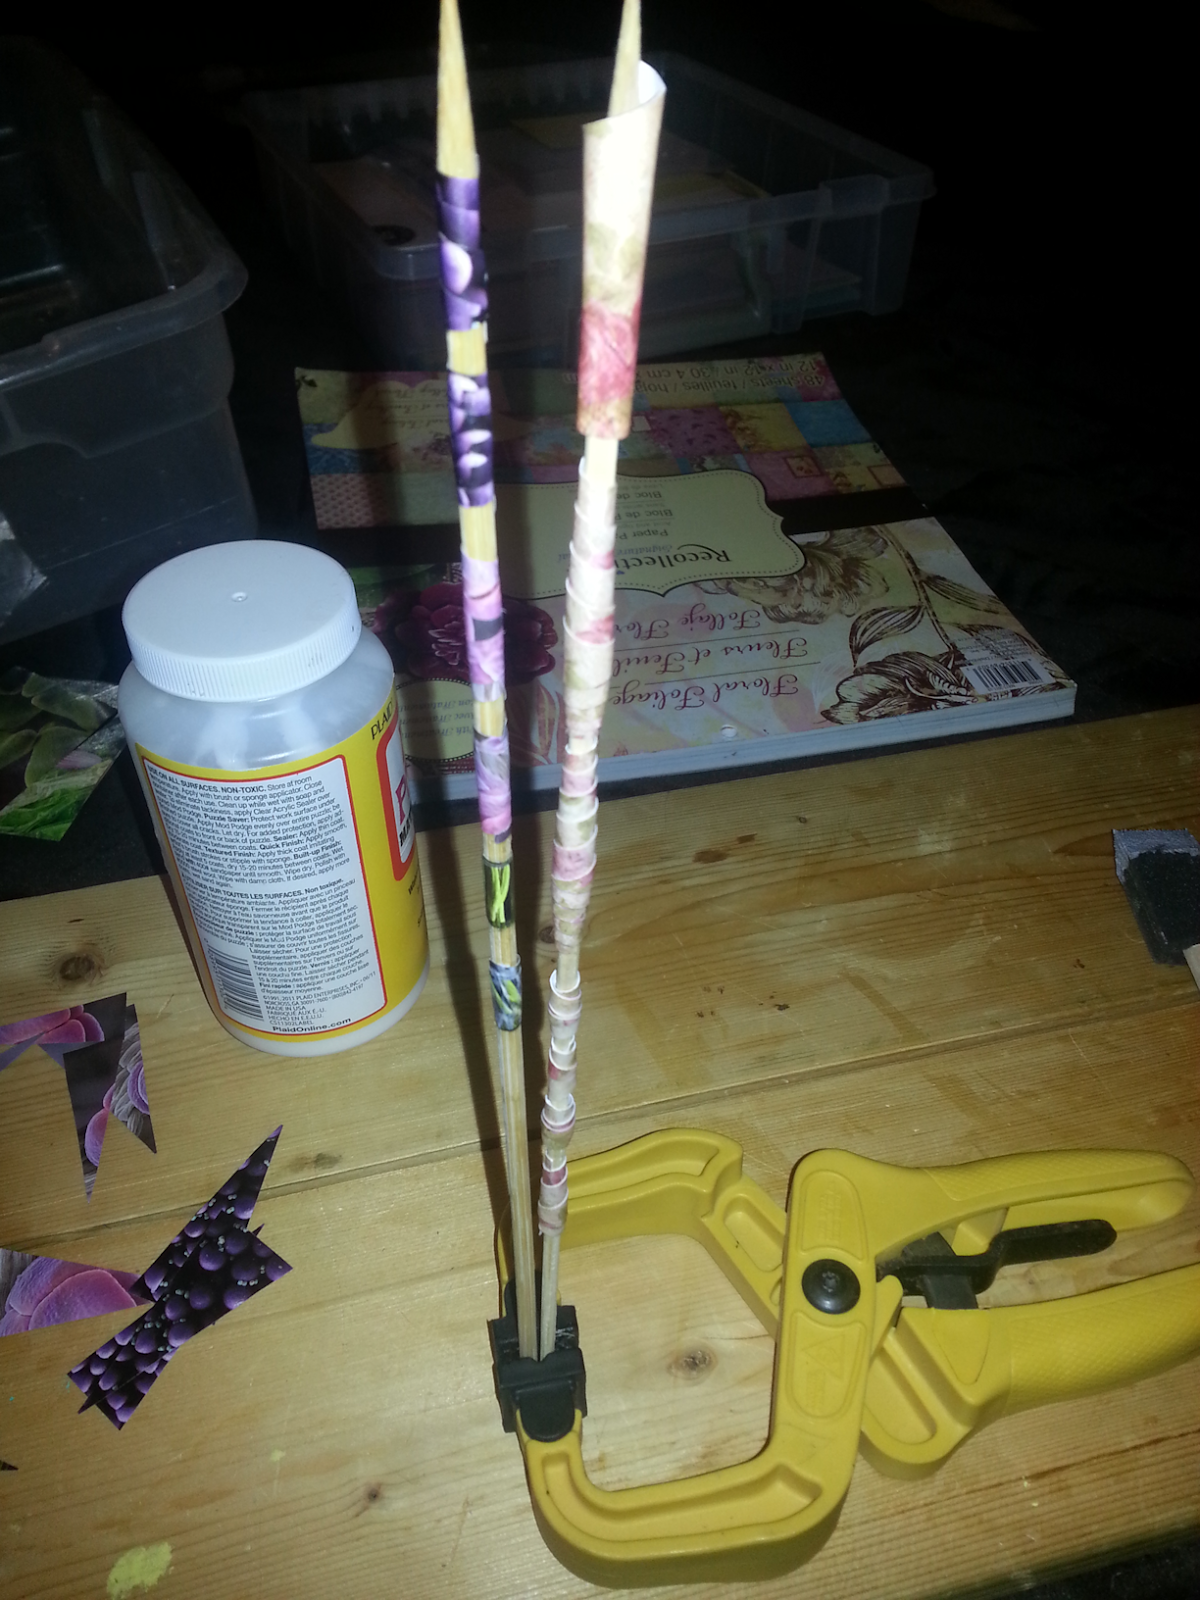
I started out by choosing a piece of extra scrapbook paper, a skewer, a paint brush (which I later changed up for a foam brush after recalling that Mod Podge kills paint brush bristles) and a clamp to hold the skewer. Not pictured are a measuring tape and scissors. Google landed me on the wikihow page, so I used that for a guideline.

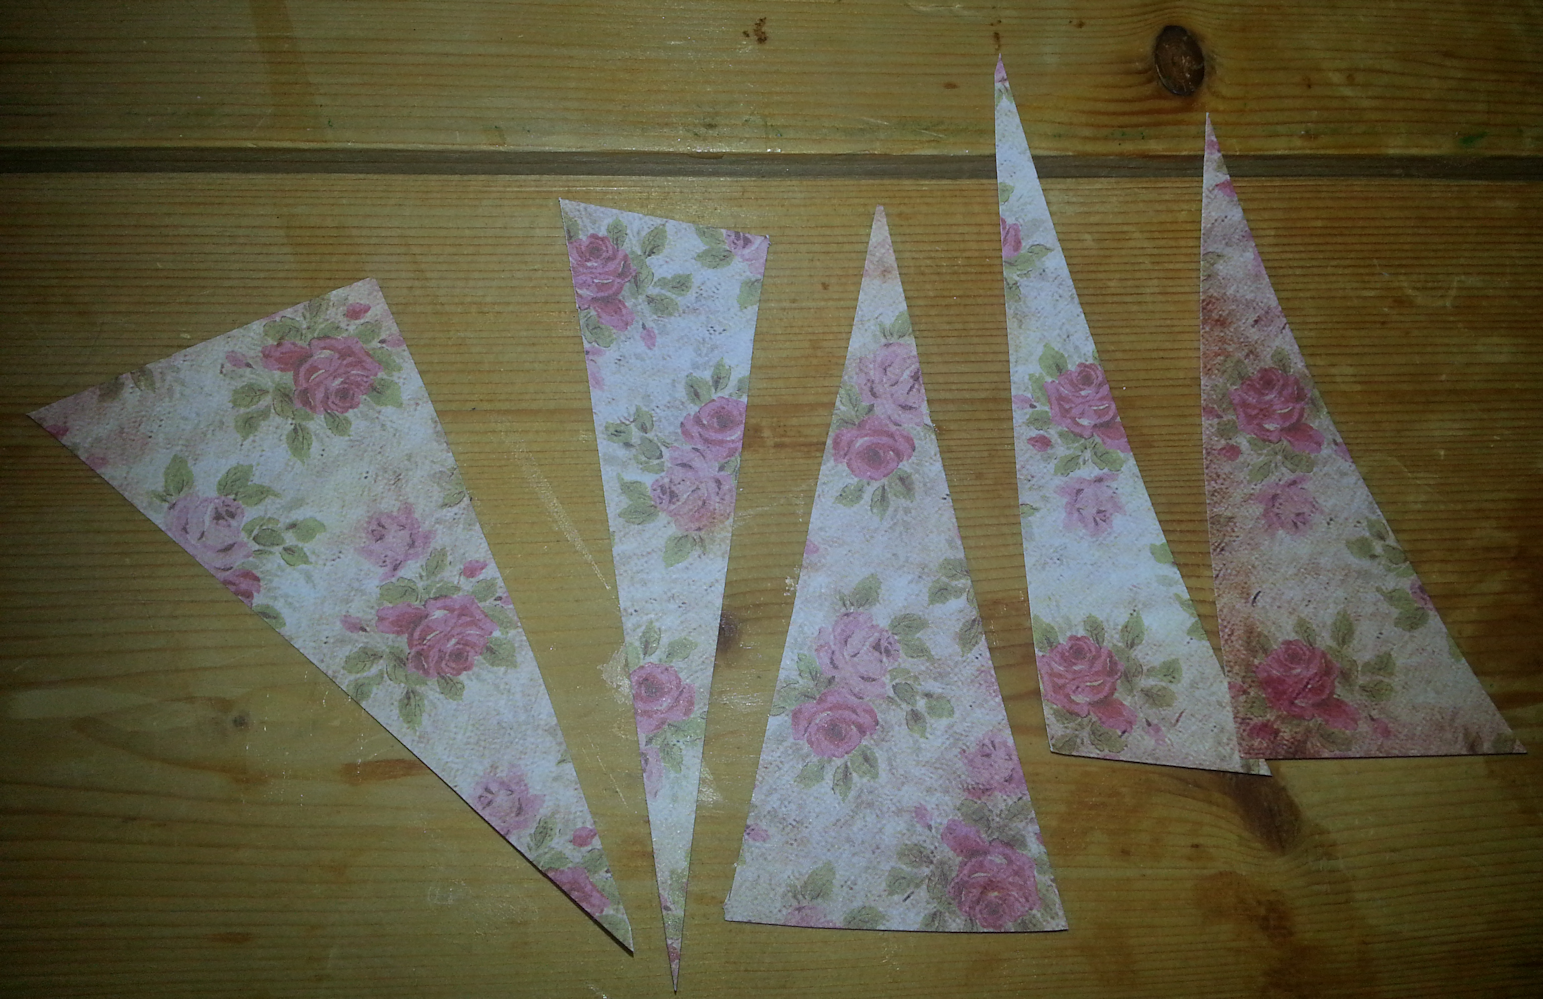
The first ones I cut were about 4.5″ long and varying widths. In the long run making a long yet narrow triangle probably would have been best.

The first bead I rolled (on the right) proved I didn’t really read the instructions beyond “roll” and “glue”, because I did narrow to wide. Oops. The second (left, covered in Mod Podge) turned out better, but I was surprised at how long they were.

I ended up hacking some of my triangles shorter and came up with a variety of widths.

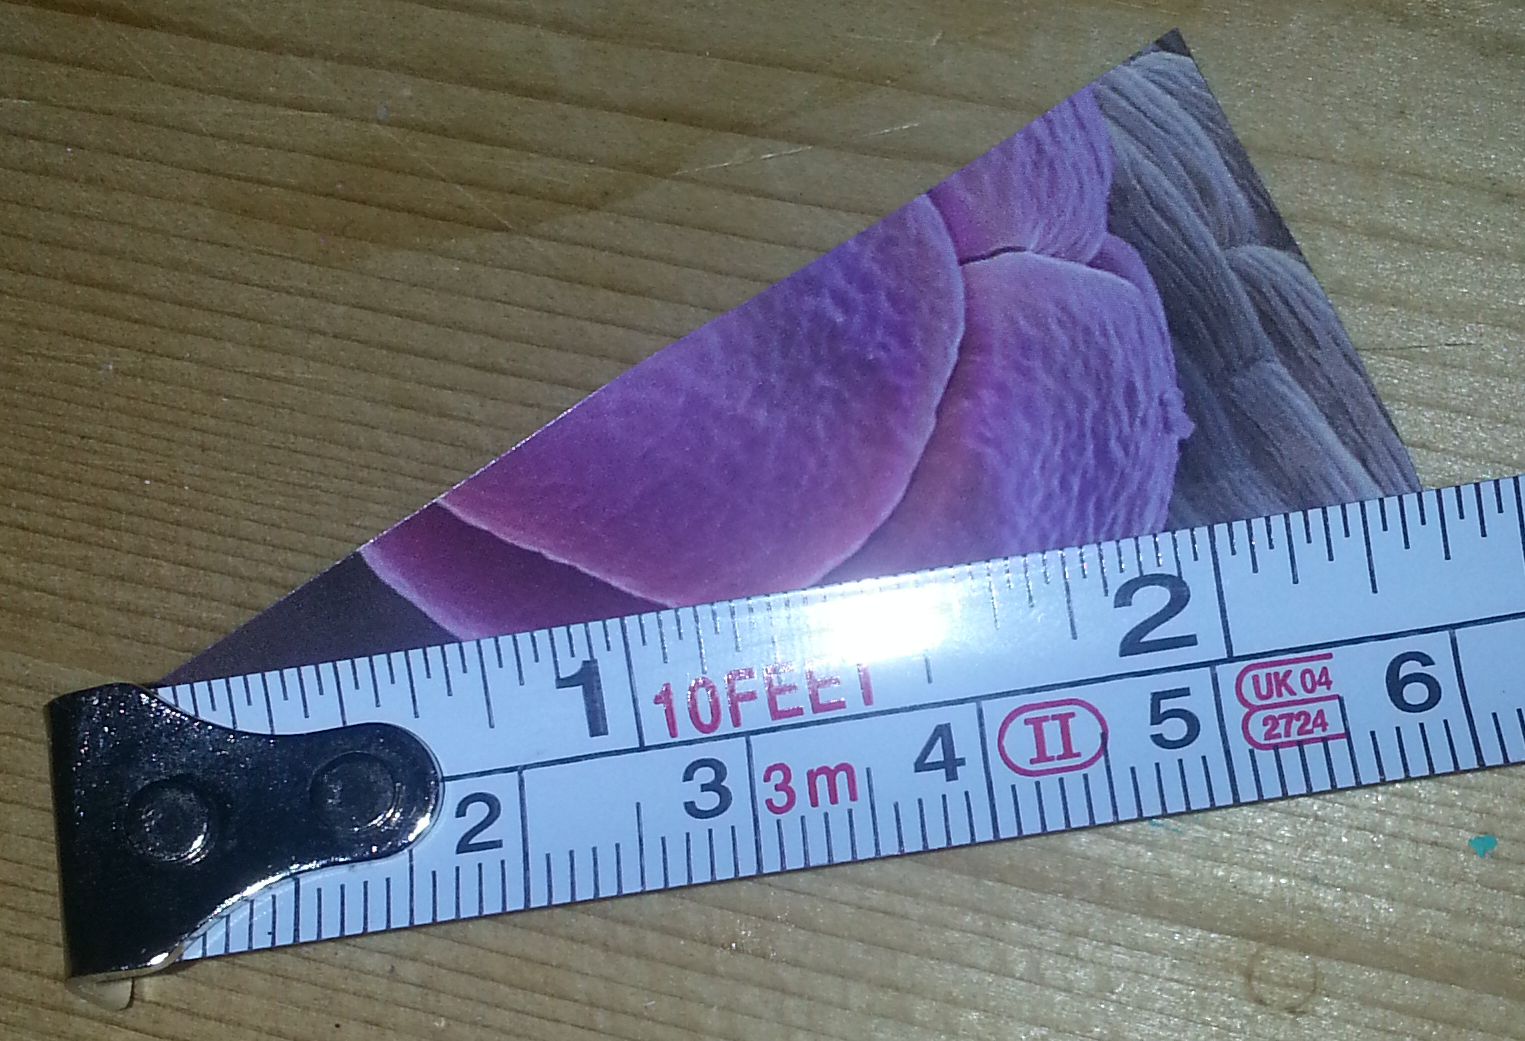
Next I figured I’d try a magazine. I had a National Geographic issue from December 2009 that had long outlived its usefulness, so I hacked up some triangles from that.

I tried to keep the magazine triangles shorter, around 2.5″ long.

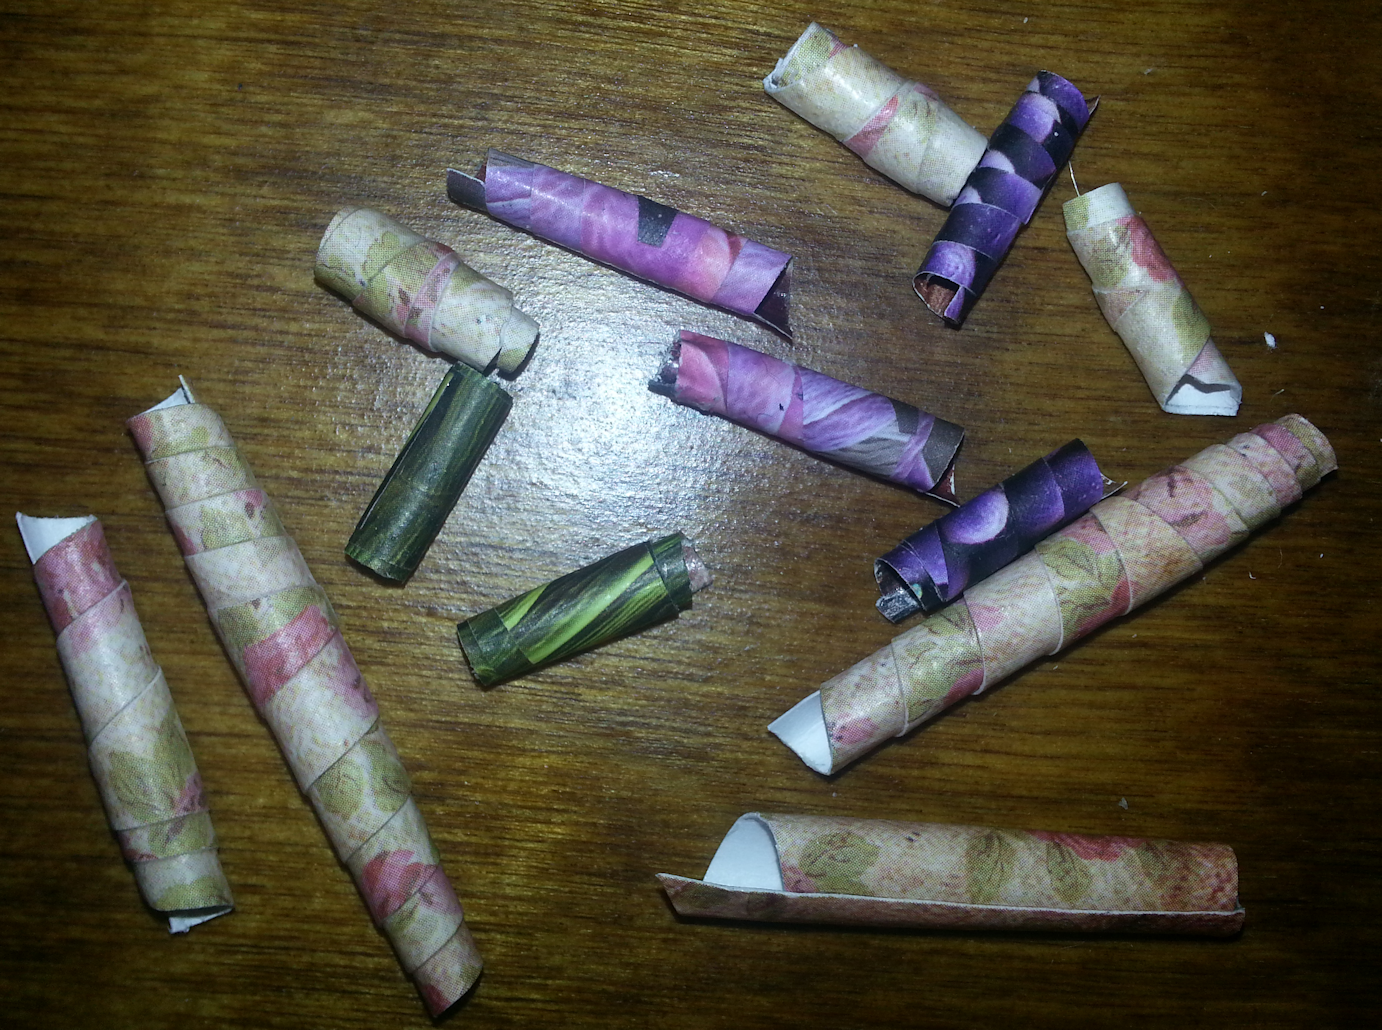
I covered the rolled beads in Mod Podge and left them to dry overnight. After about 10-15 minutes I was able to take them out of the clamp and had them propped up inside a storage bin. I also checked by gently trying to slide and/or turn each one to ensure I didn’t glue it onto the skewer.

While gluing on the ends of the scrapbook paper and the magazine paper, I definitely noticed a difference. The scrapbook paper made a quick bond, whereas the magazine paper I had to hold about about 20-30 seconds before it began to make a bond (likely due to the glossy surface).

This afternoon I took the beads off of their dowels. Only one gave me problems sliding off and it still came out in one piece. They make an interesting clattering noise if you drop them on the desk!

On the left is the first bead I rolled the wrong way and on the right is the second one rolled the correct way. the difference is pretty obvious!

Since I had messed up that first one anyway, I decided to see what happened if I trimmed the ends to be even. It didn’t horribly mar it but there is definitely a touch of obvious damage to it.

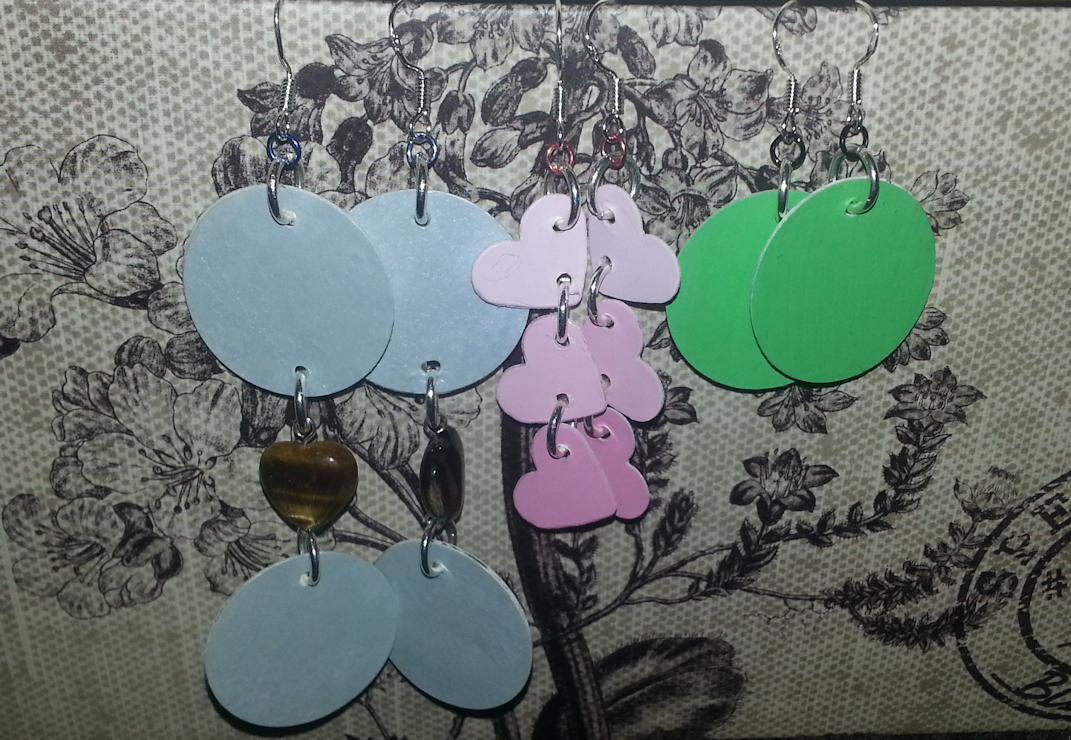
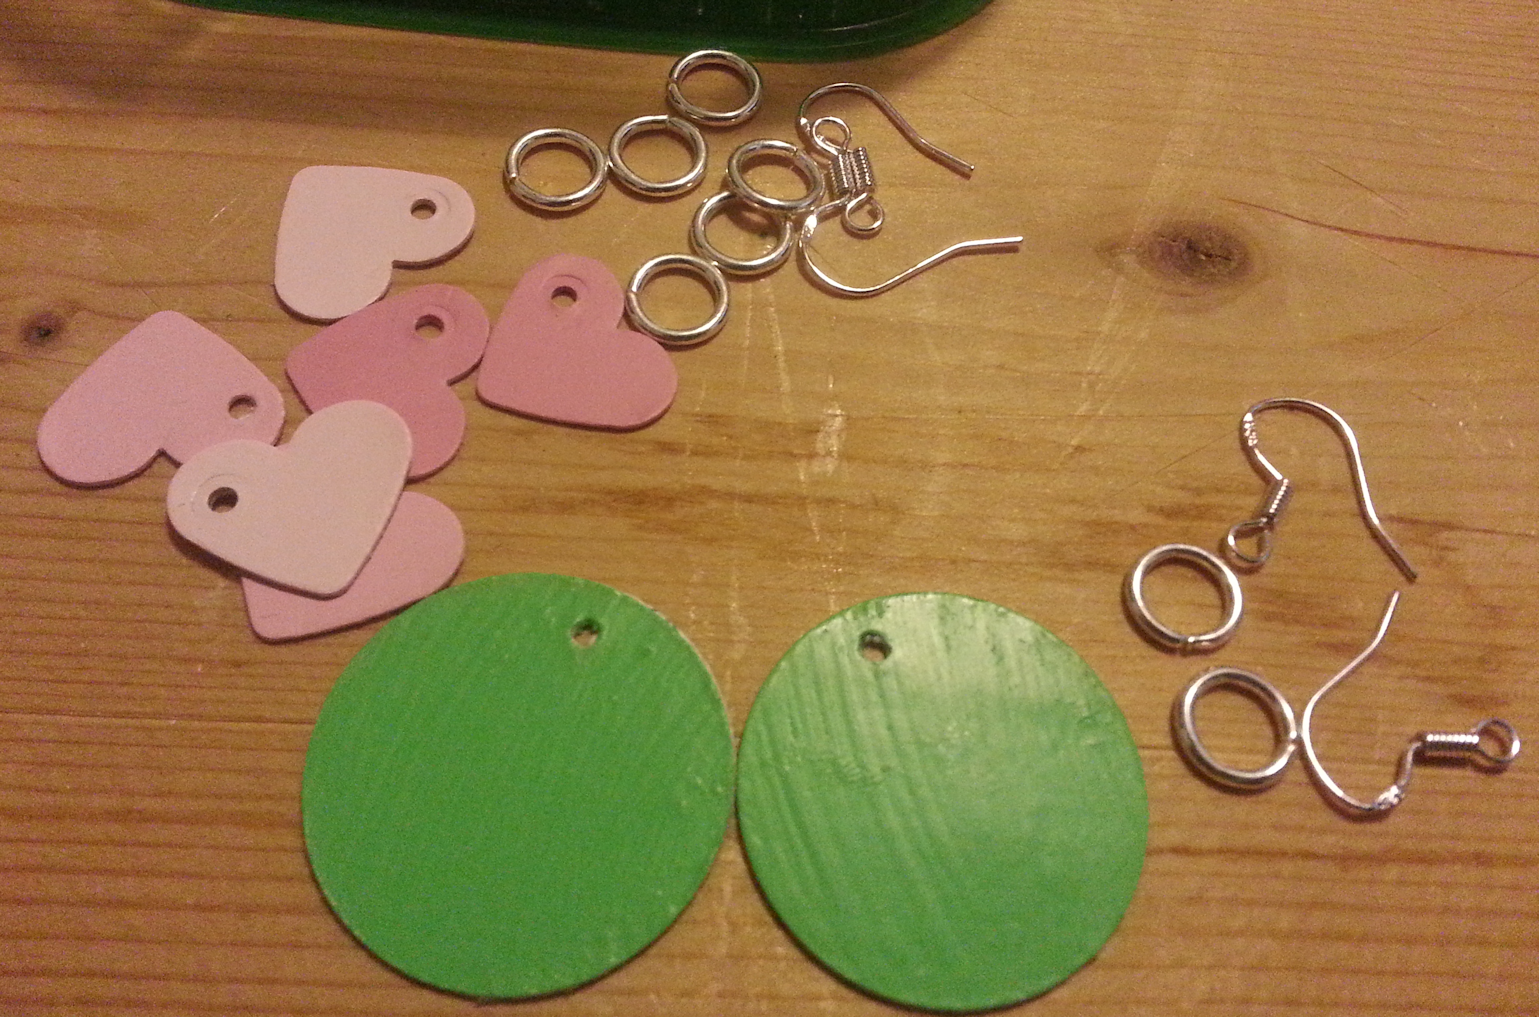
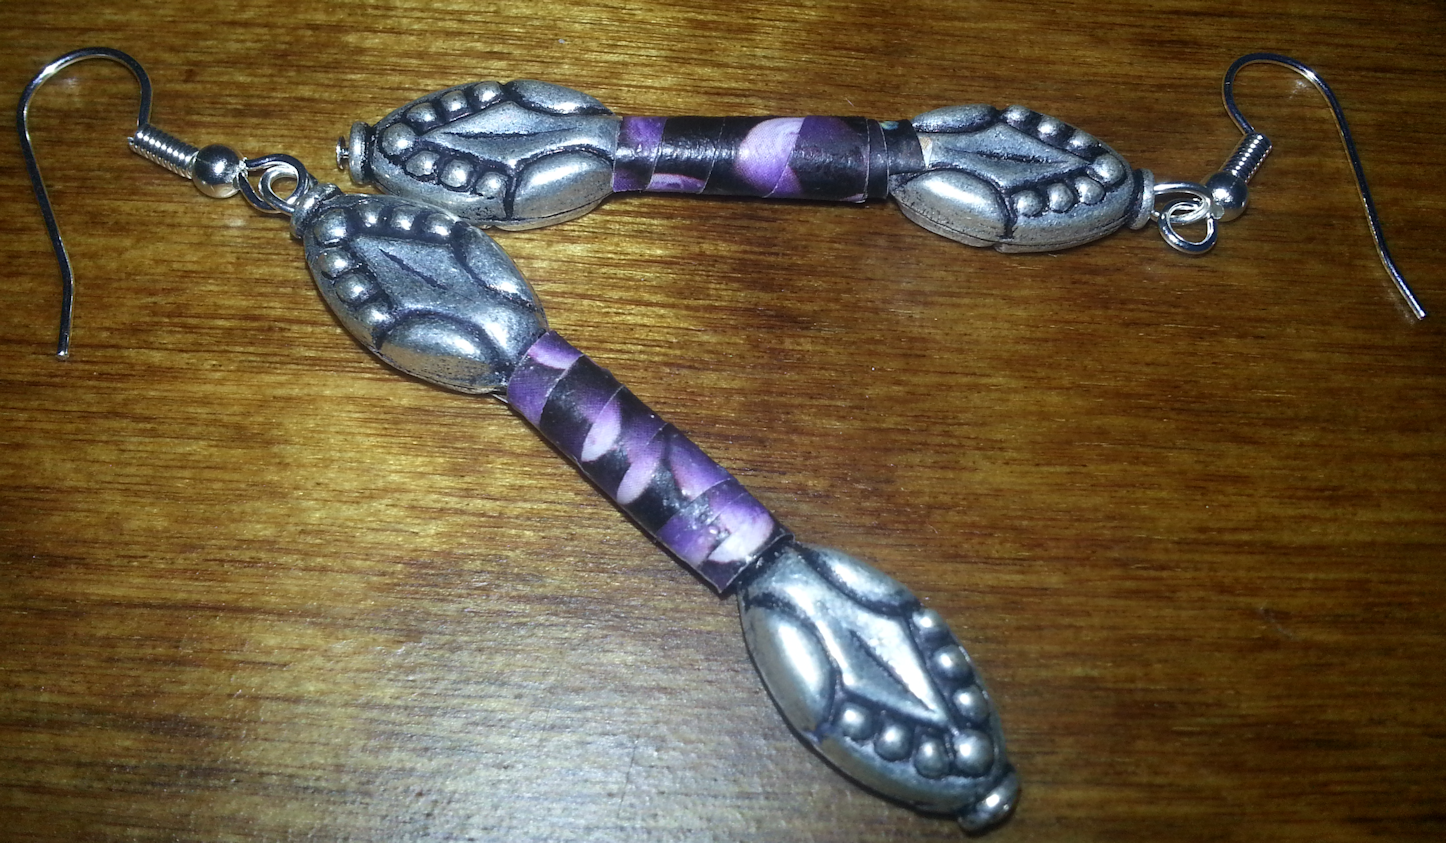
Finally, here’s the earrings I made a little bit ago. It was difficult finding beads I have that actually worked well with the paper beads. They look nice and it’s unique, but these won’t be something I’ll dive into making a massive amount of.

Tomorrow’s project is Paper Bows. If you haven’t yet, remember to follow the Aira Artistry page on Facebook!