Discovering 2014: Clay Pendants

Discovering 2014 is a personal goal to complete a daily project throughout the year!

My day 13 project, Clay Pendants, is a tie-in with my day 7 project, Clay Texture Tools. Today I put those tools to the test and got… well, mixed results, really! The idea was inspired by this pin from the Crafts n’Things blog.

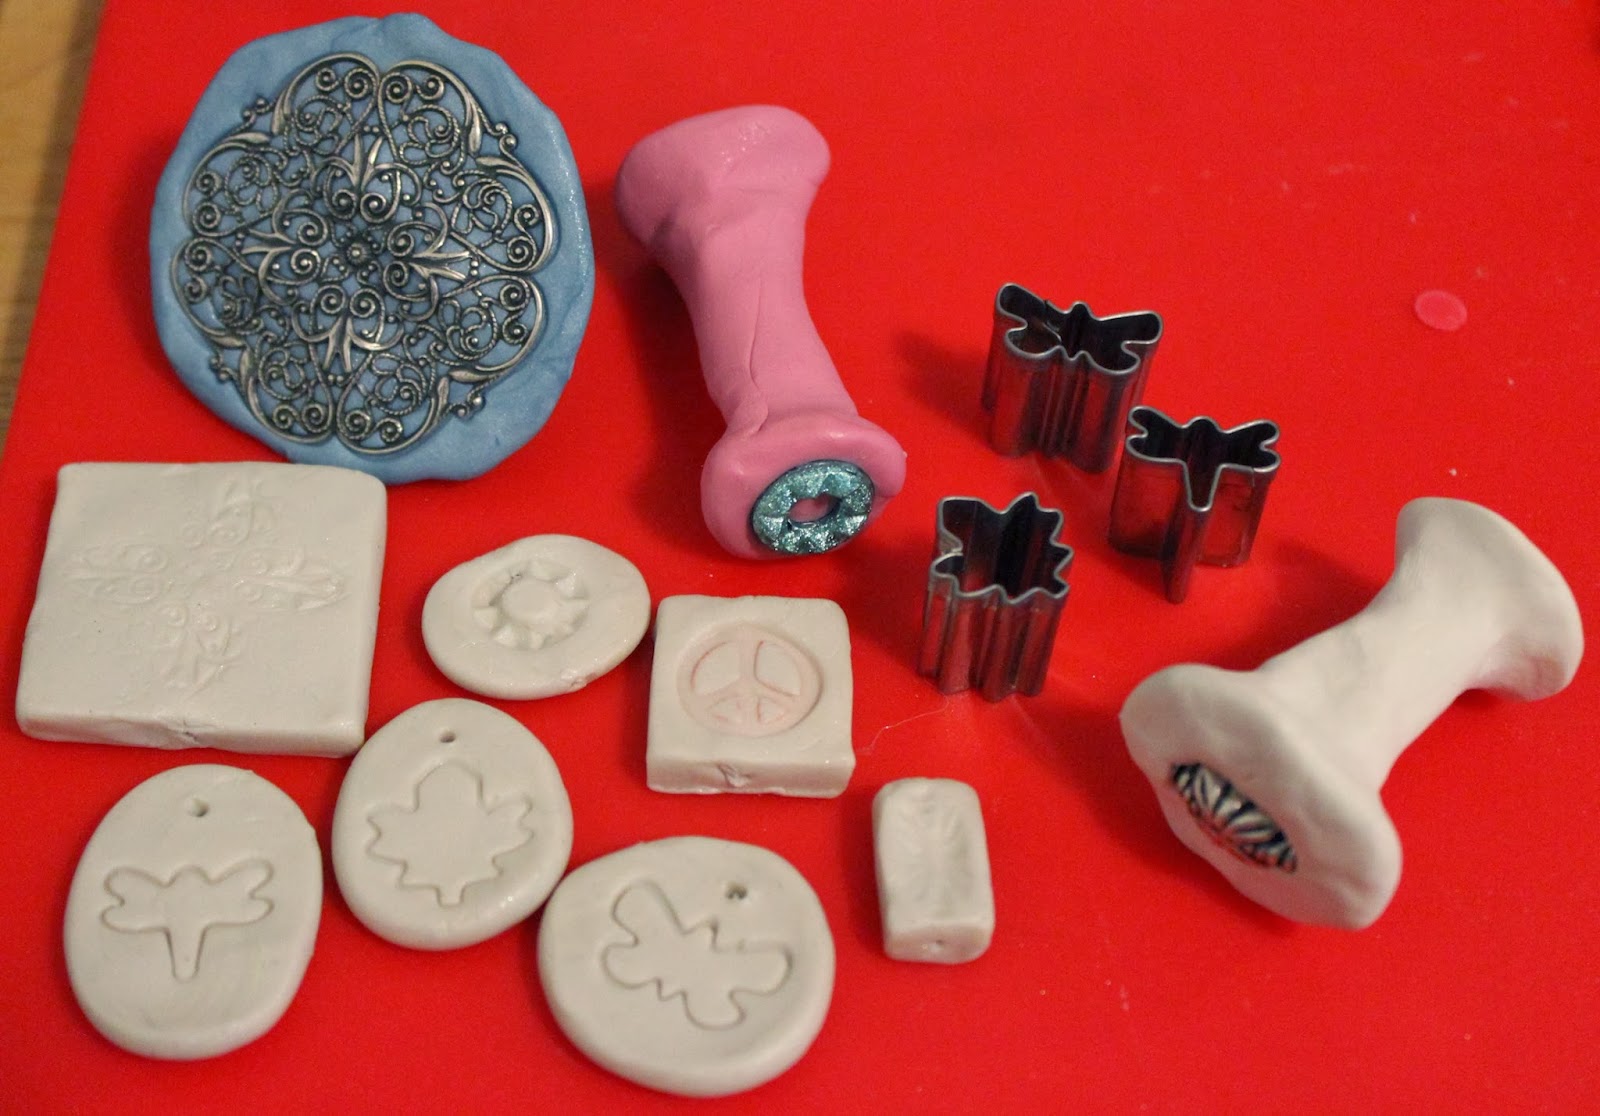
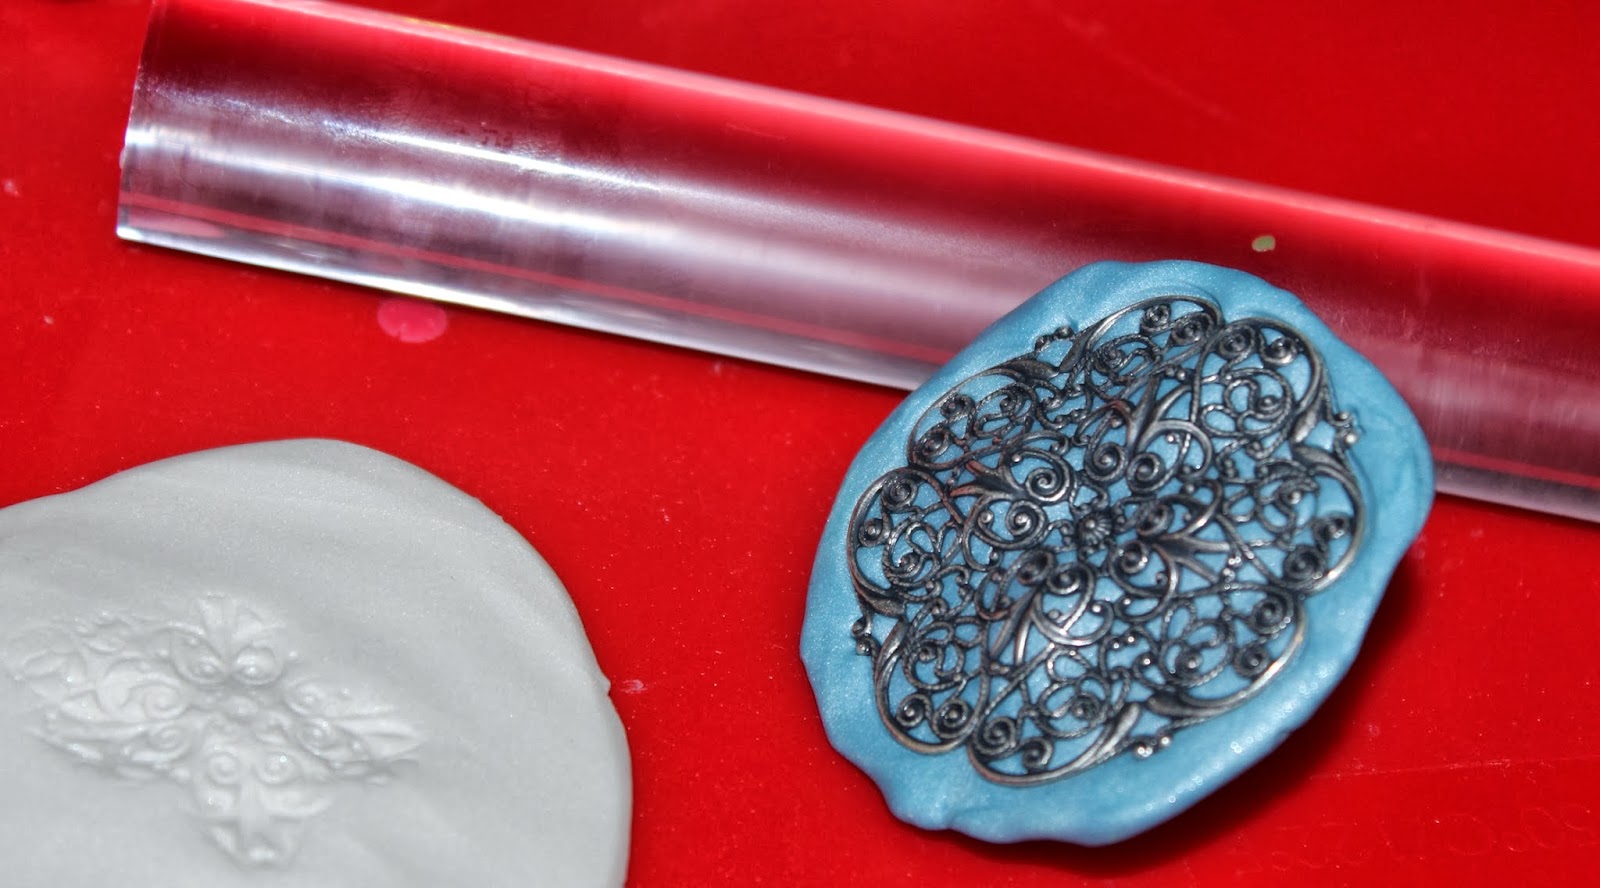
My favorite tool, from its appearance, is the big metal filigree piece. It makes a pretty imprint, but it’s very hard to see the details of its imprint from further away. I think it still is a pretty piece, anyway.

Before you bake your clay you need whatever holes you’ll be using to attach your jewelry to the necklace. I used a headpin and on some piece poked straight through (like below) and others made a jump ring hole (like the first photo).

Next I tried several other of my tools, and for pendants decided that the peace sign and oval bead worked best. The others were too small for the size I was making. The metal heart/triangle texture tool I had made actually had the pieces fall out, so I need to glue those back in.

While getting out my clay I saw my shape cutters I had gotten when I made clay beads last summer. I decided to use the blunt end of a few of these and make imprints that way, and I love how they turned out! If you do this, make sure you hold the sides when pressing down so you don’t cut yourself.

 I then had everything ready to go in the oven at 275°F for 15 minutes.
After they were baked and cooled I decided to paint them, because the white clay is pretty plain to look at. I’m mixed about how they ended up (I’m a far cry from having any art talents)–some colored in nicely while others look overdone. Overall though, they were fun to make and I’d do it again, though with a nice colored clay so I don’t go overboard painting.
The paint was still drying when I took this last picture, so none of them are in final pendant form yet, but here’s the final product!
I think the butterfly, dragonfly, and peace sign turned out the best post-painting. 🙂
Swing back tomorrow for the bookmarks project! I haven’t decided what type for certain yet, but I’m leaning toward working in some ribbons, charms, and buttons.

February and March Project Schedules

I decided to plot out the rest of my February Discovering 2014 projects during my free time today, and that also turned into plotting out March. These are subject to change as needed!

February   1: Wrapped Hair Comb
February   2: Flavored Salts
February   3: Flower Wire Ring
February   4: Flower Clippies
February   5: Bottlecap Candles
February   6: Edible Glitter
February   7: Italian Cookies
February   8: Bubble Wands
February   9: Homemade Cheez-Its
February 10: Valentine’s Day Cards
February 11: Paper Bag Booklets
February 12: Whipped Cream Frosting
February 13: Sugar Sprinkles Cookies
February 14: “Love” Necklace
February 15: Crockpot Ranch Pork Chops & Garlic Cheddar Biscuits
February 16: Homemade Nutter Butters
February 17: Confetti Bowl
February 18: Fabric Covered Tin Cans
February 19: Plastic Bag Dispenser
February 20: Bottlecap Hair Clip
February 21: Taco Seasoning
February 22: Crockpot Mac & Cheese
February 23: Japanese Cheesecake
February 24: Cauliflower Cheesesticks
February 25: Cookie Bowls
February 26: Flavored Marshmallows
February 27: Personalized Frames
February 28: Personal Dry Erase Board

March   1: Egg Carton Ladybugs
March   2: Angel Bites
March   3: Faux Sea Glass
March   4: Embroidery Floss Wrapped Cords
March   5: Dollar Store Serving Tray
March   6: Foil Starlight
March   7: Pancake Bites
March   8: Egg Carton Flowers
March   9: Lip Balm
March 10: Cherry Clippies
March 11: Whipped Short Bread
March 12: Canvas Decor
March 13: Resin Jewelry
March 14: Homemade Pasta
March 15: Felt Bows
March 16: Felt Gift Box
March 17: Pin Cushion Jar
March 18: Fabric Gift Pouch
March 19: Wigjig Earrings
March 20: Butterfly Kanzashi
March 21: Dreamcatcher
March 22: Snickerdoodle Sugar Cookies
March 23: Spike Bow
March 24: Ladybug Clippies
March 25: Marshmallow Fluff
March 26: Wigjig Barrettes
March 27: Cookie Sticks
March 28: Kawasaki Roses
March 29: “Gourmet” Mac & Cheese
March 30: Embellished Hair Comb
March 31: Ribbon Scrap Bow

Discovering 2014: Incense Cones

Discovering 2014 is a personal goal to complete a daily project throughout the year!

My day 12 project was Incense Cones. We definitely love to use incense in our home, so once I saw this pin by Live in Art I thought that if we could make our own, that would be fantastic.

The tutorial on Live in Art was very user friendly to read, but following it required letting the mixture sit overnight, and that means I was a day late to the party (lesson learned: read up the day before!). I continued searching and found an alternate tutorial from Scents of Earth. Their tutorial is quite verbose and at places can be hard to follow, but when I finally found the three paragraphs applicable to my powder ingredients, I saw that starting from powder-only state meant that it shouldn’t have to sit overnight before you could form it into cones. If there had been ingredients to grind to powder, that would have been a different story.

tl;dr: powder only ingredients means no overnight curing; grinded ingredients means let sit overnight.

With that settled, my husband and I began our work on making some incense cones! (UPDATE: Here’s how they turned out after curing!)

Our ingredients included sandalwood powder and makko powder. The makko powder is the base, and the amount you use varies on your other ingredients. I had ordered a couple more scents (Patchouli and something called “Nag Champa”) but they haven’t arrived yet. I’m sure they’ll get some use in the near future once we get our powder-to-base ratio worked out!

Because we didn’t have a resin, the tutorial states that makko should be roughly 10-25% of the sandalwood. We used 4 teaspoons of sandalwood and 1 teaspoon of makko in our mixture.

After briefly dry mixing those together in a small bowl (next time I think we’ll use a bigger bowl!), we then used a dropper to add in filtered water slowly.

We continued to very slowly add water until the mixture was felt pliable. During this process we hand mixed to feel the difference because the visual difference was very minimal.

At this point we formed cones and placed them onto wax paper to dry. If your cone is falling apart, put the mixture back in the bowl and mix in some more water. This is largely a trial and error process.

In the end, we got nine cones out of the amount that we used. With more consistent sizing we could have gotten 10, and had we wanted smaller cones, probably 12 or 13. There’s still plenty left to mix up, so we still feel we got a very reasonable yield.

Here’s the downside — curing time is supposed to be two weeks. Once they’re fully cured I’ll give an update on how they turned out!

Tune in tomorrow for the Clay Medallion Pendant project, which will put the Clay Texture Tools from last week to the test!

Discovering 2014: Decorative Mason Jar Lights

Discovering 2014 is a personal goal to complete a daily project throughout the year!

My day eleven project was Decorative Mason Jar Lights. The idea came from this pin by the Mod Podge Rocks Blog. Supplies are fairly simple: an empty jar (I used upcycled jars from spaghetti sauce and pickles), tissue paper, Mod Podge (or other craft glue), a paint brush, and some flameless lights. Chances are, you have a lot, if not all, of these supplies somewhere in your home already!

Size the tissue paper to the jar, leaving a bit of extra on the top and bottom to wrap over and under.

Apply a thin coat Mod Podge to the jar, working the tissue paper onto the jar as you work your way around. Try to keep it smoothed out, but remember that tissue paper tears very easily so once it’s glued, it’s glued!


Don’t use too much Mod Podge either, or this happens (same goes for sticky fingers).

Apply a thin coat of Mod Podge on the inside lip and tuck the excess over.

Now tuck the excess underneath the bottom and leave the jar sitting upside down to dry.

After I did the first jar I had a gee-whiz moment.. why was I gluing the entire jar? So the last three I applied glue only at the beginning and end of the paper wrap. Both looked equally attractive once dry, I think.

Once the tissue paper is all dry, you just add a light and you’re done! I had a pack of LED candles I got on clearance at K-Mart that work great for this. Since my jars are deep I decided to attach a length of embroidery floss to the lights so I can lift them in and out easier.

If you’re interested in the difference, the green jar on the far right is the one that had glue applied to the entire jar, whereas the other three did not. It’s most obvious around the neck, where the latter are looser.

These jars would look great inside or out and could also make fun gifts.

Come back tomorrow for the Incense Cone project!

… oh yes, and if you have a cat, expect them to help out with selecting the tissue paper!

Discovering 2014: Tulle Bows

Discovering 2014 is a personal goal to complete a daily project throughout the year!

My day ten project was Tulle Bows. There were several great variations available from this pin by Miss Lovie Creations, but I chose to make just the fluffy bow to start. We had purchased a roll of green tulle last year and still had half of it left, but you use so little for these bows that a single roll can last you a long time.

The tutorial suggested several loops, which I did, but originally made them too small to work with. After I lengthened them it only looped about three times. I’d suggest double for it to look better.

Next you pinch the center where the ends are open, so the looped ends are on the outside. I recommend having something ready to tie the middle with before doing this (I just used a small strip of tulle).

At this point you have a nice bow, but if you want a fluffy bow there’s a bit more to do. Gently cut open the looped ends, then trim some of the middle pieces to add more body.


Spread out the pieces some and fluff! The picture below shows a still-looped end on the left, and a fluffed end on the right. With more loops the fluffed end will look a lot fuller than pictured! 

Once you finish both ends, you have a fluffy tulle bow! This can be used for decoration, on gifts, tied on a headband, etc.

Tomorrow’s project is Decorative Mason Jar Lights!